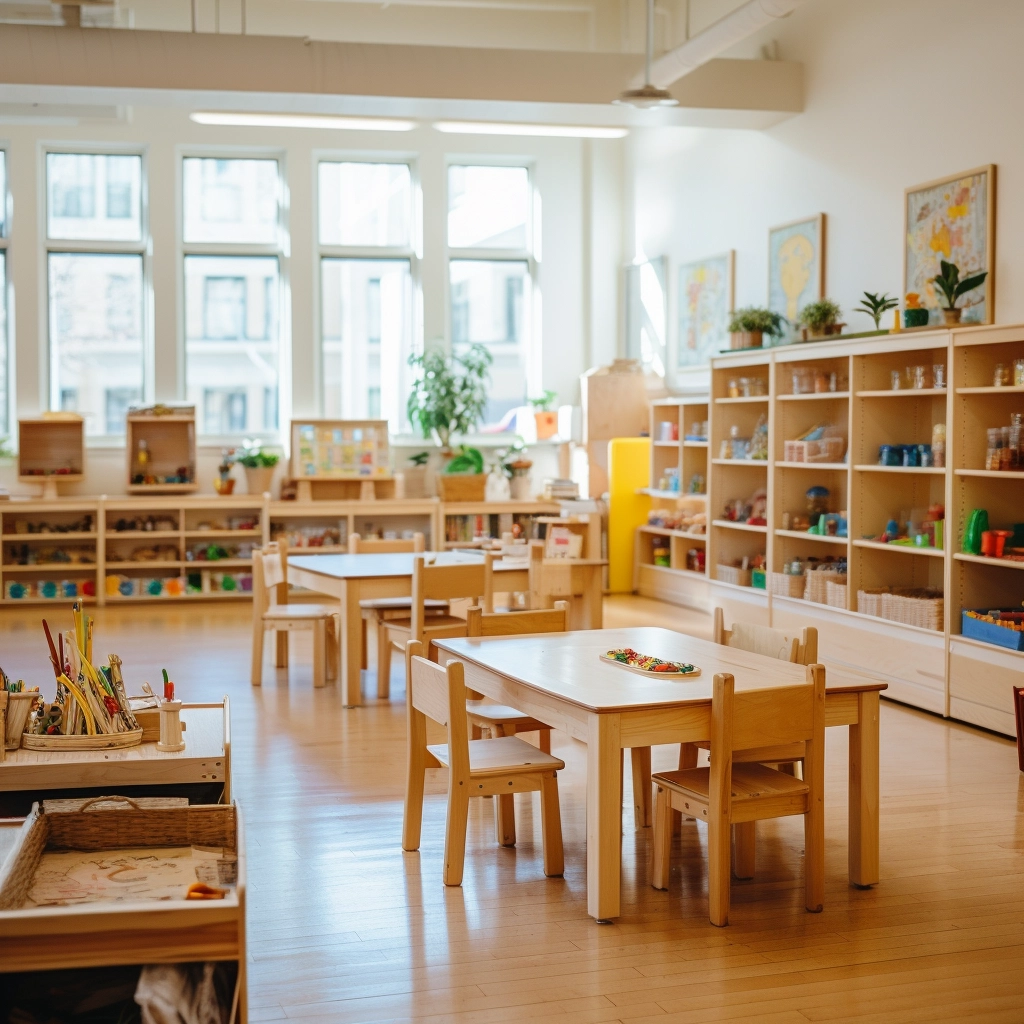
Do you know how to help preschoolers develop their artistic and creative abilities at school? One of the most popular kindergarten classes is crafts, which allows children to freely explore and create art and enjoy this special creative moment. This is where arts and crafts for preschoolers truly shine.
Through arts and crafts for preschoolers, they can explore their imaginations, improve fine motor skills, develop cognitive abilities, and express themselves creatively. Learning new skills and repeated exposure to art supplies builds confidence, which impacts future development.
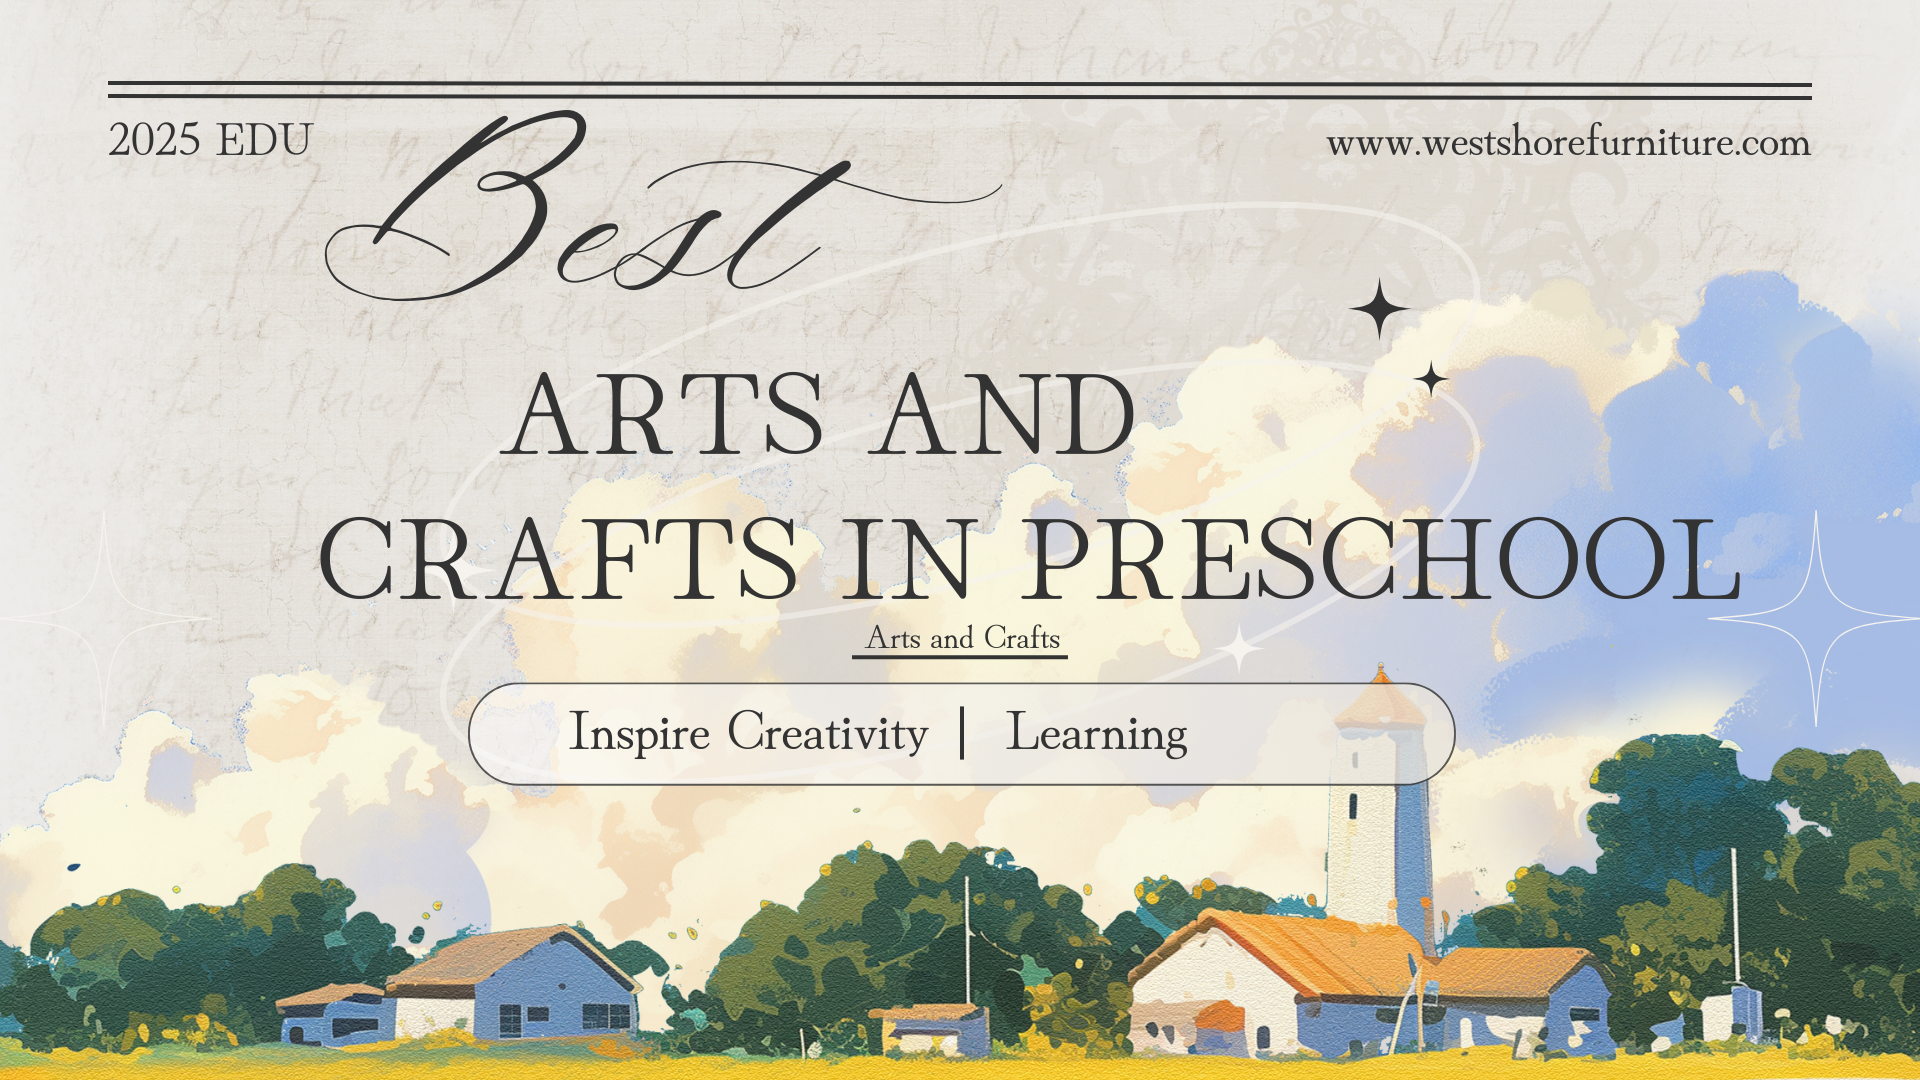
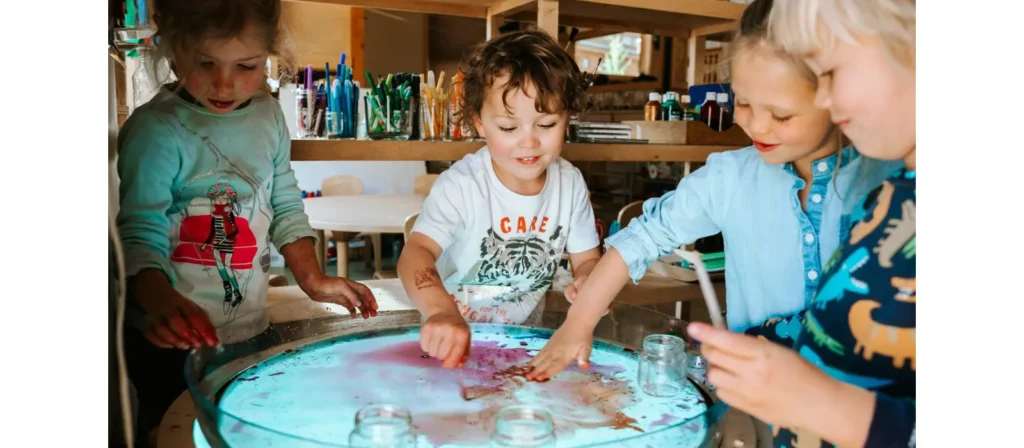
In this article, I’ll show you 21 of the best preschool and daycare craft projects—easy, fun, and educational. Introducing arts and crafts for preschoolers opens up a world of imaginative and meaningful play.
الحرف اليدوية لمرحلة ما قبل المدرسة: أكثر من مجرد نشاط ممتع
في عالم ما قبل المدرسة، غالبًا ما يُثار جدل حول ما إذا كانت الحرف اليدوية لها مكان في تعليم الطفولة المبكرة. صحيح أن الحرف اليدوية والفنون مختلفان، لكن الفن يتعلق بـ الإبداع المفتوحفي حين أن الحرف اليدوية عادة ما يكون لها نتيجة محددة، إلا أن كلاهما له قيمة في المناهج الدراسية المتكاملة.
يتيح الفن للأطفال استكشاف المواد والألوان والقوام بحرية دون قيود، مع التركيز على العملية بدلاً من المنتج النهائي. وهذا ضروري لتعزيز الإبداع والتعبير عن الذات. ومع ذلك، للحرف اليدوية فوائدها الفريدة. فهي تساعد على تطوير المهارات الحركية الدقيقة، وتعزز مفاهيم مثل التعرف على الألوان والأشكال، ويمكن أن تدعم مواضيع تعليمية أوسع. عند القيام بها في المنزل برفقة شخص بالغ مهتم، تُصبح الأعمال اليدوية نشاطًا فريدًا يُعزز الروابط الأسرية، ويخلق ذكريات ذات معنى.
Rather than viewing crafts as limiting, we should see them as complementing open-ended art experiences. A balance of both ensures that children are free to create while gaining valuable skills through structured activities.
هنا، نستكشف 21 من أفضل الحرف اليدوية لمرحلة ما قبل المدرسة المثالية للأيدي الصغيرة.
21 من أفضل الحرف اليدوية لمرحلة ما قبل المدرسة
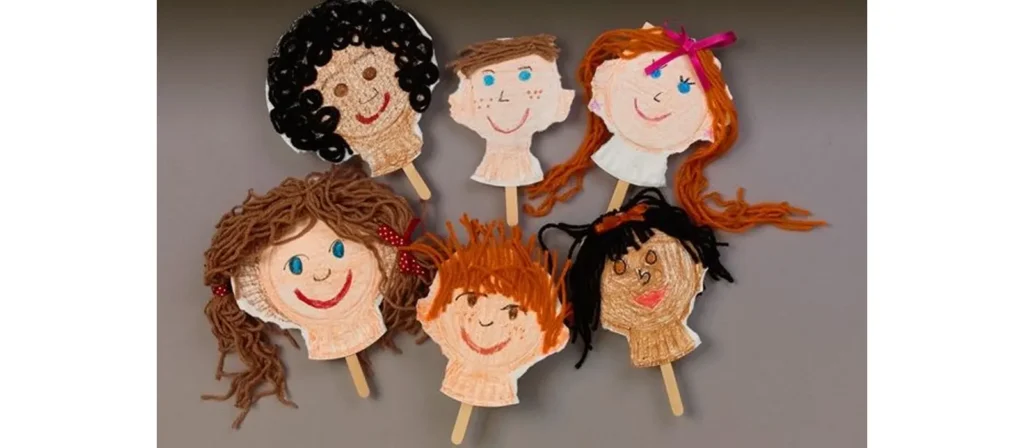
1. وجوه الأطباق الورقية
نظرة عامة على النشاط:
Turn ordinary paper plates into a gallery of joyful expressions with this delightful Paper Plate Faces activity. Children can draw, paint, or glue on yarn, buttons, and colored paper to create funny, happy, or even curious faces that reflect their emotions. Through this creative process, they begin to understand feelings, develop empathy, and strengthen their fine motor skills while having fun with textures and shapes.
مواد:
أطباق ورقية، أقلام تحديد، خيوط، غراء، زخارف متنوعة (ملصقات، عيون متحركة، كرات صوفية)
كيفية القيام بذلك:
- Set up a cheerful crafting station by laying out paper plates, markers, glue, and all sorts of fun decorations within easy reach.
- Give each child their own plate and invite them to design a face that shows an emotion such as happy, silly, surprised, or sleepy.
- Show them how to draw simple features, then let them freely add yarn hair, googly eyes, or stickers to bring their creations to life.
- Chat as they work by asking questions like “What feeling does your face have?” or “Can you make that expression too?”
- When the masterpieces are dry, turn your classroom into a Face Gallery or let the children take their smiling plates home to share.
الاختلافات:
استخدمي أطباقًا بأحجام مختلفة لتكوين مجموعة من "عائلات الوجوه" المعبرة - وهي إضافة مثالية للفنون والحرف اليدوية ذات الطابع الخاص لمرحلة ما قبل المدرسة.
2. مناظير اصنعها بنفسك

نظرة عامة على النشاط:
Spark curiosity and adventure with this charming DIY Binoculars craft. Using cardboard tubes, colorful paper, string, and a touch of imagination, children can create their very own pair of pretend binoculars. As they decorate and assemble their masterpiece, they strengthen hand-eye coordination, fine motor skills, and creativity while learning about observation and exploration.
مواد:
لفافتان فارغتان من ورق التواليت لكل طفل، شريط لاصق أو غراء، خيط أو خيوط، مثقاب، أقلام تلوين أو علامات، ملصقات، ورق ملون (اختياري)
كيفية القيام بذلك:
- Get your creative corner ready with cardboard tubes, colorful paper, tape, glue, and string.
- Give each child two rolls and invite them to decorate using markers, crayons, stickers, or paper wraps to make their binoculars uniquely theirs.
- Help them tape or glue the rolls together to form the binocular shape.
- Show how to thread yarn through the holes and tie knots to create a neck strap, introducing safe tool use in a fun way.
- Encourage kids to go on a pretend “explorer walk” around the classroom or playground, observing everything they can spot.
- Ask playful questions such as “What did you find?” or “Can you see something that starts with the letter B?”
- When finished, let them share their discoveries and show off their colorful binoculars to friends and family.
الاختلافات:
- استخدم لفات مناشف ورقية مقطوعة إلى نصفين للمنظار العملاق.
- قم بتحويل هذه الحرفة إلى لعبة من خلال إنشاء لعبة البحث عن الكنز حيث يتعين على الأطفال "اكتشاف" الأشياء المخفية.
- يمكنك إقرانها بالكتب أو الأغاني حول الطبيعة أو الاستكشاف لتعزيز الفنون والحرف اليدوية المواضيعية لجلسات ما قبل المدرسة.
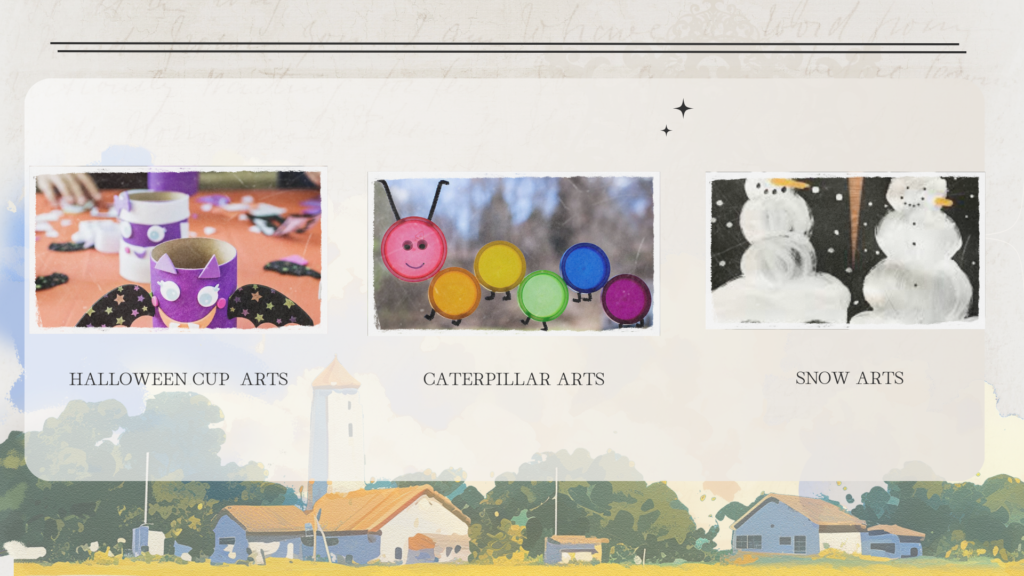
3. حرفة اليقطين السهلة

نظرة عامة على النشاط:
Celebrate the cozy spirit of autumn with this adorable Easy Pumpkin Craft. Using orange paper, glue, and a little creativity, children can cut, roll, or layer pieces to form their own bright, cheerful pumpkins. As they work with shapes and colors, they strengthen fine motor skills, practice hand coordination, and learn basic concepts like size and pattern.
مواد:
Orange construction paper, green construction paper, scissors (child-safe), glue sticks, black markers, optional: googly eyes, yarn, glitter.
كيفية القيام بذلك:
- Prepare a cozy crafting table with orange and green paper, glue sticks, scissors, and fun extras like googly eyes or glitter.
- Give each child orange paper circles or strips and guide them to glue the pieces together into a round pumpkin shape.
- Show how to add a green paper stem and let them draw a face using markers.
- Encourage them to decorate their pumpkins with yarn vines, sparkly glitter, or funny eyes to make each one special.
- Chat as they create by asking, “What kind of face will your pumpkin have? Happy or spooky?”
- After drying, use their adorable pumpkins to decorate a classroom wall or create a cheerful pumpkin patch for everyone to enjoy.
الاختلافات:
- حاول استخدام الأطباق الورقية بدلاً من ورق البناء للحصول على قاعدة أكثر قوة.
- قم بتحويلها إلى حرفة التعرف على الأسماء من خلال جعل الأطفال يكتبون أسماءهم على القرع.
- اصنعي قرعًا صغيرًا وأنشئي إكليلًا لتعليقه في جميع أنحاء الغرفة.
4. عصابة رأس على شكل ديك رومي

نظرة عامة على النشاط:
Nothing captures the joy of fall quite like creating a colorful Turkey Headband. In this heartwarming craft, children use simple materials such as construction paper, feathers, and glue to design their own playful turkey crowns. As they cut, paste, and arrange the feathers, little hands strengthen fine motor skills while young minds practice color recognition and creativity.
This activity naturally invites storytelling and imagination. Children love pretending to be cheerful turkeys, moving around the classroom with laughter and excitement. It is also a wonderful opportunity to talk about gratitude, sharing, and the beauty of autumn traditions.
مواد:
ورق بناء بني، ورق بناء أحمر، برتقالي، وأصفر، مقص (آمن للأطفال)، غراء أو شريط لاصق، أقلام تلوين أو أقلام تحديد، عيون متحركة (اختياري)، دباسة
كيفية القيام بذلك:
- Get the table ready with brown paper strips, colorful paper feathers, glue, and markers.
- Help each child fit a brown strip around their head and secure it into a circle to form the headband base.
- Invite children to color and decorate their paper feathers, then glue them to the back of the headband.
- Show how to make a turkey face using paper shapes or googly eyes, and add a beak and red wattle for fun.
- Chat about Thanksgiving and encourage each child to share one thing they are thankful for.
- When finished, let them wear their festive headbands and waddle around like cheerful turkeys during a classroom parade.
الاختلافات:
- أضف اسم الطفل إلى مقدمة عصابة الرأس كعنصر تخصيص ممتع.
- اصنع ريشة الامتنان: اطلب من كل طفل أن يكتب أو يرسم شيئًا يشعر بالامتنان له على الريشة قبل ربطها.
5. ساحرة الكوب الورقي

نظرة عامة على النشاط:
Bring a touch of Halloween magic to the classroom with this fun and imaginative Paper Cup Witch craft. Using simple materials like paper cups, construction paper, yarn, and markers, children can create their own friendly witches complete with pointy hats, bright eyes, and curly hair. As they cut, glue, and decorate, they strengthen fine motor skills and practice following steps, turning creativity into confidence.
مواد:
أكواب ورقية (خضراء أو بيضاء)، ورق مقوى أسود، غراء، مقص (آمن للأطفال)، خيط أو ورق ممزق (للشعر)، عيون متحركة، أقلام تحديد أو أقلام تلوين
كيفية القيام بذلك:
- Arrange paper cups, pre-cut witch hats, yarn hair, and black paper shapes on the table so everything is easy to reach.
- Give each child a paper cup and invite them to glue on googly eyes and draw a friendly witch face with markers.
- Help them add yarn or shredded paper hair, then top it with a pointy black hat for a magical touch.
- Wrap a small paper cape or collar around the cup to complete the witch’s outfit.
- As they create, ask fun questions such as “What kind of magic does your witch do?” or “Is your witch silly, spooky, or kind?”
- When finished, line up all the witches together for a charming Halloween display that’s full of personality.
الاختلافات:
- أضف عصا مكنسة صغيرة باستخدام أعواد المصاصة والرافيا أو الورق البني.
- قم بتحويلها إلى دمية هالوين عن طريق ربط قشة أو عصا في أسفل الكوب.
- شجع الأطفال على إنشاء شخصيات أخرى - أشباح، أو قرع، أو سحرة - لمشهد الهالوين بأكمله.
6. مخاريط الآيس كريم المنتفخة
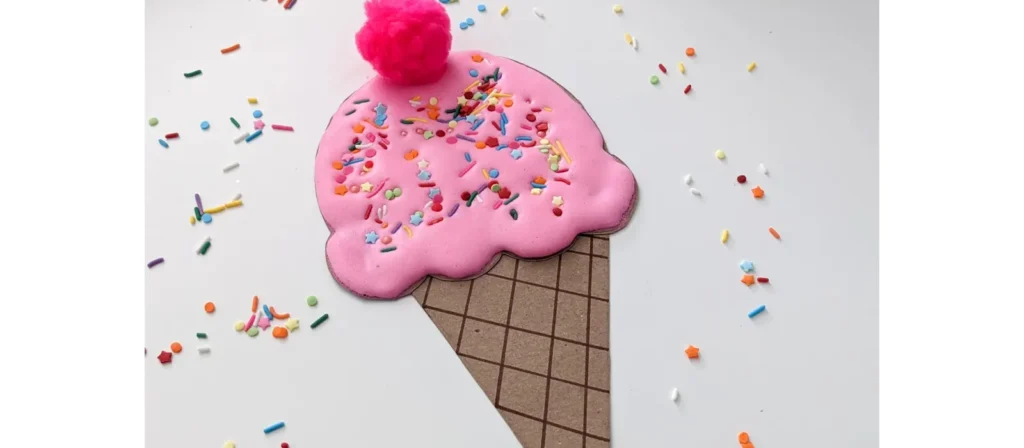
نظرة عامة على النشاط:
Bring a scoop of sweetness into the classroom with this delightful Puffy Paint Ice Cream Cones craft. Using homemade puffy paint made from shaving cream and glue, children can swirl and spread “ice cream” on paper cones, then top them with sprinkles, glitter, or pom-poms for extra fun. As they mix colors and textures, they explore sensory play while strengthening hand control and creativity.
مواد:
كريم الحلاقة، غراء أبيض، ألوان طعام أو طلاء قابل للغسل، ورق بناء بني (مخروطي)، ورق مقوى أبيض أو ورق (خلفية)، مقص، أوعية خلط، ملاعق
كيفية القيام بذلك:
- Start by mixing equal parts shaving cream and white glue in bowls, then add a few drops of food coloring or washable paint to create colorful “ice cream” puffy paint.
- Give each child a cone cutout and a sheet of cardstock to glue it on.
- Invite them to scoop, swirl, and spread the puffy paint above the cone to make their ice cream scoops.
- Encourage creativity by mixing colors, stacking tall cones, and talking about pretend flavors like strawberry, mint, or rainbow swirl.
- Let them sprinkle glitter, tiny paper dots, or pom-poms for extra toppings.
- Allow the artwork to dry overnight so the puffy texture stays firm, leaving behind a sweet, fluffy masterpiece that looks good enough to eat.
الاختلافات:
- أضف الرشات باستخدام اللمعان أو النقاط الورقية المقطوعة الصغيرة.
- قم بتحويل المخاريط النهائية إلى عرض حائطي يسمى "أفكارنا الأكثر حلاوة!"
- استخدمي كريم حلاقة معطر أو أضيفي قطرة من الفانيليا للحصول على لمسة متعددة الحواس.
7. فن فرك الأوراق
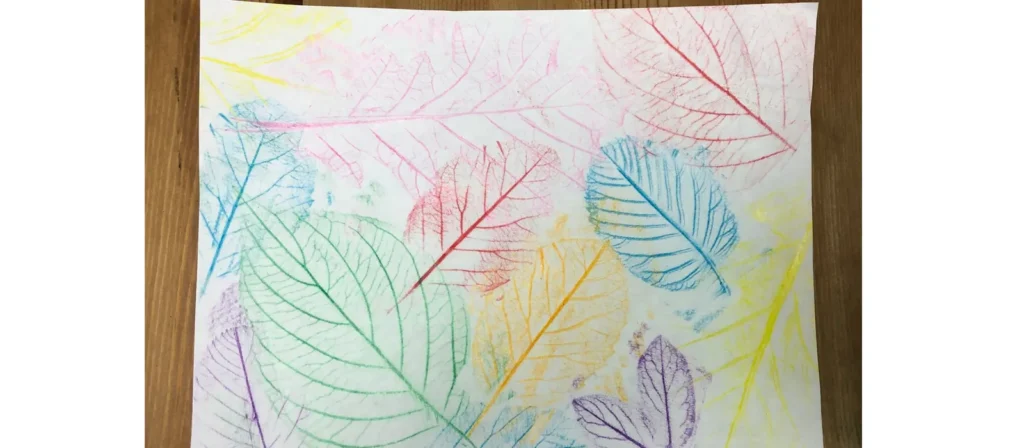
نظرة عامة على النشاط:
Celebrate the beauty of nature with this enchanting Leaf Rubbing Art activity. Children can collect leaves of different shapes and sizes, place them under a sheet of paper, and gently rub crayons or colored pencils over the surface to reveal the delicate patterns and veins. As the hidden designs appear, little learners experience the wonder of discovery while developing fine motor control and observational skills.
مواد:
أوراق متنوعة (أشكال/أحجام مختلفة)، ورق أبيض، أقلام تلوين (بعد إزالة الغلاف)، شريط لاصق (اختياري)، ألواح قصاصات أو سطح عمل مسطح
كيفية القيام بذلك:
- Take children outside to collect leaves of different shapes and sizes, or provide a set of pre-collected leaves at the table.
- Give each child a few leaves and show them how to place them vein-side up on a flat surface or clipboard.
- Lay a sheet of white paper over the leaves and demonstrate how to gently rub the side of a crayon to reveal the patterns beneath.
- Encourage kids to try different colors and leaf types, comparing the shapes and textures they uncover.
- Chat about nature as they work by asking, “What kind of tree do you think this leaf came from?” or “Why do leaves change color in fall?”
- Display their colorful rubbings around the classroom or turn them into bookmarks and greeting cards to celebrate the beauty of the season.
الاختلافات:
- قم بتحويل الفرك النهائي إلى بطاقات تهنئة أو علامات مرجعية أو ديكورات موسمية.
- استخدم ورقًا أسود وأقلام تلوين فاتحة اللون للحصول على تأثير درامي.
- يمكنك الاستمتاع بجولة بسيطة في الطبيعة ورحلة بحث عن أوراق الشجر لقضاء يوم حافل بالمرح.
8. إبداعات عجينة اللعب المنزلية
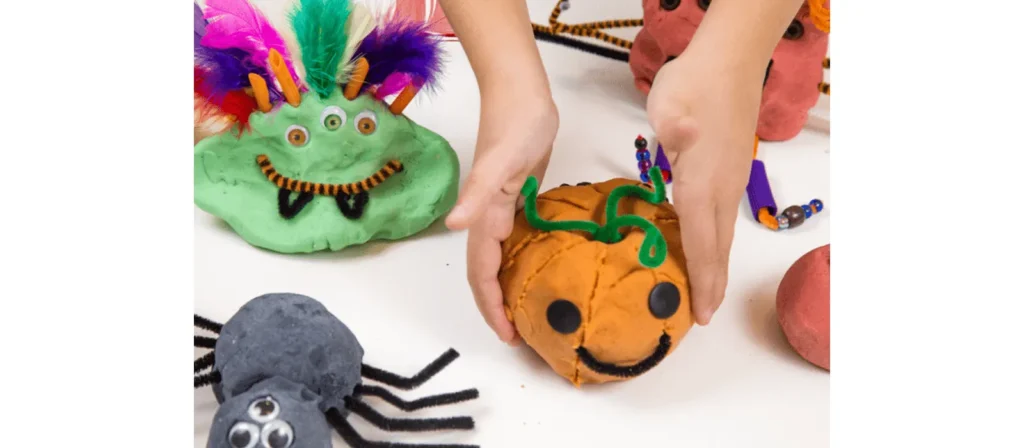
نظرة عامة على النشاط:
There’s something truly magical about molding, rolling, and shaping with soft, colorful dough. In this joyful Homemade Playdough Creations activity, children make their own playdough using simple ingredients like flour, salt, and water, then use it to sculpt anything their imagination can dream up such as animals, food, or playful patterns. The process engages all their senses while building fine motor strength, creativity, and focus.
مواد:
الدقيق، الملح، كريم التارتار، الماء، الزيت النباتي، ألوان الطعام (أو عجينة اللعب الجاهزة)، أوعية الخلط، الملاعق، أدوات النحت الآمنة للأطفال (السكاكين البلاستيكية، قواطع البسكويت، دبابيس التدحرج)
كيفية القيام بذلك:
- Prepare colorful playdough ahead of time or let children join in the fun of making it themselves by mixing flour, salt, water, oil, and food coloring.
- Once the dough is ready and cool, divide it into different colors and place it on trays or mats for easy shaping.
- Provide rolling pins, cookie cutters, and plastic tools so children can mold animals, letters, or their favorite foods.
- Encourage creativity by asking playful questions such as “What are you making today?” or “Can you shape your name out of dough?”
- Let them explore textures, colors, and shapes freely, building both imagination and fine motor skills along the way.
- When finished, store the dough in sealed containers so it can be used again for more creative sessions throughout the week.
الاختلافات:
- أضف الزيوت الأساسية (مثل اللافندر أو النعناع) للحصول على لمسة حسية مهدئة.
- دمج العناصر الطبيعية مثل الأغصان أو الحجارة أو الأوراق للحصول على موضوع مستوحى من الطبيعة.
- استخدم قواطع الأشكال لربط النشاط بمفاهيم الرياضيات المبكرة مثل الأنماط أو الهندسة.
9. مركبة اليرقة الجائعة جدًا
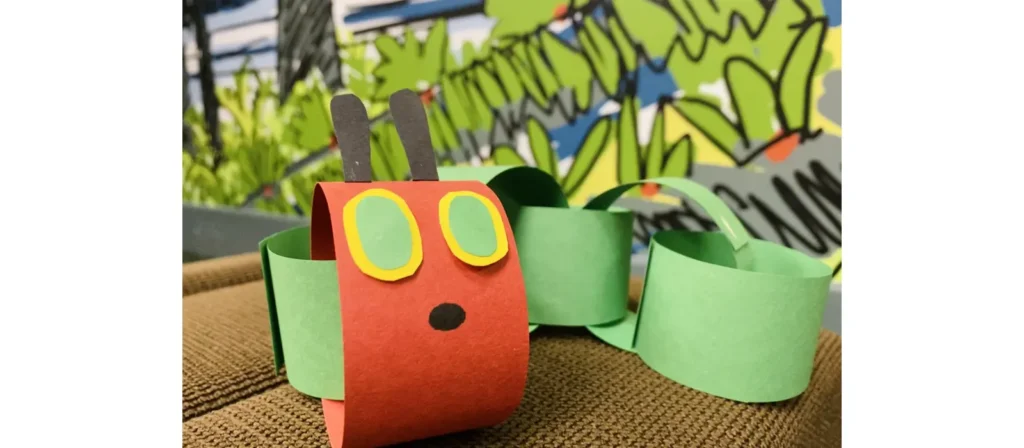
نظرة عامة على النشاط:
Bring Eric Carle’s beloved story to life with this charming The Very Hungry Caterpillar Craft. Using colorful paper circles, glue, and googly eyes, children can create their own friendly caterpillar while recalling each part of the story. As they cut, count, and arrange the pieces, they strengthen fine motor skills, practice sequencing, and develop early literacy through storytelling connections.
مواد:
ورق ملون (أحمر وأخضر)، أعواد غراء، مقص (آمن للأطفال)، قلم تحديد أسود، عيون متحركة، أطباق ورقية (اختياري للعرض)، نسخ من الكتاب (اختياري)
كيفية القيام بذلك:
- Begin by reading اليرقة الجائعة جدًا together or watching a short video version to spark children’s imagination.
- Give each child a set of green circles for the body and one red circle for the head.
- Show them how to glue the circles in a line to form the caterpillar, then add googly eyes, a smile, and antennae using a marker or paper strips.
- Encourage counting and sequencing by asking, “How many green circles did you use?” or “What did the caterpillar eat first?”
- Once finished, display the adorable caterpillars on a bulletin board or let children take them home as a fun reminder of the story.
- For added creativity, invite them to make the butterfly stage next, connecting art with storytelling and learning.
الاختلافات:
- أضف عنصر العد عن طريق ترقيم كل دائرة خضراء.
- إنشاء جدارية لدورة الحياة مع مراحل اليرقة والشرنقة والفراشة.
- استخدمي كرات القطن بدلاً من الدوائر الورقية للحصول على مظهر أكثر نعومة.
10. عباد الشمس ببصمات اليد
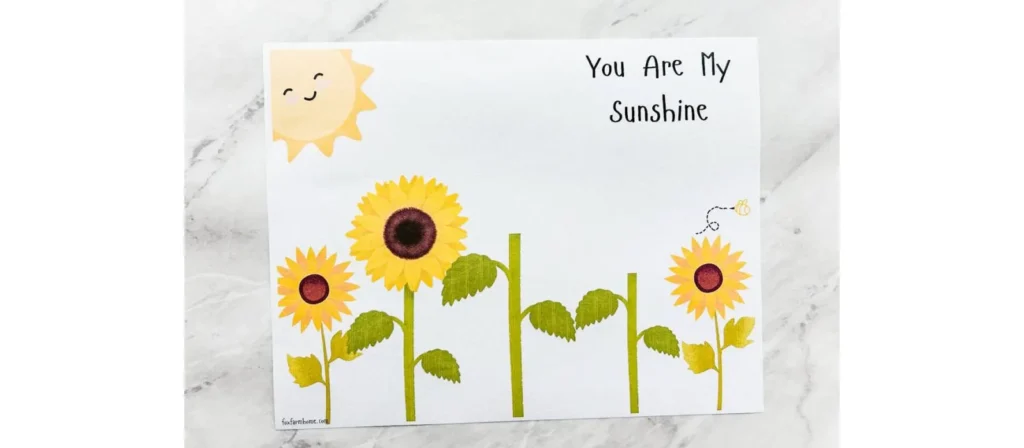
نظرة عامة على النشاط:
Fill the classroom with sunshine and smiles through this beautiful Handprint Sunflowers activity. Children trace and paint their hands to form bright yellow petals, then add a brown center and a green stem to complete their cheerful sunflowers. As they press their colorful handprints onto the paper, they build fine motor strength, explore symmetry and color blending, and experience the joy of creating something uniquely their own.
مواد:
ورق مقوى أصفر وأخضر، دوائر ورقية بنية (أو بطانات كب كيك)، غراء، مقص (آمن للأطفال)، قلم رصاص، قلم تحديد أسود، اختياري: بذور عباد الشمس الحقيقية
كيفية القيام بذلك:
- Get your table ready with yellow, green, and brown paper, glue, pencils, and scissors.
- Help children trace their hands several times on yellow paper and cut them out to form bright sunflower petals.
- Glue a brown circle or cupcake liner in the center of the page to make the flower’s middle.
- Invite kids to arrange and glue their handprint petals around the center to create a full, sunny bloom.
- Add a green stem and leaves to finish the sunflower.
- For extra fun, glue real sunflower seeds in the middle to give it a textured look.
- When all the flowers are done, display them together to form a cheerful classroom “garden” that shines with creativity and color.
الاختلافات:
- اكتب اسم كل طفل على بتلة وحولها إلى عرض "حديقة الفصل".
- استخدم الطلاء لصنع بتلات بصمة اليد للحصول على نسخة أكثر فوضوية وأكثر حساسية.
- قم بإنشاء نشاط عد من خلال مطالبة الأطفال بحساب البتلات التي استخدموها.
11. كولاج قوس قزح
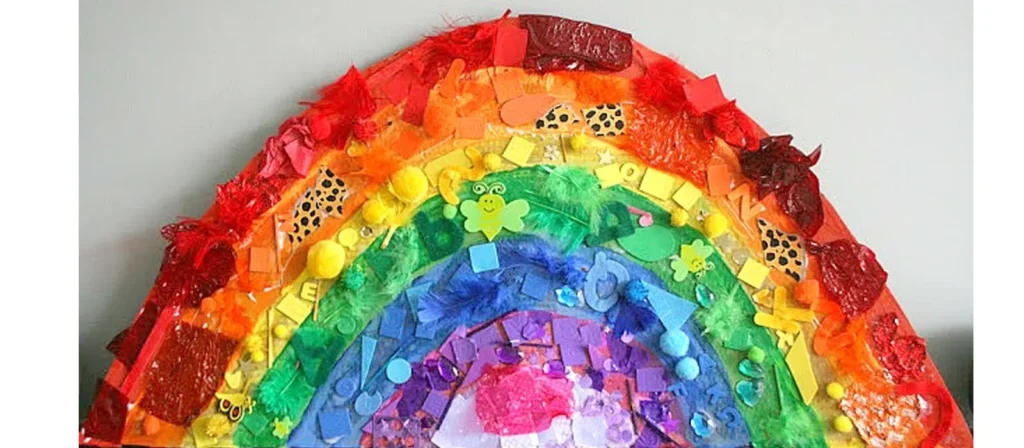
نظرة عامة على النشاط:
Brighten the classroom with color and creativity through this joyful Rainbow Collage activity. Children use scraps of paper, tissue, fabric, or any colorful materials to build their very own rainbows. As they sort, cut, and glue each color into place, they practice fine motor coordination, color recognition, and sequencing while expressing their individual creativity in a vibrant way.
مواد:
قصاصات ورق ملون (أو ورق مناديل)، أعواد غراء، ورق أبيض أو ورق مقوى، كرات قطنية، مقص (آمن للأطفال)، أقلام تلوين أو أقلام تحديد (اختياري)
كيفية القيام بذلك:
- Get the table ready with sorted paper scraps or tissue pieces in rainbow color order, along with glue sticks, scissors, and cotton balls.
- Give each child a rainbow outline or let them draw their own on white paper or cardstock.
- Invite them to glue colorful scraps one by one, following the rainbow order and naming each color as they go.
- Add cotton balls at both ends to make soft, fluffy clouds that complete the rainbow.
- Encourage conversation by asking questions like “What comes after yellow?” or “Which color is your favorite?”
- Once dry, display the bright rainbows on a classroom wall or send them home to bring a little sunshine to family spaces.
الاختلافات:
- استخدم مواد طبيعية مثل الأوراق والبتلات للحصول على قوس قزح مستوحى من يوم الأرض.
- قم بتحويلها إلى نسخة ثلاثية الأبعاد من خلال وضع طبقات من المواد مثل الخيوط أو اللباد أو الأزرار.
- قم بإنشاء قوس قزح صغير على أطباق ورقية للحصول على نسخة جماعية أسرع.
12. أشجار بصمات الأصابع

نظرة عامة على النشاط:
Turn tiny fingerprints into a forest of creativity with this heartwarming Fingerprint Trees activity. Children use their fingertips dipped in colorful paint to create leaves, blossoms, or fruits on tree branches drawn or printed on paper. Each gentle press leaves a unique mark, helping them explore colors, patterns, and the beauty of individuality while developing fine motor coordination and sensory awareness.
مواد:
ورق مقوى أبيض، أقلام تلوين بنية أو أقلام تلوين، طلاء قابل للغسل (ألوان الخريف أو الربيع)، أطباق ورقية أو صواني طلاء، مناديل أو أوعية مياه للتنظيف
كيفية القيام بذلك:
- Prepare white cardstock with tree trunks and branches already drawn, or let children sketch their own using brown markers or crayons.
- Pour small amounts of washable paint onto paper plates—choose warm tones like red, yellow, and orange for fall, or fresh colors like green, pink, and purple for spring.
- Invite children to dip their fingertips lightly into the paint and press them along the branches to create colorful leaves or blossoms.
- Encourage them to experiment with different colors and pressure to see how each fingerprint looks unique.
- Talk together about the seasons by asking, “Do these colors remind you of autumn or spring?”
- Let the paintings dry and display them as a bright seasonal forest that celebrates every child’s individuality.
الاختلافات:
- قم بإنشاء أربع أشجار جنبًا إلى جنب لتمثيل الفصول الأربعة.
- استخدمي أعواد القطن أو أعواد القطن للأطفال الذين يفضلون عدم استخدام أصابعهم.
- أضف أوراق الشجر المتساقطة حول القاعدة أو الطيور في الفروع لمزيد من التفاصيل.
13. رسم غلاف الفقاعات
نظرة عامة على النشاط:
Turn ordinary packaging into a burst of creativity with this exciting Bubble Wrap Painting activity. Children dip pieces of bubble wrap into paint and press them onto paper to reveal fun, textured patterns that pop with color and imagination. As they explore the bumpy surface, they engage their senses, strengthen fine motor skills, and learn about texture and repetition in art.
مواد:
غلاف فقاعي (مقطع إلى صفائح أو أشكال صغيرة)، طلاء قابل للغسل، أطباق ورقية (للطلاء)، ورق مقوى أبيض أو صفائح كبيرة من الورق، شريط لاصق (اختياري)، بلوزات أو مآزر
كيفية القيام بذلك:
- Cut bubble wrap into small squares or fun shapes like hearts, circles, or stars.
- Pour bright washable paints onto paper plates and set out sheets of white cardstock for printing.
- Show children how to dip the bubble wrap into paint and press it onto the paper to make colorful textured patterns.
- Encourage them to try different colors and layering effects, watching how patterns overlap and blend.
- Talk about what they see and feel by asking, “What does it feel like?” or “What happens when two colors mix?”
- Once finished, let the artwork dry flat—when the paint sets, the bubbly textures look even more amazing.
- Display their masterpieces on the wall or use them to decorate classroom bulletin boards for a vibrant touch of creativity.
الاختلافات:
- لف شريط الفقاعات حول دبوس الشباك أو أنبوب من الورق المقوى للحصول على قوام متدحرج.
- قم بقص ورق الفقاعات إلى أشكال موسمية (على سبيل المثال، رقاقات الثلج أو الأوراق) للحصول على مطبوعات ذات طابع خاص.
- قم بإقران النشاط بكتاب حول القوام أو الحواس الخمس.
14. دفوف من أطباق ورقية
نظرة عامة على النشاط:
Bring rhythm and laughter to the classroom with this joyful Paper Plate Tambourines activity. Children decorate two paper plates with colorful paints, stickers, or drawings, then fill them with a few dried beans or beads before sealing them together. Once finished, they can shake their handmade tambourines to make cheerful music that fills the room with sound and smiles.
مواد:
أطباق ورقية (2 لكل طفل)، فاصوليا جافة أو معكرونة، دباسة أو غراء، أقلام تحديد أو أقلام تلوين، ملصقات، شريط أو خيط (اختياري)، مثقاب
كيفية القيام بذلك:
- Prepare two paper plates for each child and set out markers, stickers, and paints for decoration.
- Invite children to decorate the bottom sides of their plates with bright colors and fun designs—this is their very own musical instrument.
- Place a small handful of dried beans or pasta on one plate, then cover it with the second plate, decorated sides facing out.
- Help seal the edges with a stapler or glue to trap the contents securely inside.
- For extra fun, punch small holes around the edges and let children tie colorful ribbons or yarn for movement and flair.
- Once the tambourines are ready, gather everyone for a rhythm circle or mini parade and let the joyful music begin.
- Encourage kids to experiment with different sounds by shaking gently, tapping, or moving to the beat.
الاختلافات:
- حاول استخدام أجراس أو أزرار بالداخل للحصول على أصوات مختلفة.
- Add a name label and use it during music time or performances.
- استكشف الاختلافات الصوتية باستخدام الحشوات المختلفة - الأرز أو الخرز أو الحصى.
15. دمى الأكياس الورقية
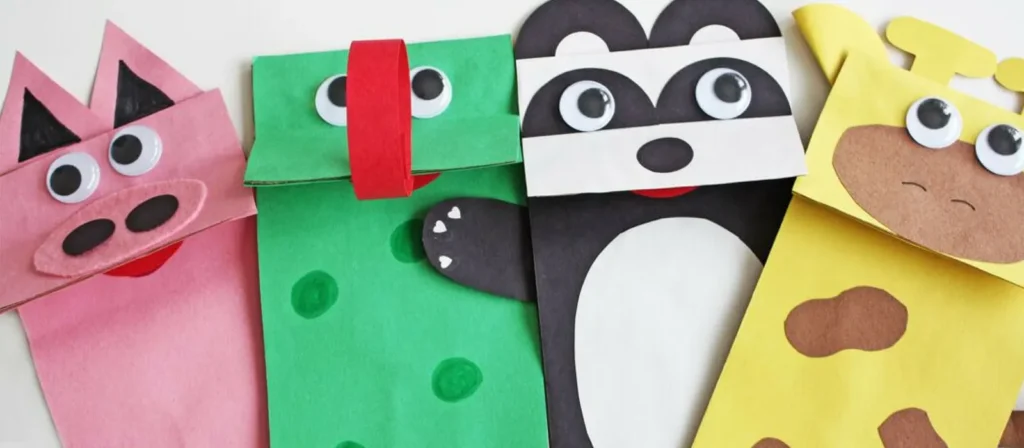
نظرة عامة على النشاط:
Let imagination take center stage with this delightful Paper Bag Puppets activity. Children turn simple paper bags into charming characters using markers, yarn, googly eyes, and bits of colored paper. As they design their puppets such as animals, people, or storybook friends, they develop creativity, storytelling skills, and fine motor coordination while expressing their emotions through art.
مواد:
أكياس غداء ورقية بنية أو بيضاء، قصاصات ورقية ملونة، أعواد غراء، أقلام تلوين أو أقلام تحديد، عيون متحركة، خيوط، مقص (آمن للأطفال)، ملصقات أو أزرار (اختياري)
كيفية القيام بذلك:
- Prepare paper bags, colorful paper scraps, yarn, googly eyes, glue, and markers on the table.
- Let children choose a paper bag and start by decorating the flap to make their puppet’s face.
- Encourage them to add googly eyes, yarn hair, and paper cutouts for mouths, ears, or hats.
- Decorate the lower part of the bag as clothing, adding details like buttons, arms, or accessories.
- Once dry, have children slip their hands inside the bags and bring their puppets to life through playful storytelling.
- Pair children to perform mini puppet shows together and encourage them to give voices to their characters.
- Create a classroom puppet theater corner so their new friends can star in many future adventures.
الاختلافات:
- قم بتعيين موضوعات مثل الحيوانات أو مساعدي المجتمع أو شخصيات القصص المصورة المفضلة لديك.
- أضف خيوطًا أو شعرًا شريطيًا لمزيد من الملمس.
- قم بإنشاء ركن مسرح العرائس باستخدام صندوق من الورق المقوى والستائر للعب الخيالي لفترة أطول.
16. مصائد الشمس المصنوعة من ورق المناديل

نظرة عامة على النشاط:
Fill the classroom with color and light through this enchanting Tissue Paper Suncatchers activity. Children use pieces of colorful tissue paper, clear contact paper, and simple shapes like hearts, stars, or circles to create beautiful window art that glows in the sunlight. As they layer and arrange the colors, they learn about transparency, color blending, and composition while strengthening their fine motor and visual-spatial skills.
مواد:
ورق اتصال شفاف أو أوراق تغليف، ورق حريري بألوان مختلفة (مقطع إلى مربعات صغيرة)، ورق مقوى أسود (للإطارات)، مقص (آمن للأطفال)، شريط لاصق
كيفية القيام بذلك:
- Prepare black paper frames by cutting simple shapes like hearts, stars, or circles, and remove the centers.
- Peel the backing off a piece of clear contact paper and place it sticky-side up on the table.
- Position the black frame on top and press it gently to secure it in place.
- Invite children to fill the inside with colorful tissue paper squares, overlapping the pieces to see how new colors appear.
- Once their design is complete, cover it with another piece of contact paper to seal the suncatcher.
- Trim any extra edges, then tape the finished artwork to a sunny window.
- Watch as sunlight shines through, turning the classroom into a rainbow-filled gallery of glowing colors.
الاختلافات:
- استخدم الأشكال الموسمية - القرع للخريف، أو البيض للربيع، أو رقاقات الثلج لفصل الشتاء.
- دع الأطفال يصنعون تصميمات مجردة وحرة الشكل بدون إطار.
- أضف بعض اللمعان أو الترتر لمزيد من التألق.
17. بصمات اليد من عجينة الملح
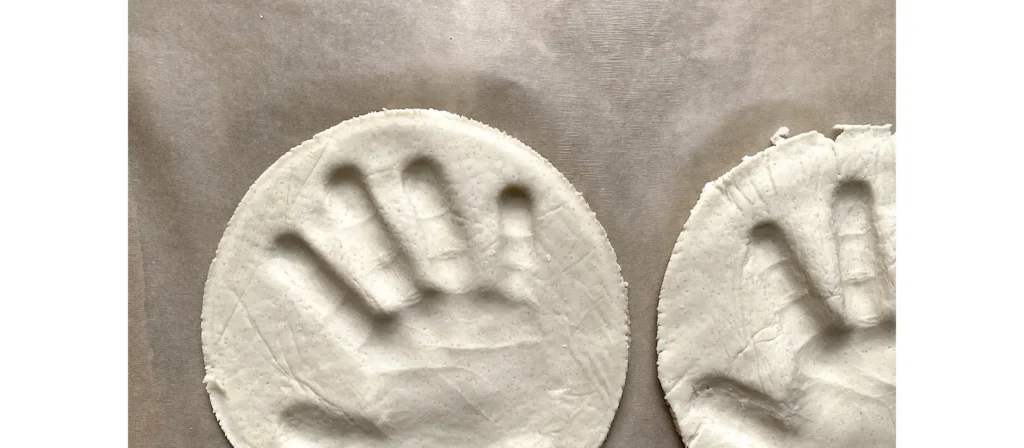
نظرة عامة على النشاط:
Capture a precious moment in time with this heartfelt Salt Dough Handprints activity. Children mix simple ingredients like flour, salt, and water to make soft dough, then press their tiny hands into it to create lasting impressions. After baking and decorating with paint or glitter, each handprint becomes a beautiful keepsake that celebrates growth, creativity, and the joy of making something by hand.
مواد:
دقيق، ملح، ماء، وعاء خلط، شوبك، صينية خبز، طلاء، فرش طلاء، مادة مانعة للتسرب شفافة (اختياري)، شريط أو خيط (اختياري للتعليق)
يثبت:
- امزجي عجينة الملح مسبقًا، أو اطلبي من الأطفال المساعدة بإضافة كوبين من الدقيق، وكوب من الملح، وكوب من الماء الدافئ. اخلطي المكونات واعجنيها حتى تصبح ناعمة.
- قم بإعداد دبابيس التدحرج والحصائر أو الصواني الصغيرة للعمل عليها.
- سخني الفرن على درجة حرارة 200 درجة فهرنهايت (90 درجة مئوية) إذا كنت تريدين الخبز حتى يصبح صلبًا.
تعليمات النشاط:
- افردي قطعة من العجين لكل طفل، بحيث يكون سمكها حوالي ½ بوصة.
- ساعدهم على الضغط بيدهم بقوة على العجينة لتكوين بصمة يد عميقة.
- إذا كنت ستعلق القطعة لاحقًا، استخدم قلم رصاص أو قشة لعمل ثقب صغير في الأعلى.
- اخبزيها لمدة 1-2 ساعة أو اتركيها لتجف في الهواء لعدة أيام.
- بعد أن يجف، يُمكن للأطفال رسم بصمات أيديهم بأي لون يُفضلونه. يُمكن إغلاقها برذاذ شفاف لضمان المتانة، إذا رغبوا في ذلك.
الاختلافات:
- اكتب اسم الطفل والتاريخ في العجينة قبل الخبز لتبقى ذكرى دائمة.
- أضف طلاءً لامعًا أو لمسات معدنية للحصول على تأثير فاخر.
- حولها إلى هدية لعيد الأم أو عيد الأب برسالة مثل "بلا شك، أنت الأفضل!"
18. عصي الشريط الراقص
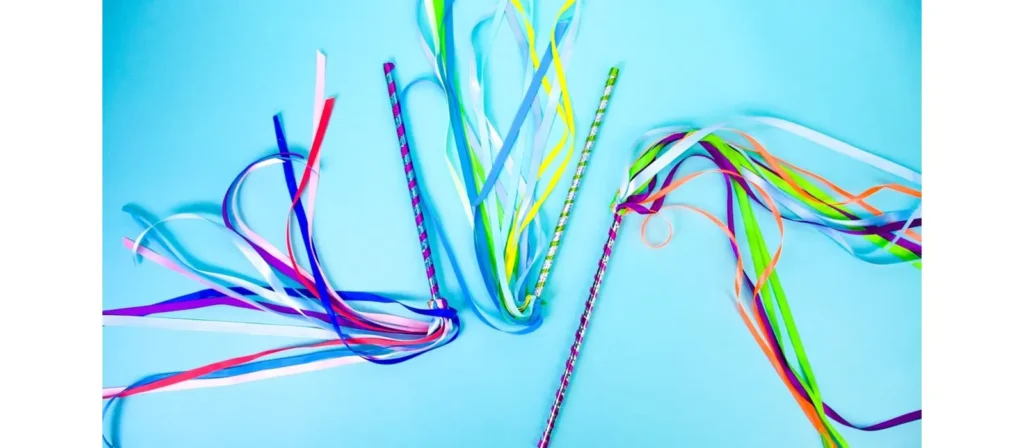
نظرة عامة على النشاط:
Add movement, color, and joy to the classroom with this lively Dancing Ribbon Wands activity. Children decorate sticks or dowels with bright ribbons, streamers, or fabric strips, then twirl and dance as their wands flutter through the air. As they wave and spin, they strengthen gross motor skills, coordination, and rhythm while expressing themselves through motion and music.
مواد:
مسامير خشبية أو أعواد حرفية، أو شرائط أو شرائط من ورق الكريب (ألوان مختلفة)، أو غراء أو شريط لاصق، أو مقص (آمن للأطفال)، أو ملصقات أو أقلام تحديد لتزيين المقابض
كيفية القيام بذلك:
- Mix 2 cups of flour, 1 cup of salt, and 1 cup of warm water in a bowl until the dough is smooth and easy to knead.
- Give each child a small piece of dough and let them roll it out to about half an inch thick on a mat or tray.
- Help them press their hand firmly into the dough to make a deep, clear handprint.
- If the piece will be hung, use a straw or pencil to poke a small hole near the top.
- Bake the handprints at 200°F (90°C) for 1–2 hours, or let them air dry over a few days until hard.
- Once dry, children can paint their creations with bright colors, add glitter for sparkle, and even write their names or the date.
- Seal with a clear spray for lasting shine, then tie a ribbon through the hole to hang it as a precious keepsake or family gift.
الاختلافات:
- استخدم الألوان الموسمية لإنشاء عصي ذات طابع خاص (على سبيل المثال، الأحمر والأخضر للعطلات، والألوان الباستيل للربيع).
- Add bells to the ends of the ribbons for a musical element.
- حوّل الأمر إلى أداء: أنشئ روتينًا جماعيًا بسيطًا ودعهم "يؤدون" أمام الآباء أو الفصول الدراسية الأخرى.
19. دمى الوحش السخيفة
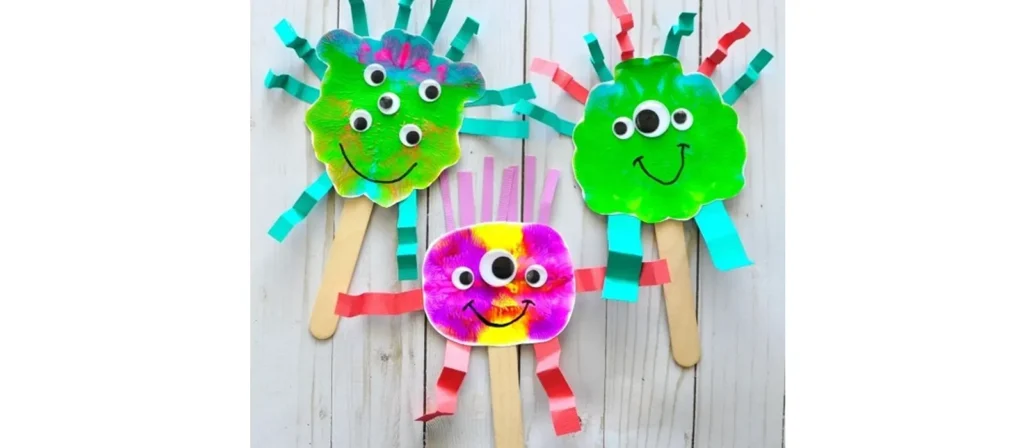
نظرة عامة على النشاط:
Bring giggles and creativity to art time with this playful Silly Monster Puppets activity. Children use colorful paper, yarn, googly eyes, and craft sticks to design their own friendly monsters with funny faces, spiky hair, and wobbly eyes. As they cut, glue, and decorate, they strengthen fine motor skills, experiment with colors and shapes, and discover how imagination can turn ordinary materials into extraordinary creations.
مواد:
أكياس ورقية للغداء، ورق مقوى، أعواد غراء، أقلام تحديد أو أقلام تلوين، كرات صوفية، عيون متحركة، خيوط، مقص (آمن للأطفال)، أشكال رغوية أو منظفات أنابيب (اختياري)
كيفية القيام بذلك:
- Prepare paper bags, colorful paper shapes, googly eyes, pom poms, yarn, and glue for each child.
- Show how the flap of the paper bag can become the monster’s mouth, then let children start decorating.
- Encourage them to glue on eyes in any number they like and add fun details like spiky hair, horns, arms, or big teeth.
- Let them use markers or crayons to draw silly smiles, wiggly tongues, or tiny spots for extra personality.
- As they work, ask fun questions such as “What’s your monster’s name?” or “Does it roar or laugh?”
- Once finished, gather the group for a monster puppet show where each child can perform with their silly new friend.
- Celebrate their creativity by displaying the puppets or creating a “Monster of the Week” wall to introduce everyone’s creations.
الاختلافات:
- قم بتحديد موضوعات الوحوش لدروس محددة (على سبيل المثال، وحوش العاطفة لتعلم SEL).
- استخدم اللباد بدلاً من الورق للحصول على نسخة محببة.
- اصنع عرضًا حائطيًا بعنوان "وحش الأسبوع" حيث يقوم كل طفل بتقديم شخصيته.
20. فن كوكب فلتر القهوة

نظرة عامة على النشاط:
Take young learners on an out-of-this-world adventure with this mesmerizing Coffee Filter Planet Art activity. Children color round coffee filters with markers, then lightly mist them with water to watch the colors blend and swirl like real galaxies. Once dry, they can cut out and label their colorful “planets,” turning simple materials into a stunning solar system full of imagination and discovery.
مواد:
مرشحات قهوة دائرية، أقلام قابلة للغسل، زجاجات رش أو أكواب صغيرة من الماء مع قطارات، مناشف ورقية، رقائق معدنية أو صواني، ورق مقوى أسود (اختياري للخلفية)، غراء
كيفية القيام بذلك:
- Flatten coffee filters on trays or foil so they are ready for coloring.
- Give children washable markers and let them fill the filters with bright circular designs that look like planets.
- When finished, spray the filters lightly with water or use droppers to wet the surface and watch the colors swirl together.
- Allow the filters to dry completely for one to two hours until the watercolor effect appears.
- Once dry, cut out the colorful planets and glue them onto black paper to create a mini solar system.
- Encourage children to name their planets or add stars and fun space facts around them.
- Display the finished artwork on the classroom wall to create a dazzling galaxy full of imagination and discovery.
الاختلافات:
- قم بتحويله إلى مشروع نظام شمسي عن طريق إنشاء كواكب متعددة ووضعها في مدارها.
- استخدم أقلام التلوين البيضاء لرسم المرشحات أولاً للحصول على تأثير "مقاومة" مخفي.
- أضف غراءًا لامعًا للحصول على بريق المجرة.
21. ماندالا الطبيعة

نظرة عامة على النشاط:
Invite peace, focus, and creativity into the classroom with this beautiful Nature Mandalas activity. Children gather natural materials such as leaves, petals, stones, and twigs, then arrange them in circular patterns to create stunning mandalas that celebrate balance and harmony in nature. As they carefully place each piece, they strengthen concentration, pattern recognition, and an appreciation for the beauty found outdoors.
مواد:
الأوراق، البتلات، العصي، الحجارة الصغيرة، أقماع الصنوبر، الجوز، اللحاء، الدوائر الورقية أو قواعد الكرتون (اختياري)، الغراء (اختياري للعرض الدائم)
كيفية القيام بذلك:
- Take children on a short nature walk to collect safe and interesting materials such as leaves, petals, stones, and twigs.
- Provide paper or cardboard circles as bases, or let children create directly on the ground or table for a more natural feel.
- Explain that a mandala begins in the center and grows outward in patterns or circles.
- Invite children to place one object in the center, then build outward by arranging similar items in repeating or symmetrical designs.
- Encourage them to observe textures and colors while working by asking, “How does this leaf feel?” or “What shapes do you notice?”
- When the mandalas are finished, display them indoors or take photos before nature reclaims the materials.
- Celebrate their creativity by discussing how each mandala is unique, just like the natural world it was made from.
الاختلافات:
- استخدم المواد الموسمية - الزهور في الربيع والأوراق الملونة في الخريف.
- أضف لمسات شخصية مثل الصخور المطلية أو العناصر المصنفة.
- تحويلها إلى مشروع جماعي: ماندالا كبيرة مصنوعة من خلال العمل الجماعي.
نصائح السلامة والتنظيف لوقت الحرف اليدوية
حتى أفضل الفنون والحرف اليدوية للأطفال في سن ما قبل المدرسة قد تتحول إلى فوضى إذا لم نكن مستعدين. مع التنظيم السليم والعادات الصحيحة، يمكنكِ تشجيع الإبداع دون القلق بشأن الانسكابات أو البقع أو لزج الأصابع.

وضع الحدود قبل أن تبدأ المتعة
- مناطق الصناعة: استخدم طاولات مخصصة أو حصائر قابلة للغسل
- المآزر أو القمصان القديمة: ضرورية لمرحلة ما قبل المدرسة
- ضع قواعد "نظافة الأيدي" قبل استخدام الغراء أو الطلاء
استخدام مواد آمنة ومناسبة للعمر
- اختر دائمًا اللوازم غير السامة والقابلة للغسل
- تجنب الأدوات الحادة، ومخاطر الاختناق البسيطة، أو المواد المسببة للحساسية
- قم بتخزين المواد الخطرة بعيدًا عن متناول الأطفال
تعليم التنظيف كجزء من النشاط
- استخدم صناديق ذات ألوان مرمزة لتنظيم المواد
- إنشاء أغاني أو روتينات ممتعة حول التنظيف
- تعيين "قادة تنظيف" صغار لكل طاولة
كيف تدعم الفنون والحرف اليدوية التعلم في منهج مونتيسوري وريجيو
الفلسفات وراء مونتيسوري وريجيو إميليا ندعم بقوة الفنون والحرف اليدوية لمرحلة ما قبل المدرسة - ليس فقط كشكل فني ولكن كطريقة للتعلم والتعبير وفهم العالم.
تعزيز الاستقلال من خلال العمل العملي
- يختار الأطفال المواد ويكملون المهام بالسرعة التي تناسبهم
- المشاريع الموجهة ذاتيًا تبني الاستقلالية والثقة
- الأدوات واللوازم متاحة على ارتفاع الطفل
تشجيع الملاحظة والإبداع المستوحى من الطبيعة
- تؤكد ريجيو إميليا على المواد الطبيعية والاستكشاف الحسي
- المشي في الطبيعة واللعب الحر يربطان الفن بالعالم الحقيقي
- تعمل الحرف الموسمية على تعزيز إيقاعات ودورات الحياة
دعم التطور المعرفي من خلال التكرار والروتين
- يساعد تكرار الحركات الحركية الدقيقة على بناء مسارات الدماغ
- تساعد الطقوس المتعلقة بالفنون والحرف اليدوية على بناء النظام والصبر والتركيز
- يمكن أن تشمل مواد مونتيسوري ملحقات حرفية (على سبيل المثال، التثقيب بالدبابيس، والتتبع)
الحرف اليدوية بأسعار معقولة: نصائح لمرحلة ما قبل المدرسة ورياض الأطفال
High-quality arts and crafts for preschoolers don’t require a big budget. With a bit of creativity and planning, you can provide meaningful art experiences without breaking the bank.
استخدم المواد المعاد تدويرها والمواد اليومية
- لفات ورق التواليت، وأغطية الزجاجات، وعلب الحبوب، وبقايا القماش
- الشراكة مع أولياء الأمور لإنشاء صناديق التبرعات
- تعليم الاستدامة من خلال إعادة الاستخدام
اشتري بكميات كبيرة ونظم بذكاء
- احصل على اللوازم الأساسية (الغراء والورق والفرش) من بائعي الجملة
- قم بالتخزين حسب الفئة واللون للوصول السريع
- قوالب مغلفة شائعة الاستخدام للاستخدام المتكرر
التخطيط للوحدات الموضوعية مسبقًا
- قم بمحاذاة الحرف مع المواسم أو العطلات أو مواضيع الدروس
- إعادة استخدام الحرف اليدوية عبر مختلف الفئات العمرية مع اختلافات طفيفة
- احتفظ بملف يحتوي على قوالب وتعليمات قابلة للطباعة لفريقك
خاتمة
الفنون والحرف اليدوية لمرحلة ما قبل المدرسة ليست مجرد نشاط ممتع، بل هي أساسية لتنمية المهارات الحركية الدقيقة، وتشجيع التعبير العاطفي، وغرس حب الإبداع مدى الحياة. سواء كنتَ معلمًا أو صاحب مدرسة أو ولي أمر، فإن منح الأطفال حرية الإبداع بأيديهم يبني الثقة بالنفس والتواصل والفضول.
وراء كل مساحة حرفية ناجحة بيئة مصممة بعناية. أثاث ويست شورنحن متخصصون في تصميم هذه البيئات. بخبرة تزيد عن 20 عامًا في تصنيع وتوريد أثاث ما قبل المدرسة، نقدم حلولاً متكاملة الخدمات.من تصميم الفصول الدراسية وتخصيص الأثاث، إلى الإنتاج ومراقبة الجودة والتسليم. تشمل مجموعتنا أثاثًا متنوعًا لمرحلة ما قبل المدرسة بأنماط ومواد وأحجام مختلفة لتلبية الاحتياجات المتنوعة لمساحات التعلم المبكر.
عندما تكون مستعدًا لرفع مستوى مناطق الفن لديك أو إعادة تصميم مساحة ما قبل المدرسة لإلهام المزيد من الإبداع، فنحن هنا للمساعدة - لأن البيئة المناسبة تصنع كل الفارق.