Suchen Sie nach kreativen Möglichkeiten, Vorschulkinder ohne Bildschirme zu beschäftigen? Fragen Sie sich, wie Sie Fantasie anregen, feine Motorikund gleichzeitig die frühe Bildung fördern? Ob Lehrer, Betreuer oder Eltern – die richtige Balance zwischen Spaß und Entwicklungswert bei Aktivitäten zu finden, kann überwältigend sein. Hier kommt die Kraft von „Kunst und Handwerk für Vorschulkinder“ voll zum Tragen.
Basteln für Vorschulkinder ist mehr als nur ein Spiel – es ist eines der wirksamsten Mittel für die frühkindliche Entwicklung. Diese kreativen Erfahrungen stärken die Feinmotorik, verbessern die Hand-Augen-Koordination, fördern die Problemlösung, fördern frühe mathematische und sprachliche Konzepte und stärken die emotionale Widerstandsfähigkeit. Jeder Pinselstrich, jeder Papierschnitt und jeder Klebemoment ermöglicht es Vorschulkindern, Ideen auszudrücken, Emotionen zu verarbeiten und stolz auf ihre Kreationen zu sein. Diese Aktivitäten bieten Struktur, Konzentration und freudiges Entdecken zu Hause oder in der Schule.
Von Kinderkrippen und Kindertagesstätten über Kindergärten bis hin zum Wohnzimmer: „Kunst und Handwerk für Vorschulkinder“ eröffnet eine Welt der Fantasie und des sinnvollen Spielens. In diesem Artikel stelle ich Ihnen 21 der besten Projekte vor – einfach, unterhaltsam und voller pädagogischem Wert. Ob Sie eine Reggio-inspirierte Vorschule leiten oder eine Wochenendaktivität zu Hause planen – diese Ideen werden das Lernen anregen und kleine Herzen zum Leuchten bringen.
Basteln im Vorschulalter: Mehr als nur eine lustige Aktivität
Im Vorschulbereich wird oft darüber diskutiert, ob Kunsthandwerk in der frühkindlichen Bildung einen Platz hat. Zwar sind Kunsthandwerk und Kunst unterschiedlich – Kunst ist unbegrenzte Kreativität, während Handwerk in der Regel ein festgelegtes Ergebnis hat – beide sind in einem umfassenden Lehrplan wertvoll.
Kunst ermöglicht es Kindern, Materialien, Farben und Texturen frei und ohne Einschränkungen zu erkunden und sich auf den Prozess statt auf das Endprodukt zu konzentrieren. Dies ist wichtig für die Förderung von Kreativität und Selbstdarstellung. Handwerk bietet jedoch einzigartige Vorteile. Es fördert die Entwicklung feinmotorischer Fähigkeiten und stärkt Konzepte wie Farb- und Formerkennung, und kann umfassendere Lernthemen unterstützen. Wenn man zu Hause mit einem fürsorglichen Erwachsenen bastelt, wird das Basteln zu einer einzigartigen Aktivität, die Bindung aufbaut und bedeutungsvolle Erinnerungen schafft.
Anstatt Basteln als Einschränkung zu betrachten, sollten wir es als Ergänzung zu offenen Kunsterlebnissen sehen. Eine ausgewogene Mischung aus beidem gewährleistet, dass Kinder frei gestalten können und gleichzeitig durch strukturierte Aktivitäten wertvolle Fähigkeiten erwerben.
Hier entdecken wir die 21 besten Bastelprojekte für den Vorschulbereich, die perfekt für kleine Hände sind.
21 beste Bastelarbeiten für die Vorschule
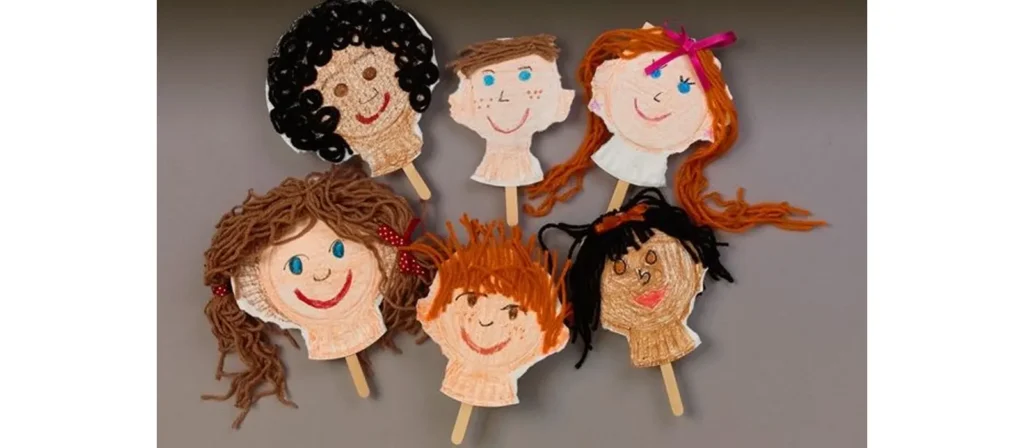
1. Gesichter aus Papptellern
Aktivitätsübersicht:
Dieses ausdrucksstarke Projekt bietet Kindern eine unterhaltsame und spannende Möglichkeit, Gefühle künstlerisch zu erkunden. Als eine der vielseitigsten Kunst- und Bastelideen für Vorschulkinder ermöglichen Papptellergesichter Kindern, Emotionen zu visualisieren und gleichzeitig ihre Feinmotorik und ihre sozial-emotionalen Fähigkeiten kreativ zu entwickeln.
Materialien:
Pappteller, Marker, Garn, Kleber, verschiedene Dekorationen (Aufkleber, Wackelaugen, Pompons)
Aufstellen:
- Ordnen Sie alle Materialien auf einem Tisch in Kinderhöhe an, damit Vorschulkinder selbstständig darauf zugreifen können.
- Geben Sie jedem Kind einen eigenen Pappteller, einen Stiftsatz, einen Klebestift und ein Tablett mit Dekorationen.
- Ordnen Sie Garn, Aufkleber und Wackelaugen in kleinen Behältern, um den Raum ordentlich und inspirierend zu halten.
Aktivitätsanweisungen:
- Verteilen Sie Pappteller und fordern Sie die Kinder auf, Gesichter zu malen, die unterschiedliche Emotionen ausdrücken – glücklich, traurig, albern, überrascht und mehr.
- Zeigen Sie, wie man mit Markern einfache Gesichtszüge zeichnet und wie man Garn oder Pompons für kreative Frisuren aufklebt.
- Fördern Sie die Personalisierung, indem Sie Kinder Aufkleber, Wackelaugen und Farben verwenden lassen, um ihre individuellen Ideen auszudrücken.
- Beteiligen Sie sie während der Arbeit an einer Diskussion: „Was fühlt dieses Gesicht?“ oder „Kannst du diese Emotion auch mit deinem Gesicht zeigen?“
- Sobald die Gesichter trocken sind, können Sie sie im Raum aufhängen oder sie nach Hause schicken, damit die ganze Familie sie bewundern kann.
Variationen:
Verwenden Sie Teller in verschiedenen Größen, um eine Gruppe ausdrucksstarker „Gesichtsfamilien“ zu bilden – eine perfekte Ergänzung zum thematischen Kunsthandwerk für Vorschulkinder.
Bitten Sie die Kinder, Figuren aus ihren Lieblingsbüchern zu erschaffen oder Porträts ihrer Familienmitglieder aus Papptellern anzufertigen.
2. DIY-Fernglas

Aktivitätsübersicht:
Dieses umweltfreundliche Projekt verwandelt alltägliche Wertstoffe in Abenteuerwerkzeuge! Selbstgebaute Ferngläser sind ein beliebtes Bastelprojekt für Vorschulkinder und regen die Fantasie an, fördern Rollenspiele und fördern das explorative Lernen drinnen und draußen.
Materialien:
Zwei leere Toilettenpapierrollen pro Kind, Klebeband oder Klebstoff, Schnur oder Garn, Locher, Buntstifte oder Marker, Aufkleber, farbiges Papier (optional)
Aufstellen:
- Reinigen und legen Sie für jedes Kind zwei Toilettenpapierrollen bereit.
- Richten Sie eine Kreativstation mit Markern, Aufklebern, farbigem Papier und dekorativen Extras ein.
- Stanzen Sie in jede Seite der Rollen ein Loch, um den Umhängegurt zu befestigen – dies ist eine großartige Möglichkeit, wichtige Werkzeuge einzuführen, die sicher und angeleitet verwendet werden können.
Aktivitätsanweisungen:
- Lassen Sie die Kinder die Außenseite ihrer Toilettenpapierrollen mit Buntstiften, Filzstiften, Aufklebern oder durch Einwickeln in buntes Papier verzieren.
- Helfen Sie ihnen, die Rollen zusammenzukleben oder mit Klebeband zu versehen, um die Basis des Fernglases zu bilden.
- Führen Sie sie durch das Fädeln von Garn durch die vorgestanzten Löcher, um einen Riemen zu erstellen, und machen Sie dann Knoten, um ihn zu befestigen.
- Ermutigen Sie Vorschulkinder, mit ihrem Fernglas eine fantasievolle „Expedition“ durch das Zimmer oder den Spielplatz zu unternehmen und so Beobachtungen und Gespräche anzuregen.
- Stellen Sie Fragen, um den Lernstoff zu erweitern: „Was haben Sie entdeckt?“ oder „Können Sie etwas finden, das mit dem Buchstaben B anfängt?“
Variationen:
- Verwenden Sie für Jumbo-Ferngläser halbierte Papierhandtuchrollen.
- Machen Sie aus diesem Handwerk ein Spiel, indem Sie eine Schnitzeljagd veranstalten, bei der Kinder versteckte Objekte „entdecken“ müssen.
- Kombinieren Sie es mit Büchern oder Liedern über die Natur oder Entdeckungen, um thematische Kunst- und Bastelstunden für Vorschulkinder zu bereichern.
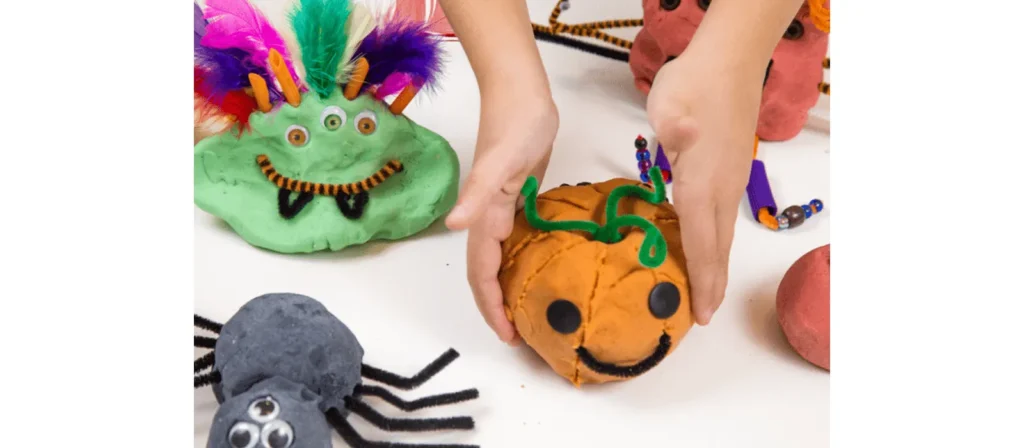
3. Einfaches Kürbishandwerk

Aktivitätsübersicht:
Dies ist ein lustiges und saisonales Projekt, bei dem Vorschulkinder niedliche Kürbisse aus einfachen Formen basteln. Es ist eine perfekte herbstliche Ergänzung zu Ihrem Halloween-Bastelprojekt für Vorschulkinder und hilft ihnen, Formen, Farben und Feinmotorik zu entdecken.
Materialien:
Oranges Tonpapier, grünes Tonpapier, Schere (kindersicher), Klebestifte, schwarze Marker, optional: Wackelaugen, Garn, Glitzer
Aufstellen:
- Schneiden Sie orangefarbenes Papier in große Kreise oder Streifen (je nach Stil) vor.
- Schneiden Sie grünes Papier in kleine Rechtecke oder Blattformen für Kürbisstiele.
- Legen Sie die Materialien in geordneten Schalen auf dem Tisch aus – halten Sie Kleber, Marker und Zubehör in Reichweite.
Aktivitätsanweisungen:
- Geben Sie jedem Kind einen runden Orangenausschnitt oder helfen Sie ihm, Orangenstreifen zu einer runden Kürbisform zusammenzukleben.
- Zeigen Sie ihnen, wie man mit schwarzen Markern einen grünen Stiel oben anklebt und ein Gesicht auf den Kürbis malt.
- Bitten Sie die Kinder, ihre Kürbisse mit Wackelaugen, Garn (als Ranken) oder Glitzer für zusätzlichen Glanz zu dekorieren.
- Nutzen Sie die Gelegenheit, über Herbst, Erntedank oder Halloween zu sprechen. Fragen Sie: „Was für ein Gesicht wird Ihr Kürbis haben? Ein fröhliches? Ein gruseliges?“
- Lassen Sie die Kürbisse nach der Fertigstellung trocknen und gestalten Sie daraus eine festliche Dekoration im Klassenzimmer oder ein Kürbisbeet aus Papier an der Wand.
Variationen:
- Versuchen Sie, für eine stabilere Basis Pappteller anstelle von Bastelpapier zu verwenden.
- Machen Sie daraus ein Namenserkennungs-Kunstwerk, indem Sie die Kinder ihre Namen auf die Kürbisse schreiben lassen.
- Machen Sie Mini-Kürbisse und basteln Sie daraus eine Girlande, die Sie im Zimmer aufhängen können.
4. Truthahn-Stirnband

Aktivitätsübersicht:
Dieses Truthahn-Stirnband ist ein beliebtes Thanksgiving-Accessoire und eine spielerische Möglichkeit für Kinder, die Feiertage zu feiern. Als Teil der saisonalen Bastel- und Bastelaktion für Vorschulkinder fördert es Kreativität und Feinmotorik und führt Kinder ganz ohne Hände in kulturelle Traditionen ein.
Materialien:
Braunes Tonpapier, rotes, orangefarbenes und gelbes Tonpapier, Schere (kindersicher), Kleber oder Klebeband, Buntstifte oder Marker, Wackelaugen (optional), Hefter
Aufstellen:
- Schneiden Sie Streifen aus braunem Papier vor, die als Basis für das Stirnband dienen (ca. 5 cm breit).
- Schneiden Sie Federformen aus rotem, orangefarbenem und gelbem Papier aus. Schneiden Sie die Federn vor oder lassen Sie ältere Vorschulkinder das Schneiden üben.
- Legen Sie alle Materialien auf Tische und stellen Sie zur Inspiration Beispielstirnbänder bereit.
Aktivitätsanweisungen:
- Helfen Sie jedem Kind, einen braunen Papierstreifen um den Kopf zu wickeln, um die richtige Größe zu erhalten, und tackern oder kleben Sie ihn dann zu einem Kreis zusammen.
- Lassen Sie die Kinder ihre Federn ausmalen und verzieren, bevor sie sie auf die Rückseite des Stirnbands kleben.
- Zeigen Sie ihnen, wie man mit Papierausschnitten oder Wackelaugen ein einfaches Truthahngesicht auf der Vorderseite bastelt. Fügen Sie einen Schnabel und einen roten Kehllappen hinzu.
- Sprechen Sie darüber, was Thanksgiving bedeutet, und bitten Sie die Kinder, etwas zu nennen, wofür sie dankbar sind.
- Wenn Sie fertig sind, können die Kinder ihre Truthahn-Stirnbänder bei einer Parade im Klassenzimmer oder einer Feier zum Mitnehmen nach Hause tragen.
Variationen:
- Fügen Sie den Namen des Kindes als lustiges Personalisierungselement auf der Vorderseite des Stirnbands hinzu.
- Gestalten Sie eine Dankbarkeitsfeder: Lassen Sie jedes Kind etwas, wofür es dankbar ist, auf eine Feder schreiben oder zeichnen, bevor Sie sie daran befestigen.
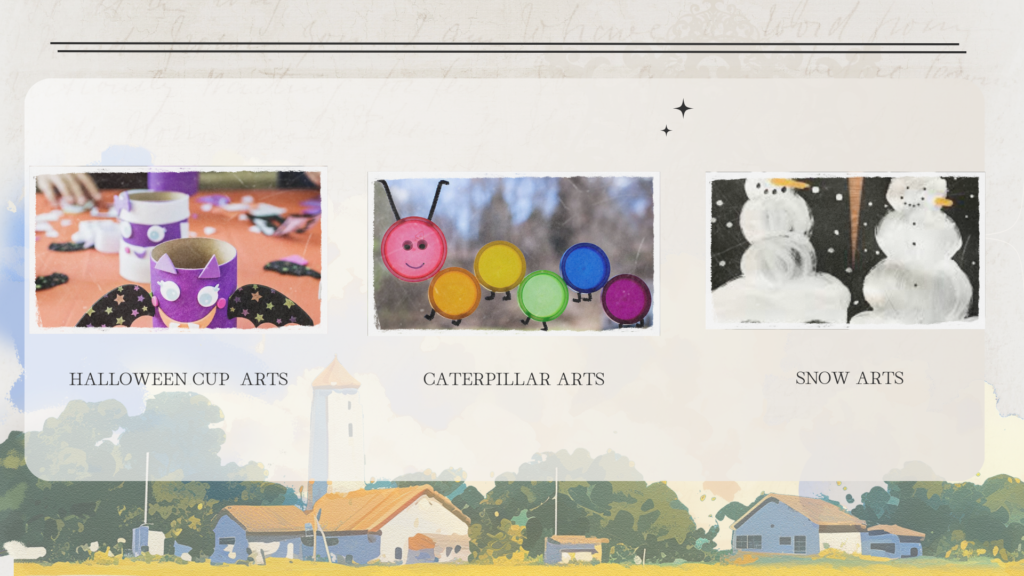
5. Pappbecher-Hexe

Aktivitätsübersicht:
Dieses Halloween-Bastelprojekt verwandelt einfache Pappbecher in süße kleine Hexen! Als eines der beliebtesten Bastelprojekte für Vorschulkinder regt es zum fantasievollen Geschichtenerzählen an, führt in festliche Traditionen ein und fördert durch Ausschneiden und Zusammensetzen die Feinmotorik.
Materialien:
Pappbecher (grün oder weiß), schwarzes Bastelpapier, Kleber, Schere (kindersicher), Garn oder Papierschnitzel (für die Haare), Wackelaugen, Filzstifte oder Buntstifte
Aufstellen:
- Stellen Sie Pappbecher, vorgeschnittene Hexenhüte und Umhangformen aus schwarzem Bastelpapier bereit.
- Bereiten Sie Garnstränge oder Papierschnitzel in kleinen Schüsseln als Haare vor.
- Sorgen Sie an jeder Tischstation für einfachen Zugriff auf Kleber, Marker und Zubehör.
Aktivitätsanweisungen:
- Geben Sie jedem Kind einen Pappbecher und helfen Sie ihm, Wackelaugen aufzukleben und mit Filzstiften einen Mund und eine Nase zu malen.
- Lassen Sie sie Garn oder Papierschnitzel auf die Oberseite oder die Seiten des Bechers kleben, um wildes Hexenhaar zu kreieren.
- Befestigen Sie den vorgeschnittenen Hut aus Bastelpapier mit Klebstoff oder Klebeband oben auf dem Becher.
- Wickeln Sie einen kleinen schwarzen Umhang oder Kragen um den unteren Teil der Tasse, um das Hexenkostüm zu vervollständigen.
- Während die Kinder kreativ sind, sollten sie Fragen stellen wie: „Welche Art von Magie macht deine Hexe?“ oder „Ist deine Hexe albern, gruselig oder nett?“
Variationen:
- Fügen Sie einen kleinen Besenstiel aus Eisstielen und Bast oder Packpapier hinzu.
- Machen Sie eine Halloween-Puppe daraus, indem Sie einen Strohhalm oder Stock am Boden des Bechers befestigen.
- Ermutigen Sie Kinder, andere Figuren – Geister, Kürbisse oder Zauberer – für eine komplette Halloween-Szene zu erschaffen.
6. Eistüten mit Puffy Paint
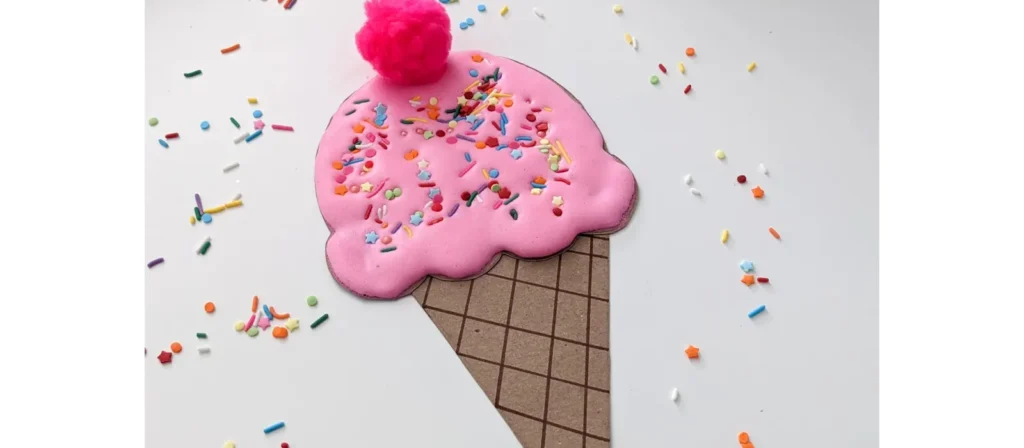
Aktivitätsübersicht:
Bei diesem entzückenden, sommerlich inspirierten Projekt können Vorschulkinder Eistüten mit Puffy Paint „bemalen“ und so einen strukturierten 3D-Effekt erzeugen. Als unterhaltsame und taktile Aktivität ist es ein Highlight im sensorischen Kunst- und Bastelbereich für Vorschulkinder – und hilft Kindern, Texturen, Farben und Kreativität gleichzeitig zu entdecken.
Materialien:
Rasierschaum, Weißleim, Lebensmittelfarbe oder abwaschbare Farbe, braunes Tonpapier (Kegel), weißer Karton oder Papier (Hintergrund), Schere, Rührschüsseln, Löffel
Aufstellen:
- Mischen Sie Rasierschaum und Weißleim in mehreren Schüsseln, um Puffy Paint herzustellen. Fügen Sie verschiedene Farben mit Lebensmittelfarbe oder abwaschbarer Farbe hinzu.
- Vorgestanzte Kegelformen aus braunem Tonpapier.
- Legen Sie Materialien und Plastiklöffel oder -bürsten bereit, damit Sie die Masse leichter aufnehmen und verteilen können.
Aktivitätsanweisungen:
- Geben Sie jedem Kind ein Stück Karton und einen Kegelausschnitt, den es unten aufkleben kann.
- Lassen Sie sie ihre „Eiskugeln“ mit den farbigen Puffy-Paint-Mischungen ausstechen oder aufpinseln.
- Ermutigen Sie die Kinder, mehrere Farben auszuwählen und ihre Kugeln zu stapeln, um große, lustige Kegel zu machen.
- Sprechen Sie beim Malen über die verschiedenen Geschmacksrichtungen – „Welche Geschmacksrichtung hat das Rosa?“ oder „Wie viele Kugeln passen hinein?“
- Lassen Sie das Kunstwerk über Nacht trocknen, damit die bauschige Textur fest und erhaben bleibt.
Variationen:
- Fügen Sie Streusel mit Glitzer oder kleinen ausgeschnittenen Papierpunkten hinzu.
- Verwandeln Sie die fertigen Tüten in ein Wanddisplay mit dem Titel „Unsere süßesten Ideen!“
- Verwenden Sie duftende Rasiercreme oder geben Sie einen Tropfen Vanille hinzu, um eine multisensorische Note zu erzielen.
7. Blattreibkunst
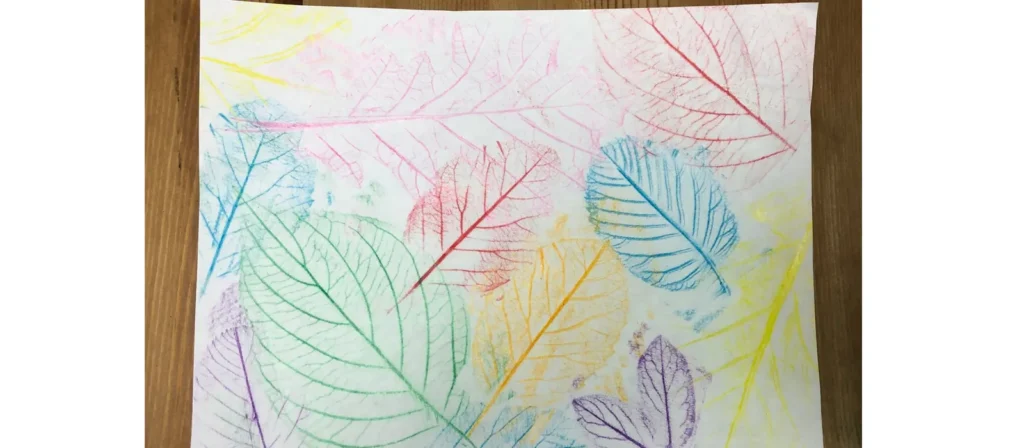
Aktivitätsübersicht:
Diese klassische Herbstaktivität hilft Kindern, die Natur künstlerisch zu entdecken. Echte Blätter werden verwendet, um strukturierte Abreibungen zu erstellen. Es ist eine beruhigende und lehrreiche Ergänzung zum naturbasierten Kunst- und Basteln für Vorschulkinder und verbindet die Erkundung der Natur mit Kreativität und Feinmotorik.
Materialien:
Verschiedene Blätter (unterschiedliche Formen/Größen), weißes Papier, Buntstifte (ohne Verpackung), Klebeband (optional), Klemmbretter oder flache Arbeitsfläche
Aufstellen:
- Gehen Sie mit den Kindern nach draußen, um Blätter zu sammeln, oder geben Sie bereits gesammelte Blätter am Basteltisch ab.
- Entfernen Sie die Buntstiftverpackungen vorher, damit sich die Farbe leichter reiben lässt.
- Stellen Sie Klemmbretter oder feste Oberflächen bereit, auf denen die Kinder Papier über die Blätter legen können.
Aktivitätsanweisungen:
- Lassen Sie die Kinder einige Blätter auswählen und mit der Blattader nach oben auf den Tisch oder das Klemmbrett legen.
- Kleben Sie die Blätter bei Bedarf leicht fest und legen Sie dann ein Stück weißes Papier darauf.
- Zeigen Sie den Kindern, wie sie mit der Seite eines Buntstifts sanft über das Papier reiben, um die Blattform und -struktur darunter freizulegen.
- Ermutigen Sie sie, verschiedene Farben, Größen und Blattarten auszuprobieren, um Muster zu vergleichen.
- Nutzen Sie diesen Moment, um über die Natur zu sprechen: „Von was für einem Baum stammt dieses Blatt Ihrer Meinung nach?“ oder „Wie verändern sich Blätter im Herbst?“
Variationen:
- Machen Sie aus den fertigen Abreibungen Grußkarten, Lesezeichen oder saisonale Dekorationen.
- Verwenden Sie schwarzes Papier und helle Buntstifte für einen dramatischen Effekt.
- Kombinieren Sie es mit einem einfachen Spaziergang in der Natur und einer Schnitzeljagd nach Blättern für einen Tag mit vollem Thema.
8. Selbstgemachte Knete-Kreationen
Aktivitätsübersicht:
Selbstgemachte Knete ist ein zeitloser Favorit und ermöglicht es Vorschulkindern, frei zu formen, zu kneten und zu modellieren. Als eine der flexibelsten Bastelaktivitäten für Vorschulkinder fördert sie die sensorische Entwicklung, Kreativität und die Stärkung der Feinmotorik.
Materialien:
Mehl, Salz, Weinstein, Wasser, Pflanzenöl, Lebensmittelfarbe (oder fertige Knete), Rührschüsseln, Löffel, kindersichere Modellierwerkzeuge (Plastikmesser, Ausstechformen, Nudelhölzer)
Aufstellen:
- Bereiten Sie Knete in verschiedenen Farben vor oder lassen Sie die Kinder beim Mischen der Knete helfen, um ein zusätzliches Sinneserlebnis zu schaffen.
- Legen Sie an jeder Station Bildhauerwerkzeuge und Zubehör bereit.
- Stellen Sie Tabletts oder Matten bereit, um die Unordnung einzudämmen.
Aktivitätsanweisungen:
- Wenn Sie den Teig von Grund auf selbst zubereiten, zeigen Sie Ihren Kindern, wie sie 2 Tassen Mehl, 1 Tasse Salz, 2 Esslöffel Weinstein, 2 Esslöffel Öl und 1,5 Tassen Wasser in einem Topf vermengen. Erhitzen und rühren, bis ein Teig entsteht (Hilfe eines Erwachsenen erforderlich).
- Sobald der Teig abgekühlt ist, teilen Sie ihn und mischen Sie Lebensmittelfarbe unter, um leuchtende Farbtöne zu erzeugen.
- Lassen Sie Kinder alles Mögliche formen und herstellen, von Tieren über Buchstaben bis hin zu Lebensmitteln.
- Bieten Sie Anregungen wie „Können Sie Ihr Lieblingsessen zubereiten?“ oder „Versuchen Sie, Ihren Namen zu formen!“
- Bewahren Sie Knete in verschlossenen Behältern oder Beuteln auf, um sie im Laufe der Woche wiederzuverwenden.
Variationen:
- Fügen Sie ätherische Öle (wie Lavendel oder Pfefferminze) für eine beruhigende sensorische Note hinzu.
- Integrieren Sie natürliche Elemente wie Zweige, Steine oder Blätter für ein naturbasiertes Thema.
- Verwenden Sie Ausstechformen, um die Aktivität mit frühen mathematischen Konzepten wie Mustern oder Geometrie zu verknüpfen.
9. Die kleine Raupe Nimmersatt
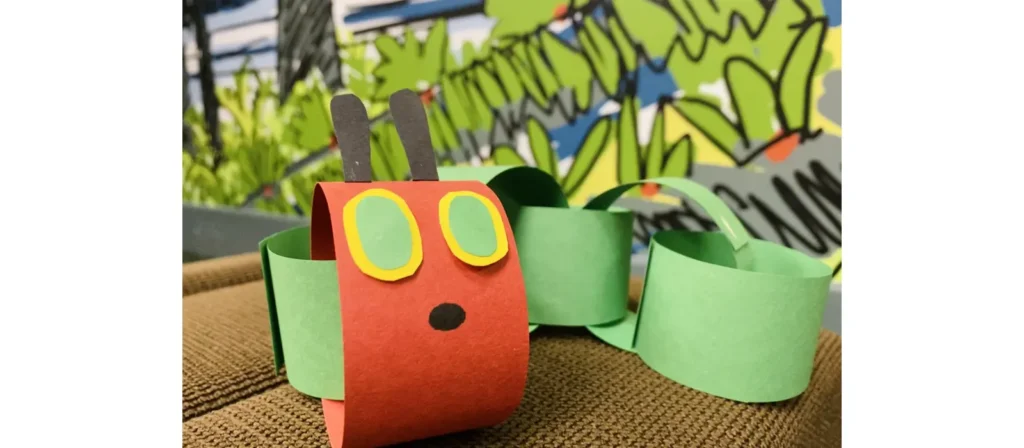
Aktivitätsübersicht:
Inspiriert von Eric Carles Kinderbuchklassiker erweckt diese farbenfrohe Raupenbastelei Geschichten zum Leben. Sie verbindet Literatur mit Kunst und Handwerk für Vorschulkinder und fördert gleichzeitig die Reihenfolge, Farberkennung und Feinmotorik.
Materialien:
Farbiges Bastelpapier (rot und grün), Klebestifte, Schere (kindersicher), schwarzer Marker, Wackelaugen, Pappteller (optional zur Präsentation), Exemplare des Buches (optional)
Aufstellen:
- Vorgeschnittene grüne Kreise für die Körpersegmente der Raupe und rote Kreise für den Kopf.
- Legen Sie die Materialien in kleine Schalen, damit die Kinder schnell das nehmen können, was sie brauchen.
- Habe das Buch Die kleine Raupe Nimmersatt zum Lesen vor oder während der Aktivität verfügbar.
Aktivitätsanweisungen:
- Lesen Die kleine Raupe Nimmersatt den Kindern laut vorlesen oder gemeinsam eine Videoversion ansehen.
- Verteilen Sie die roten und grünen Kreise. Lassen Sie die Kinder diese in einer Reihe aufkleben, sodass der Körper der Raupe entsteht.
- Klebe Wackelaugen auf und male ein Lächeln auf den roten Kreis. Füge Fühler mit schwarzem Papier oder einem Marker hinzu.
- Stellen Sie den Kindern Fragen wie „Was hat die Raupe gefressen?“ oder „Wie viele grüne Kreise hast du verwendet?“
- Hängen Sie die fertigen Raupen an ein schwarzes Brett oder schicken Sie sie als Leselernprojekt nach Hause.
Variationen:
- Fügen Sie ein Zählelement hinzu, indem Sie jeden grünen Kreis nummerieren.
- Erstellen Sie ein Wandbild zum Lebenszyklus mit den Stadien Raupe, Kokon und Schmetterling.
- Verwenden Sie für ein flauschigeres Aussehen Wattebäusche anstelle von Papierkreisen.
10. Handabdruck-Sonnenblumen
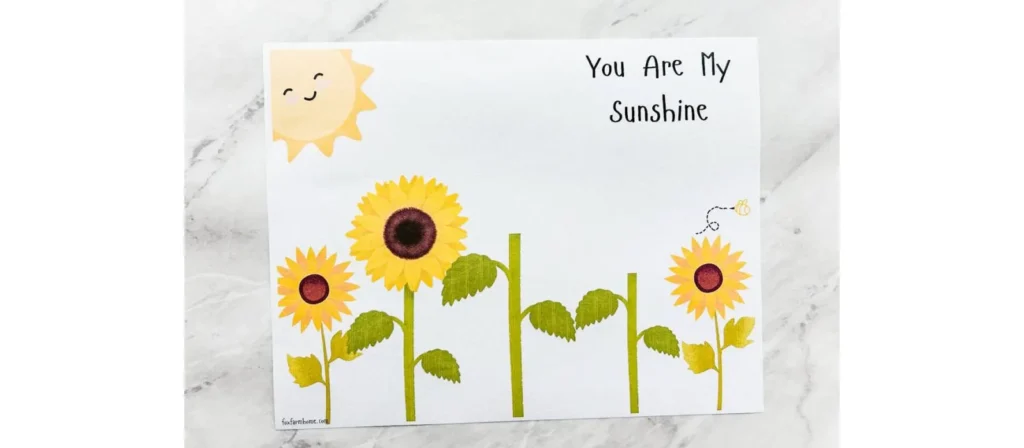
Aktivitätsübersicht:
Dieses fröhliche Bastelprojekt nutzt Kinderhandabdrücke, um sonnige Sonnenblumenblätter zu gestalten! Es ist eine schöne, unvergessliche Aktivität, die Selbstentfaltung mit saisonalen Themen verbindet und sich perfekt für naturnahes und sinnliches Basteln im Vorschulalter eignet.
Materialien:
Gelbes und grünes Tonpapier, braune Papierkreise (oder Cupcake-Förmchen), Kleber, Schere (kindersicher), Bleistift, schwarzer Marker, optional: echte Sonnenblumenkerne
Aufstellen:
- Vorgeschnittene grüne Stiele und braune Kreise für die Sonnenblumenmitte.
- Legen Sie gelbes Papier und Stifte bereit, damit die Kinder ihre Hände nachzeichnen (oder Hilfe anbieten) können.
- Bereiten Sie zur Inspiration eine Sonnenblume als Beispiel vor und legen Sie die Materialien in geordneten Schalen aus.
Aktivitätsanweisungen:
- Helfen Sie den Kindern, ihre Hände mehrere Male auf gelbem Papier nachzuzeichnen und schneiden Sie dann die Formen aus, um sie als Sonnenblumenblätter zu verwenden.
- Kleben Sie den braunen Kreis (oder das Cupcake-Förmchen) in die Mitte des Papiers.
- Lassen Sie die Kinder ihre Handabdruck-„Blütenblätter“ um die Mitte kleben, um eine ganze Sonnenblume zu erstellen.
- Befestigen Sie einen grünen Stiel und Blätter, um die Blume zu vervollständigen.
- Optional können Sie echte Sonnenblumenkerne in die Mitte kleben, um für mehr Struktur und sensorischen Spaß zu sorgen.
Variationen:
- Schreiben Sie den Namen jedes Kindes auf ein Blütenblatt und machen Sie daraus eine „Klassengarten“-Ausstellung.
- Verwenden Sie Farbe, um Blütenblätter aus Handabdrücken zu erstellen und so eine chaotischere, taktilere Version zu erhalten.
- Erstellen Sie eine Zählaktivität, indem Sie die Kinder bitten, die verwendeten Blütenblätter zu zählen.
11. Regenbogencollage
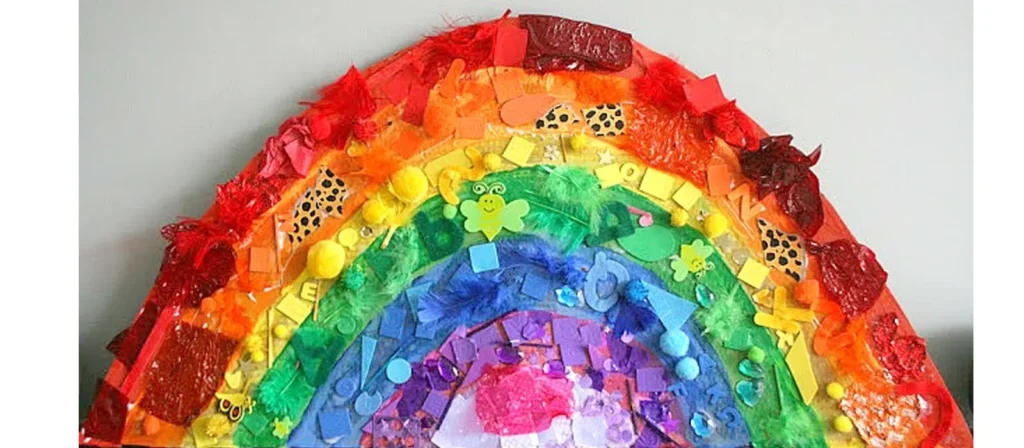
Aktivitätsübersicht:
Mit diesem lebendigen Bastelprojekt können Vorschulkinder Farben, Texturen und Muster entdecken, während sie aus Papierstücken und Bastelmaterialien Regenbögen basteln. Es ist eine hervorragende Möglichkeit, die Farbtheorie und -sequenzierung greifbar und ansprechend zu vermitteln – ein fester Bestandteil des offenen Bastelns für Vorschulkinder.
Materialien:
Farbige Bastelpapierreste (oder Seidenpapier), Klebestifte, weißes Papier oder Karton, Wattebäusche, Schere (kindersicher), Buntstifte oder Marker (optional)
Aufstellen:
- Sortieren Sie farbige Papierreste nach ROYGBIV (Regenbogenfarbreihenfolge) vorab in kleine Schüsseln oder Tabletts.
- Bereiten Sie die Umrisse des Regenbogens auf weißem Papier vor oder lassen Sie die Kinder ihre eigenen zeichnen.
- Legen Sie an jedem Tisch Klebestifte und Wattebäusche bereit, um Wolkenakzente zu setzen.
Aktivitätsanweisungen:
- Geben Sie jedem Kind einen Regenbogenumriss oder ein leeres Blatt für seine Collage.
- Lassen Sie sie farbige Papierschnipsel in der richtigen Regenbogenreihenfolge aufkleben und fördern Sie so die Feinmotorik, während sie jedes Stück auswählen und platzieren.
- Fügen Sie an jedem Ende des Regenbogens Wattebäusche hinzu, um flauschige „Wolken“ zu erzeugen.
- Ermutigen Sie die Kinder, beim Arbeiten jede Farbe zu identifizieren und zu benennen: „Was kommt nach Gelb?“ oder „Welche Farbe gefällt dir am besten?“
- Hängen Sie die Collagen nach dem Trocknen in eine „Farbecke“ oder nehmen Sie sie mit nach Hause, um den Kühlschrank zu verschönern.
Variationen:
- Verwenden Sie natürliche Materialien wie Blätter und Blütenblätter für einen Regenbogen zum Thema Tag der Erde.
- Machen Sie eine 3D-Version daraus, indem Sie Materialien wie Garn, Filz oder Knöpfe übereinander legen.
- Für eine schnellere Gruppenversion können Sie Mini-Regenbögen auf Papptellern erstellen.
12. Fingerabdruckbäume

Aktivitätsübersicht:
Vorschulkinder gestalten saisonale Bäume nur mit Farbe und Fingern voller bunter Blätter. Dieses praktische Projekt ist ein beliebtes sensorisches Kunst- und Bastelprojekt für Vorschulkinder und fördert Kreativität, Farberkennung und emotionalen Ausdruck durch Berührung.
Materialien:
Weißer Karton, braune Marker oder Buntstifte, abwaschbare Farbe (Herbst- oder Frühlingsfarben), Pappteller oder Farbwannen, Tücher oder Wasserschüsseln zum Aufräumen
Aufstellen:
- Zeichnen Sie auf jedes Blatt Karton Baumstämme und Äste vor oder lassen Sie die Kinder mit braunen Stiften ihre eigenen zeichnen.
- Gießen Sie Farbe in flache Schalen oder auf Pappteller – Rot, Gelb und Orange für den Herbst und Grün, Rosa und Lila für den Frühling.
- Richten Sie eine Reinigungsstation mit Tüchern, Wasser und Papiertüchern ein.
Aktivitätsanweisungen:
- Geben Sie jedem Kind ein Blatt mit der Umrisszeichnung eines Baumes.
- Lassen Sie sie ihre Finger in die Farbe tauchen und ihre Fingerabdrücke auf die Zweige drücken, um Blätter zu erzeugen.
- Regen Sie zum Mischen von Farben an und experimentieren Sie mit unterschiedlichem Fingerdruck, um verschiedene Blattformen zu erzeugen.
- Besprechen Sie die Jahreszeit, die sie repräsentieren: „Sehen diese Farben nach Herbst oder Frühling aus?“
- Lassen Sie die Kunstwerke trocknen, bevor Sie sie ausstellen – sie eignen sich perfekt als saisonale Wandkunst oder als Mitbringsel für zu Hause.
Variationen:
- Erstellen Sie vier Bäume nebeneinander, um alle vier Jahreszeiten darzustellen.
- Verwenden Sie Q-Tips oder Wattestäbchen für Kinder, die ihre Finger lieber nicht benutzen möchten.
- Fügen Sie für zusätzliche Details herabfallende Blätter um die Basis herum oder Vögel in den Zweigen hinzu.
13. Luftpolsterfolienmalerei
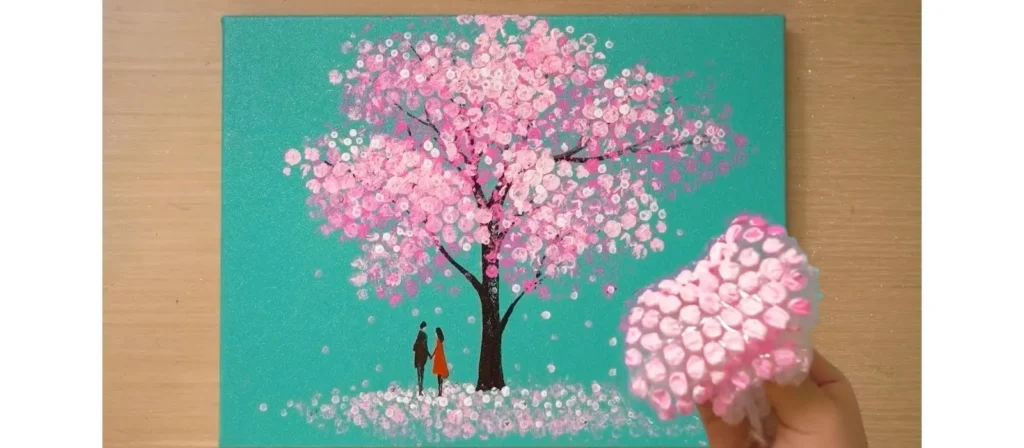
Aktivitätsübersicht:
Diese sinnlich anregende Malaktivität lässt Vorschulkinder Texturen, Muster und Ursache-Wirkung-Zusammenhänge erforschen, indem sie Luftpolsterfolie als kreatives Stempelwerkzeug nutzen. Es ist eine spielerische Variante der traditionellen Pinselmalerei – und ein großartiges Beispiel für prozessorientiertes Kunsthandwerk für Vorschulkinder.
Materialien:
Luftpolsterfolie (in kleine Blätter oder Formen geschnitten), abwaschbare Farbe, Pappteller (für die Farbe), weißer Karton oder große Blätter Papier, Klebeband (optional), Kittel oder Schürzen
Aufstellen:
- Schneiden Sie Luftpolsterfolie in kleine Quadrate oder interessante Formen (Kreise, Herzen, Sterne usw.).
- Gießen Sie für einen einfacheren Zugriff Farbe in verschiedenen Farben auf Pappteller.
- Richten Sie Malstationen mit Karton, Kitteln und Reinigungsmaterialien in der Nähe ein.
Aktivitätsanweisungen:
- Zeigen Sie den Kindern, wie sie Luftpolsterfolie in die Farbe drücken und auf Papier stempeln.
- Lassen Sie sie frei mit verschiedenen Farben, Mustern und überlappenden Formen experimentieren.
- Sprechen Sie darüber, wie die Textur der Luftpolsterfolie einzigartige Drucke erzeugt. Stellen Sie Fragen wie „Wie fühlt es sich an?“ oder „Was passiert, wenn man zwei Farben mischt?“
- Ermutigen Sie sie, das Papier auszufüllen oder abstrakte „Seifenblasengärten“ oder strukturierte Himmel zu erstellen.
- Legen Sie das fertige Kunstwerk zum Trocknen flach hin – der Struktureffekt ist noch eindrucksvoller, wenn die Farbe fest ist!
Variationen:
- Kleben Sie Luftpolsterfolie um ein Nudelholz oder eine Pappröhre, um Texturen auszurollen.
- Schneiden Sie Luftpolsterfolie in saisonale Formen (z. B. Schneeflocken oder Blätter), um thematische Drucke zu erhalten.
- Kombinieren Sie die Aktivität mit einem Buch über Texturen oder die fünf Sinne.
14. Pappteller-Tamburine
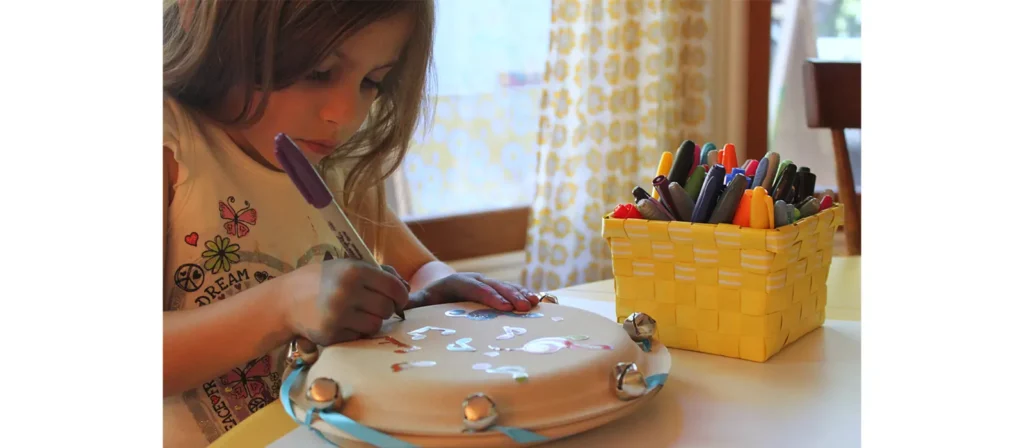
Aktivitätsübersicht:
Mit diesem musikalischen Bastelprojekt können Vorschulkinder aus Papptellern und einfachen Materialien funktionierende Tamburine basteln. Es vereint Klang, Bewegung und Kreativität und ist damit eines der spannendsten fächerübergreifenden Kunst- und Bastelprojekte für Vorschulkinder. Es fördert den künstlerischen Ausdruck und die Sinneswahrnehmung.
Materialien:
Pappteller (2 pro Kind), trockene Bohnen oder Nudeln, Hefter oder Kleber, Marker oder Buntstifte, Aufkleber, Band oder Garn (optional), Locher
Aufstellen:
- Stapeln Sie Pappteller in Zweiersets vor und legen Sie die Dekorationsmaterialien bereit.
- Stellen Sie kleine Schüsseln mit getrockneten Bohnen oder Nudeln für Schüttelgeräusche bereit.
- Wenn Sie Bänder verwenden, schneiden Sie kurze Stränge vor und stanzen Sie Löcher um die Tellerränder.
Aktivitätsanweisungen:
- Lassen Sie die Kinder die Unterseite jedes Tellers mit Buntstiften, Filzstiften oder Aufklebern dekorieren. Ermutigen Sie zur Personalisierung – „Das ist dein Instrument!"
- Geben Sie eine kleine Handvoll Bohnen oder Nudeln auf einen Teller.
- Heften oder kleben Sie den zweiten Teller vorsichtig oben drauf (mit der dekorierten Seite nach außen) und versiegeln Sie die Kanten, um den Inhalt aufzufangen.
- Optional: Stanzen Sie den Rand mit einem Locher und helfen Sie den Kindern, Bänder oder Garn durchzubinden, um dem Ganzen mehr Flair zu verleihen.
- Sobald die Versiegelung abgeschlossen ist, kann die Musik beginnen! Bilden Sie einen Rhythmuskreis oder eine Parade, bei der die Kinder ihre Tamburine zu Takten oder Liedern schütteln.
Variationen:
- Versuchen Sie, im Inneren Glocken oder Knöpfe für verschiedene Geräusche zu verwenden.
- Fügen Sie ein Namensschild hinzu und verwenden Sie es während der Musikstunde oder bei Auftritten.
- Erkunden Sie Klangunterschiede mit verschiedenen Füllungen – Reis, Perlen oder Kieselsteinen.
15. Papiertütenpuppen
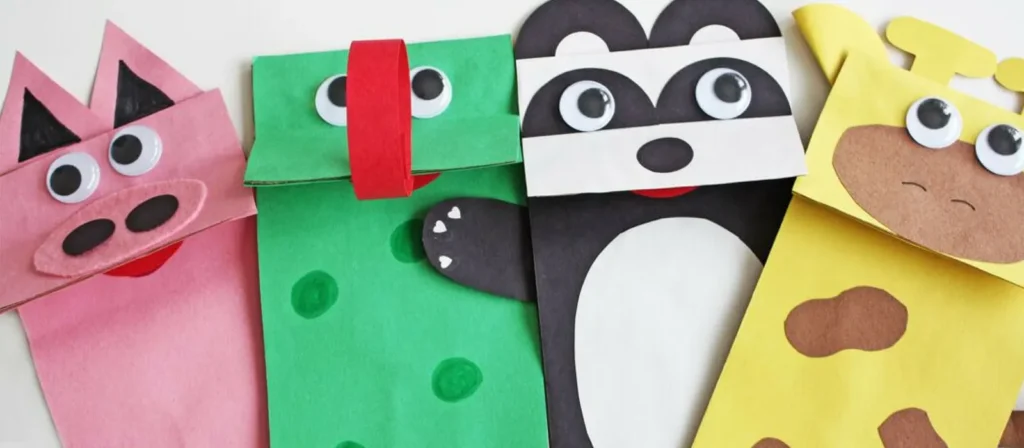
Aktivitätsübersicht:
Mit Papiertütenpuppen wird Geschichtenerzählen spielerisch zu einem kreativen Abenteuer. Vorschulkinder können Figuren zum Leben erwecken und gleichzeitig Emotionen, Kommunikation und Design entdecken. Es ist ein fantastisches, offenes Projekt, das die Lese- und Schreibfähigkeit durch Kunst und Handwerk für Vorschulkinder fördert.
Materialien:
Braune oder weiße Lunchtüten aus Papier, Bastelpapierreste, Klebestifte, Buntstifte oder Marker, Wackelaugen, Garn, Schere (kindersicher), Aufkleber oder Knöpfe (optional)
Aufstellen:
- Legen Sie verschiedene Papiertüten und Dekorationsmaterialien in Schalen oder Körben bereit.
- Vorgeschnittene Grundformen (Dreiecke, Kreise, Rechtecke) für jüngere Kinder zum Bauen von Merkmalen wie Mündern, Ohren und Kleidung.
- Stellen Sie den Kindern inspirierende Beispiele oder Charakterideen zur Auswahl.
Aktivitätsanweisungen:
- Lassen Sie die Kinder eine Papiertüte auswählen und beginnen Sie mit dem Verzieren der Klappe – dies wird das Gesicht der Puppe.
- Verwenden Sie Marker, Wackelaugen und Papierausschnitte, um Augen, Nase, Mund und Haare zu gestalten.
- Verzieren Sie den Körper der Puppe (die untere Hälfte der Tasche), um Kleidung, Arme oder Accessoires hinzuzufügen.
- Sobald die Tüten trocken sind, können die Kinder ihre Hände in sie stecken und ihre Puppen durch Geschichtenerzählen oder Puppenspiele zum Leben erwecken.
- Fördern Sie die soziale Interaktion, indem Sie Kinder in Paaren Mini-Szenen mit ihren Puppen nachspielen lassen!
Variationen:
- Weisen Sie Themen wie Tiere, Helfer in der Gemeinde oder beliebte Märchenfiguren zu.
- Fügen Sie für mehr Struktur Garn oder Haarbänder hinzu.
- Gestalten Sie mit einem Karton und Vorhängen eine Puppentheaterecke für ausgedehntes Fantasiespiel.
16. Sonnenfänger aus Seidenpapier

Aktivitätsübersicht:
Sonnenfänger aus Seidenpapier bieten Vorschulkindern eine lebendige Möglichkeit, Farbmischungen, Formen und Licht zu entdecken. Sie sind ein sinnliches und visuell lohnendes Projekt, das Wissenschaft und Kunst in einem sinnvollen Kunst- und Bastelprojekt für Vorschulkinder auf wunderbare Weise verbindet.
Materialien:
Transparentes Kontaktpapier oder Laminierfolien, Seidenpapier in verschiedenen Farben (in kleine Quadrate geschnitten), schwarzes Bastelpapier (für Rahmen), Schere (kindersicher), Klebeband
Aufstellen:
- Schneiden Sie schwarzes Papier in einfache Formen (Herzen, Sterne, Kreise usw.) vor und schneiden Sie die Mitte aus, um Rahmen zu erstellen.
- Schneiden Sie Seidenpapier in kleine Quadrate und legen Sie diese nach Farben sortiert in Schüsseln.
- Stellen Sie Kontaktpapier bereit, das etwas größer als die Rahmenformen zugeschnitten ist.
Aktivitätsanweisungen:
- Ziehen Sie die Rückseite des Kontaktpapiers ab und legen Sie es mit der Klebeseite nach oben auf den Tisch.
- Den schwarzen Papierrahmen darauflegen und gut andrücken.
- Lassen Sie die Kinder Seidenpapierstücke in den Rahmen legen und dabei die Farben überlappen, um Farbmischungen auszuprobieren.
- Sobald Sie fertig sind, versiegeln Sie das Design mit einem weiteren Stück Kontaktpapier. Schneiden Sie die Ränder bei Bedarf ab.
- Kleben Sie die fertigen Sonnenfänger an die Fenster und beobachten Sie, wie die Farben im Licht lebendig werden!
Variationen:
- Verwenden Sie saisonale Formen – Kürbisse für den Herbst, Eier für den Frühling oder Schneeflocken für den Winter.
- Lassen Sie Kinder abstrakte, frei geformte Designs ohne Rahmen erstellen.
- Für zusätzlichen Glanz können Sie Glitzer oder Pailletten einarbeiten.
17. Handabdrücke aus Salzteig
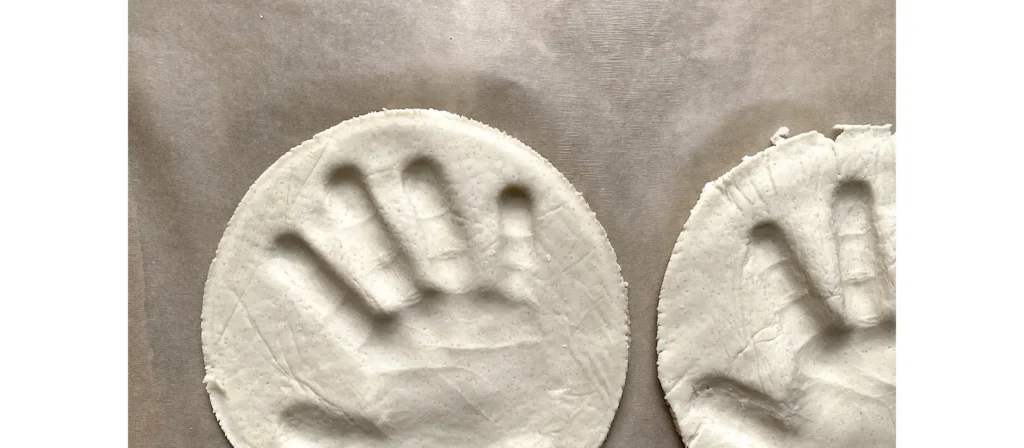
Aktivitätsübersicht:
Handabdrücke aus Salzteig sind ein zeitloses Andenken, bei dem kleine Hände im wahrsten Sinne des Wortes einen großen Eindruck hinterlassen. Es ist eines der bedeutungsvollsten Kunst- und Bastelprojekte für Vorschulkinder und vereint sensorisches Spiel, Kreativität und eine persönliche Note, die Familien für immer in Erinnerung behalten werden.
Materialien:
Mehl, Salz, Wasser, Rührschüssel, Nudelholz, Backblech, Farbe, Pinsel, transparentes Dichtungsmittel (optional), Band oder Schnur (optional zum Aufhängen)
Aufstellen:
- Den Salzteig vormischen oder die Kinder mithelfen lassen, indem sie 2 Tassen Mehl, 1 Tasse Salz und 1 Tasse warmes Wasser unterrühren. Vermischen und kneten, bis alles glatt ist.
- Legen Sie Nudelhölzer und kleine Matten oder Tabletts zum Arbeiten bereit.
- Wenn Sie zum Aushärten backen, heizen Sie den Backofen auf 90 °C (200 °F) vor.
Aktivitätsanweisungen:
- Rollen Sie für jedes Kind ein etwa 1,25 cm dickes Stück Teig aus.
- Helfen Sie ihnen, ihre Hand fest in den Teig zu drücken, um einen tiefen Handabdruck zu hinterlassen.
- Wenn das Stück später aufgehängt werden soll, machen Sie mit einem Bleistift oder Strohhalm oben ein kleines Loch.
- 1–2 Stunden backen oder mehrere Tage an der Luft trocknen lassen.
- Nach dem Trocknen können Kinder ihre Handabdrücke in jeder beliebigen Farbe bemalen. Für eine längere Haltbarkeit können Sie sie mit Klarlackspray versiegeln.
Variationen:
- Schreiben Sie vor dem Backen den Namen des Kindes und das Datum in den Teig, um eine bleibende Erinnerung zu schaffen.
- Für einen ausgefallenen Effekt fügen Sie Glitzerfarbe oder Metallic-Oberflächen hinzu.
- Machen Sie daraus ein Geschenk zum Muttertag oder Vatertag mit einer Botschaft wie „Du bist zweifellos der Beste!“
18. Tanzende Bandstäbe
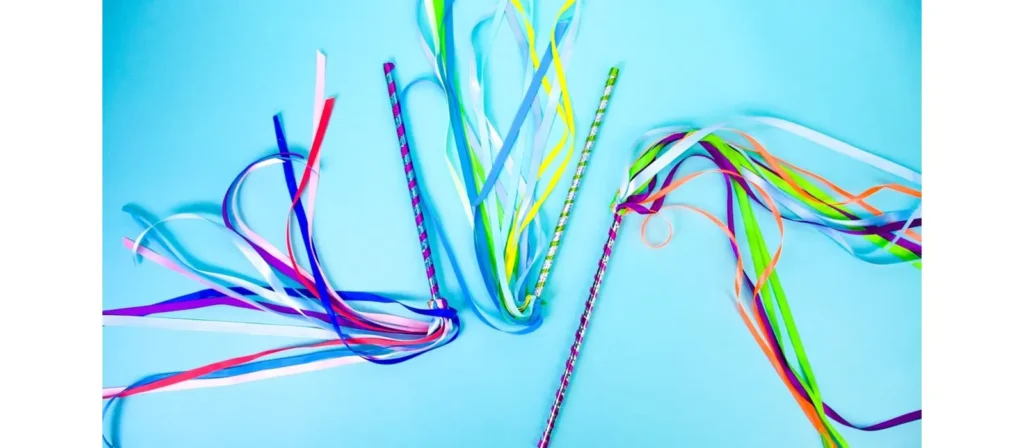
Aktivitätsübersicht:
Tanzende Bänder sind eine farbenfrohe, interaktive Bastelidee, mit der Vorschulkinder Bewegungsrequisiten gestalten können. Sie sind eine perfekte Mischung aus bildender Kunst und körperlicher Aktivität – genau das macht Kunst und Basteln für Vorschulkinder so wertvoll für Selbstausdruck, Koordination und Freude.
Materialien:
Holzdübel oder Bastelstäbe, Bänder oder Krepppapier-Luftschlangen (verschiedene Farben), Kleber oder Klebeband, Schere (kindersicher), Aufkleber oder Marker zum Dekorieren der Griffe
Aufstellen:
- Schneiden Sie Bänder in einer Länge von ca. 60–90 cm vor und legen Sie sie nach Farben sortiert aus.
- Stellen Sie Dekorationsmaterial auf den Tischen bereit, damit die Kinder die Griffe ihrer Zauberstäbe individuell gestalten können.
- Stellen Sie Klebstoff oder starkes Klebeband bereit, um die Bänder an den Stäbchen zu befestigen.
Aktivitätsanweisungen:
- Lassen Sie die Kinder einen Dübel oder Bastelstab aussuchen, den sie mit Markern, Aufklebern oder Farbe dekorieren können.
- Helfen Sie ihnen, 3–5 Bänder auszuwählen und diese mit Klebstoff oder Klebeband an einem Ende des Stabes zu befestigen. Wickeln Sie zusätzliches Klebeband oder ein Stück Papier um die Spitze, um sie zu befestigen.
- Wenn Sie fertig sind, fordern Sie die Kinder auf, ihre Zauberstäbe zu testen, indem sie zur Musik tanzen, sich drehen oder wiegen.
- Spielen Sie Instrumental- oder Kulturmusik, um zu verschiedenen Bewegungsarten anzuregen.
- Fragen Sie die Kinder, wie sich die Bänder bewegen und wie es sich anfühlt zu tanzen – und fördern Sie so die sprachliche und emotionale Wahrnehmung.
Variationen:
- Verwenden Sie saisonale Farben, um thematisch passende Zauberstäbe zu erstellen (z. B. Rot und Grün für Feiertage, Pastellfarben für den Frühling).
- Fügen Sie an den Enden der Bänder Glöckchen hinzu, um ein musikalisches Element hinzuzufügen.
- Machen Sie eine Aufführung daraus: Erstellen Sie eine einfache Gruppenroutine und lassen Sie sie vor Eltern oder anderen Klassen „auftreten“.
19. Dumme Monsterpuppen
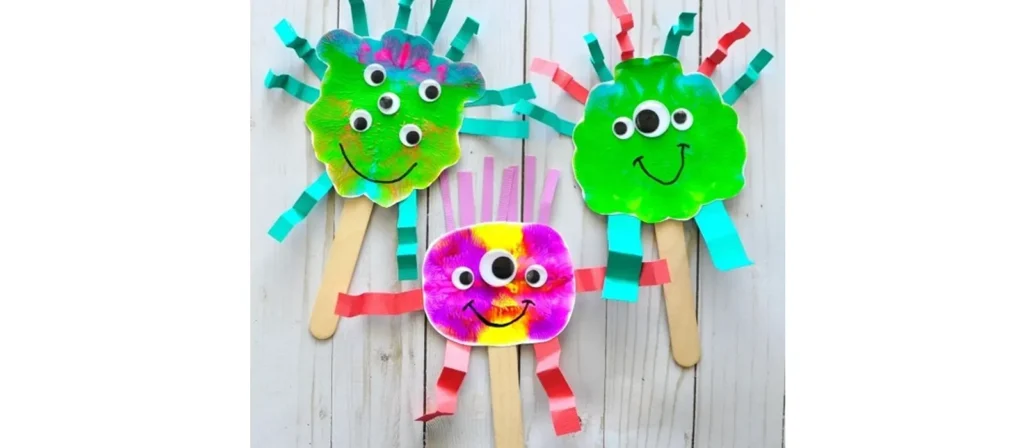
Aktivitätsübersicht:
Mit Wackelaugen, flauschigen Texturen und wilden Farben bieten lustige Monsterpuppen Vorschulkindern die kreative Freiheit, lustige, freundliche oder gruselige Figuren zu gestalten. Dieses spielerische und fantasievolle Projekt fördert den emotionalen Ausdruck und das Geschichtenerzählen – perfekt für ausdrucksstarkes Basteln im Vorschulalter.
Materialien:
Papiertüten für das Mittagessen, Bastelpapier, Klebestifte, Filzstifte oder Buntstifte, Pompons, Wackelaugen, Garn, Schere (kindersicher), Schaumstoffformen oder Pfeifenreiniger (optional)
Aufstellen:
- Schneiden Sie aus buntem Bastelpapier verschiedene Formen (Zähne, Hörner, Arme, Augenbrauen etc.) vor.
- Legen Sie Wackelaugen, Pompons und Garn für einen einfachen Zugriff in unterteilte Schalen.
- Legen Sie Beispielmonster oder Ideenkarten aus, um die Kreativität anzuregen, aber fördern Sie originelle Designs.
Aktivitätsanweisungen:
- Geben Sie jedem Kind eine Papiertüte, die es als Unterlage für seine Puppe verwenden kann. Die Klappe wird zum Mund des Monsters.
- Lassen Sie sie Augen aufkleben (so viele sie möchten!), lustige Münder zeichnen und Merkmale wie Hörner, Haare oder Stacheln hinzufügen.
- Ermutigen Sie die Kinder, ihr Monster zu beschreiben: „Wie heißt es?“ „Brüllt oder kichert es?“ „Ist es schüchtern oder super albern?“
- Wenn Sie fertig sind, laden Sie die Kinder ein, ein kleines Puppenspiel aufzuführen, um ihr Selbstvertrauen und ihre Sprachkenntnisse zu stärken.
- Verwenden Sie Monsterstimmen und -bewegungen, um ihre Kreationen zum Leben zu erwecken!
Variationen:
- Ordnen Sie den Monstern bestimmte Unterrichtsstunden zu (z. B. Emotionsmonster für SEL-Lernen).
- Verwenden Sie für eine strukturierte Version Filz statt Papier.
- Gestalten Sie eine Wanddekoration mit dem Titel „Monster der Woche“, auf der jedes Kind seine Figur vorstellt.
20. Kaffeefilter Planet Art

Aktivitätsübersicht:
Dieses Weltraum-Bastelprojekt verwandelt gewöhnliche Kaffeefilter mithilfe von Markern und Wasser in atemberaubende Planeten. Es vermittelt Farbmischung, Wissenschaft und Kunst in einem – eine spannende Möglichkeit für STEAM-orientiertes Kunst- und Basteln im Vorschulalter.
Materialien:
Runde Kaffeefilter, abwaschbare Marker, Sprühflaschen oder kleine Tassen Wasser mit Tropfern, Papiertücher, Folie oder Tabletts, schwarzes Bastelpapier (optional für den Hintergrund), Kleber
Aufstellen:
- Legen Sie Kaffeefilter auf Tabletts oder mit Folie abgedeckte Tische, um die Feuchtigkeit aufzunehmen.
- Legen Sie Markierungen in vielen verschiedenen Farben bereit und stellen Sie Sprühflaschen oder Tropfer mit Wasser bereit.
- Halten Sie Papiertücher zum Reinigen und Trocknen bereit.
Aktivitätsanweisungen:
- Lassen Sie die Kinder ihre Kaffeefilter nach Belieben mit abwaschbaren Stiften bemalen – fördern Sie kreisförmige Muster, die Planeten nachahmen.
- Sobald die Filter fertig gefärbt sind, besprühen Sie sie leicht mit Wasser oder befeuchten Sie die Oberfläche mit einer Pipette.
- Beobachten Sie, wie sich die Farben vermischen und ein aquarellähnlicher Effekt entsteht.
- Lassen Sie die Filter vollständig trocknen (normalerweise 1–2 Stunden).
- Optional können Sie die Planeten auf schwarzes Papier kleben und Sterne, Namen oder lustige Fakten hinzufügen, um daraus eine Mini-Weltraumgalerie zu machen!
Variationen:
- Machen Sie ein Sonnensystemprojekt daraus, indem Sie mehrere Planeten erschaffen und sie in die Umlaufbahn bringen.
- Zeichnen Sie zunächst mit weißen Buntstiften auf die Filter, um einen versteckten „Resist“-Effekt zu erzielen.
- Fügen Sie Glitzerkleber hinzu, um ein galaktisches Funkeln zu erzeugen.
21. Natur-Mandalas

Aktivitätsübersicht:
Naturmandalas sind kreisförmige Kunstwerke aus Naturmaterialien, die in sich wiederholenden Mustern angeordnet sind. Diese meditative und kreative Aktivität verbindet Kinder mit der Natur und fördert gleichzeitig die Mustererkennung und Achtsamkeit – ein sinnvoller und umweltfreundlicher Ansatz für Kunst und Handwerk im Vorschulalter.
Materialien:
Blätter, Blütenblätter, Stöcke, kleine Steine, Tannenzapfen, Eicheln, Rinde, Papierkreise oder Pappunterlagen (optional), Kleber (optional für dauerhafte Präsentation)
Aufstellen:
- Machen Sie mit den Kindern einen Spaziergang in der Natur, um sichere, interessante Gegenstände zu sammeln (oder lassen Sie eine Auswahl vorab sammeln und sortieren).
- Stellen Sie große weiße Papier- oder Kartonkreise als Basis bereit (optional) oder arbeiten Sie für einen natürlicheren Ansatz direkt auf dem Boden oder Tisch.
- Stellen Sie Tabletts oder Körbe mit Naturgegenständen auf, sortiert nach Art und Farbe.
Aktivitätsanweisungen:
- Stellen Sie die Idee eines Mandalas vor – ein Design, das in der Mitte beginnt und Muster nach außen in einem Kreis wiederholt.
- Bitten Sie die Kinder, ihre Mandalas zu erstellen, indem sie ein Objekt in die Mitte platzieren und weitere Objekte in kreisförmigen Reihen hinzufügen.
- Fördern Sie je nach Entwicklungsstand des jeweiligen Kindes Wiederholungen, Symmetrie oder freie Formen.
- Sprechen Sie während der Arbeit über Texturen, Formen und natürliche Farben – „Wie fühlt sich dieses Blatt an?“ oder „Welches Muster bilden Sie?“
- Stellen Sie fertige Mandalas im Innenbereich aus oder fotografieren Sie temporäre Mandalas im Freien, bevor die Natur sie zurückbringt!
Variationen:
- Verwenden Sie saisonale Materialien – Blumen im Frühling und bunte Blätter im Herbst.
- Fügen Sie persönliche Details hinzu, beispielsweise bemalte Steine oder beschriftete Gegenstände.
- Machen Sie es zu einem Gruppenprojekt: ein großes Mandala, das in kollektiver Teamarbeit erstellt wird.
Sicherheits- und Aufräumtipps für die Bastelzeit
Selbst die beste Bastelarbeit für Vorschulkinder kann zu einem Chaos werden, wenn wir nicht vorbereitet sind. Mit der richtigen Struktur und den richtigen Gewohnheiten können Sie Kreativität fördern, ohne sich um Verschüttetes, Flecken oder klebrige Finger sorgen zu müssen.

Grenzen setzen, bevor der Spaß beginnt
- Bastelzonen: Verwenden Sie spezielle Tische oder waschbare Matten
- Schürzen oder alte T-Shirts: Ein Must-have für Vorschulkinder
- Legen Sie die Regel „saubere Hände“ fest, bevor Sie kleben oder malen
Verwendung sicherer, altersgerechter Materialien
- Entscheiden Sie sich immer für ungiftige, waschbare Produkte
- Vermeiden Sie scharfe Werkzeuge, leichte Erstickungsgefahren oder allergene Materialien
- Gefährliche Stoffe außerhalb der Reichweite aufbewahren
Aufräumen als Teil der Aktivität lehren
- Verwenden Sie farbcodierte Behälter zur Organisation von Materialien
- Erstellen Sie lustige Lieder oder Routinen rund ums Putzen
- Weisen Sie jedem Tisch einen kleinen „Aufräumleiter“ zu
Wie Kunst und Handwerk das Montessori- und Reggio-Lernen unterstützen
Die Philosophien dahinter Montessori und Reggio Emilia unterstützen Kunst und Handwerk für Vorschulkinder nachdrücklich – nicht nur als Kunstform, sondern als Möglichkeit zu lernen, sich auszudrücken und die Welt zu verstehen.
Förderung der Unabhängigkeit durch praktische Arbeit
- Kinder wählen Materialien aus und erledigen Aufgaben in ihrem eigenen Tempo
- Selbstgesteuerte Projekte fördern Autonomie und Selbstvertrauen
- Werkzeuge und Zubehör sind auf Kinderhöhe erreichbar
Förderung der Beobachtung und der von der Natur inspirierten Kreativität
- Reggio Emilia legt Wert auf natürliche Materialien und sensorische Erkundung
- Spaziergänge in der Natur und das Spiel mit freier Hand verbinden Kunst mit der realen Welt
- Saisonales Basteln verstärkt Rhythmen und Zyklen des Lebens
Unterstützung der kognitiven Entwicklung durch Wiederholung und Routine
- Die Wiederholung feinmotorischer Aktionen hilft beim Aufbau von Gehirnbahnen
- Rituale rund um Kunst und Handwerk schaffen Ordnung, Geduld und Konzentration
- Montessori-Materialien können handwerkliche Erweiterungen beinhalten (z. B. Nadelstiche, Nachzeichnen)
Basteln mit kleinem Budget: Tipps für Vorschule und Kindergarten
Hochwertiges Kunsthandwerk für Vorschulkinder erfordert kein großes Budget. Mit etwas Kreativität und Planung können Sie sinnvolle Kunsterlebnisse ermöglichen, ohne die Bank zu sprengen.
Verwenden Sie recycelte und alltägliche Materialien
- Toilettenpapierrollen, Flaschendeckel, Müslischachteln und Stoffreste
- Arbeiten Sie mit Eltern zusammen, um Spendenbehälter zu erstellen
- Nachhaltigkeit durch Wiederverwendung lehren
Kaufen Sie in großen Mengen und organisieren Sie intelligent
- Besorgen Sie sich Grundbedarfsartikel (Kleber, Papier, Pinsel) von Großhändlern
- Für schnellen Zugriff nach Kategorie und Farbe speichern
- Laminieren Sie häufig verwendete Vorlagen für die wiederholte Verwendung
Planen Sie Themeneinheiten im Voraus
- Passen Sie das Basteln an Jahreszeiten, Feiertage oder Unterrichtsthemen an
- Bastelarbeiten mit leichten Variationen für alle Altersstufen wiederverwenden
- Bewahren Sie einen Ordner mit druckbaren Vorlagen und Anweisungen für Ihr Team auf
Abschluss
Basteln für Vorschulkinder ist mehr als nur ein vergnüglicher Teil des Tages – es ist wichtig für die Entwicklung der Feinmotorik, fördert den emotionalen Ausdruck und weckt eine lebenslange Freude an Kreativität. Ob Lehrer, Schulbesitzer oder Eltern: Kindern die Freiheit zu geben, mit ihren Händen zu gestalten, stärkt ihr Selbstvertrauen, ihre Verbundenheit und ihre Neugier.
Hinter jedem erfolgreichen Handwerksraum steht eine durchdachte Umgebung. Bei West Shore MöbelWir sind auf die Gestaltung dieser Umgebungen spezialisiert. Mit über 20 Jahren Erfahrung in der Herstellung und Lieferung von Vorschulmöbeln bieten wir eine Komplettlösung –Von der Klassenzimmergestaltung und Möbelanpassung bis hin zur Produktion, Qualitätskontrolle und Lieferung. Unser Produktsortiment umfasst verschiedene Vorschulmöbel in unterschiedlichen Stilen, Materialien und Größen, um den vielfältigen Anforderungen frühkindlicher Lernräume gerecht zu werden.
Wenn Sie bereit sind, Ihre Kunstbereiche aufzuwerten oder Ihren Vorschulbereich neu zu gestalten, um noch mehr Kreativität zu fördern, sind wir hier, um Ihnen zu helfen – denn die richtige Umgebung macht den Unterschied.