
In a preschool classroom, a storage cabinet that tips forward or pulls away from the wall can cause serious injury. To reduce this risk, secure the cabinet to a structural fixing point with suitable anti-tip hardware. This guide explains how to choose the correct hardware and install it safely.
Why Preschool Storage Cabinets with Doors Should Be Anchored?
In 2014, a wall-mounted cabinet fell onto two children during naptime at a preschool in Fremont, California. A three-year-old girl suffered a serious injury and was airlifted to a trauma center, while another child sustained minor injuries. The cabinet was reported to have been improperly mounted and overloaded. Although this incident involved a wall-mounted cabinet rather than a freestanding storage cabinet, it shows how poor fixing and excessive loading can turn classroom cabinetry into a serious safety hazard.
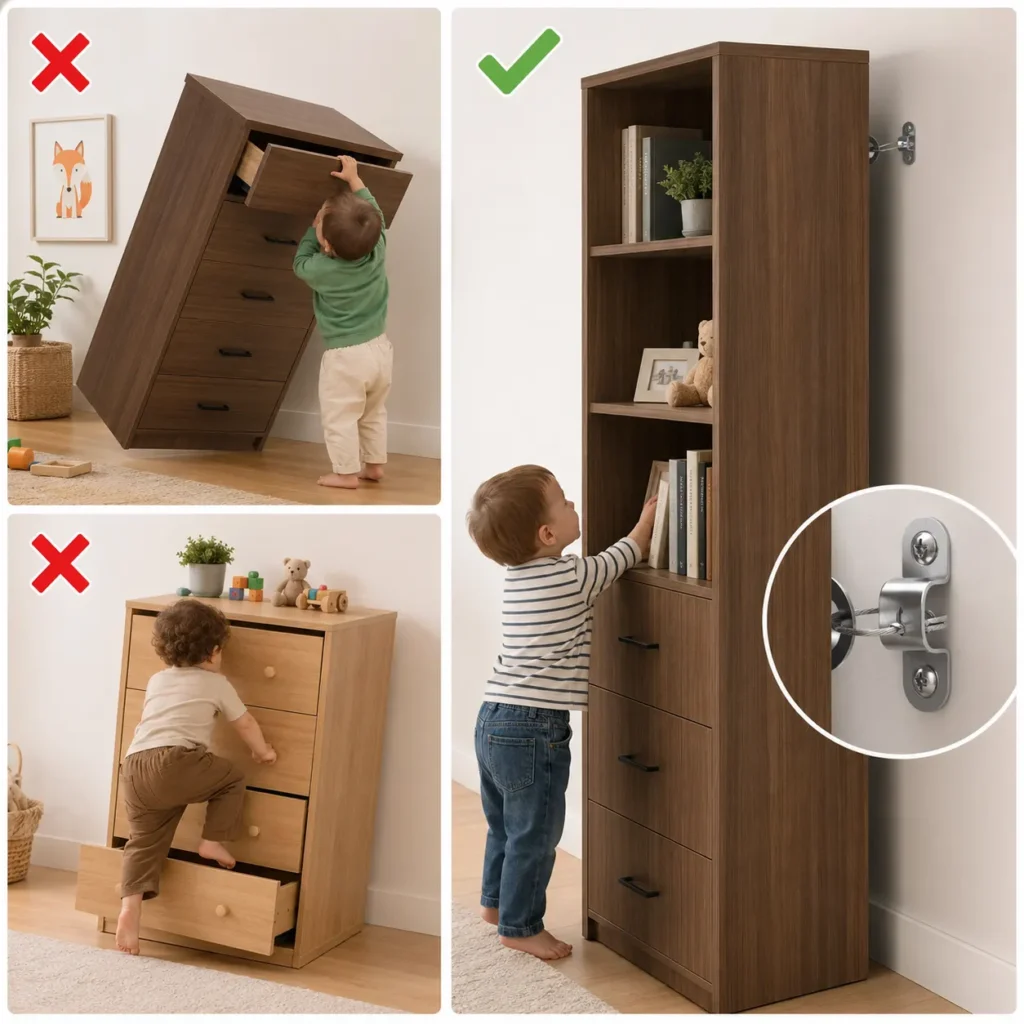
A preschool storage cabinet may become unstable for several possible reasons:
- Weak fixing points: The hardware may be attached only to a thin back panel instead of the cabinet frame or reinforced structure.
- Excessive loading: Heavy items may place greater stress on the cabinet structure.
- Poor weight distribution: Heavy items stored on upper shelves may raise the cabinet’s center of gravity.
- Children pulling on the doors: A child may use an open door for support or pull it with their body weight.
- Children climbing the shelves: Internal shelves may be used as steps, creating a strong forward force.
- Several doors opening at once: Open doors may shift the cabinet’s balance toward the front.
- Loose or damaged hardware: Screws, hinges, brackets, or wall anchors may gradually loosen through repeated use.
- Uneven flooring: A cabinet that is not level may already lean forward before it is loaded or used.
Any one of these conditions may increase the risk of movement, detachment, or tipping. Proper anchoring provides additional protection when the cabinet is overloaded, pulled, climbed on, or used in an unexpected way.
How to Choose the Right Anchoring Hardware for Your Wall?
The anchoring hardware must match both the cabinet and the wall behind it. A strong strap or bracket will not provide reliable protection if it is attached to a weak cabinet panel or fixed into the wrong part of the wall.
Identify the Wall Construction
In most preschool projects, you will usually encounter one of these situations:
- Drywall over wood or metal studs: Use a stud finder to locate the framing behind the drywall. Whenever possible, secure the wall plate directly to a structural stud instead of relying only on the drywall surface. Wood and metal studs may require different screws or fixing systems.
- Concrete, brick, or masonry wall: Ordinary wood screws will not hold securely in these materials. Use a masonry drill bit together with concrete screws, expansion anchors, or masonry fixings designed for the actual wall material. The hole diameter and depth must match the selected anchor.
- No confirmed structural fixing point: If you cannot locate a stud or determine what is behind the wall, do not guess. Use a rated fixing system suitable for the complete wall construction or ask a qualified installer to assess the wall.
Also check whether a baseboard creates a gap between the cabinet and the wall. Do not simply tighten the restraint until the cabinet is pulled backward. Use a solid spacer or mounting block where necessary so the fixing remains properly supported.
Choose Hardware That Matches the Cabinet
The cabinet side of the restraint should be attached to a strong structural section, such as the top panel, side panel, reinforced rail, or a fixing point provided by the manufacturer. Avoid attaching it only to a thin back panel.
Common anchoring options include:
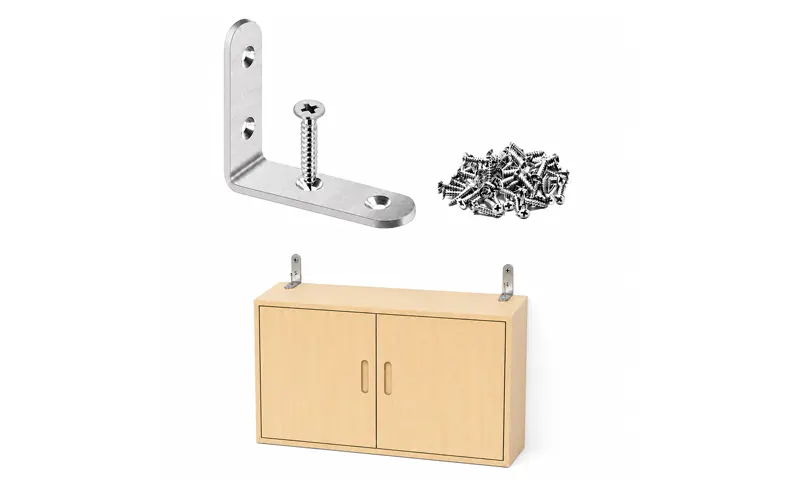
- L-shaped brackets: Provide a rigid connection and are suitable for cabinets that will remain in a fixed position.
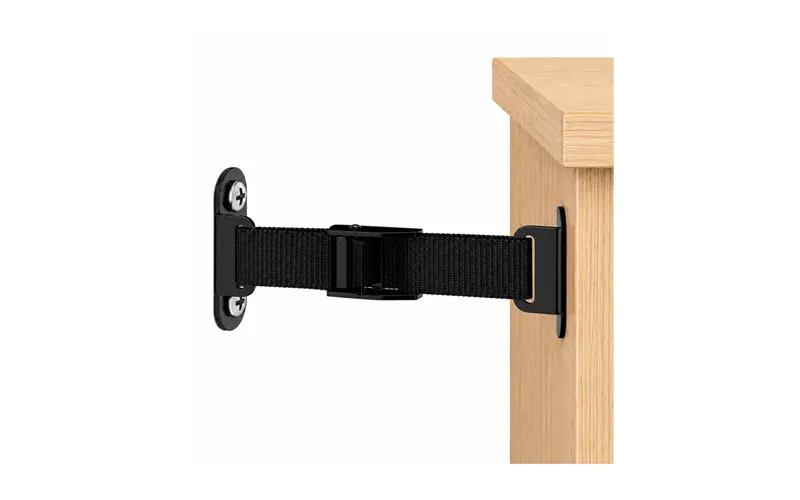
- Furniture straps: Allow some adjustment and can be loosened when the cabinet needs to be moved slightly.
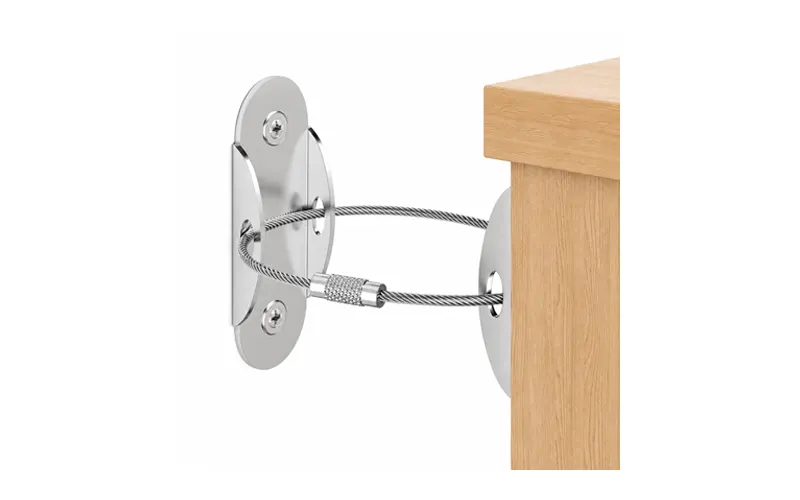
- Steel cable restraints: Take up less space behind the cabinet and provide a durable connection.
Compare the Main Anchoring Options
| Hardware | Best suited for | Main consideration |
|---|---|---|
| L-shaped bracket | Permanent cabinet placement | Strong and easy to inspect, but less convenient to remove |
| Furniture strap | Cabinets that may need occasional movement | Must be tightened correctly and checked for wear |
| Steel cable restraint | Narrow spaces behind the cabinet | Should not be installed with excessive slack |
| Manufacturer anti-tip kit | Cabinets with designated fixing points | Wall hardware must still match the wall construction |
For a wide or heavy preschool storage cabinet, use two fixing points where the cabinet design and manufacturer’s instructions allow. This distributes the load more evenly and helps limit twisting or forward movement.
How to Secure Preschool Storage Cabinets with Doors to the Wall?
The exact screws and wall anchors will vary, but the basic installation process is similar for wood or metal stud walls, concrete, brick, and other masonry walls. Before drilling, confirm that the selected fixing system is suitable for both the wall construction and the cabinet load.
Step 1: Empty and Position the Cabinet
Remove all stored items and any loose shelves. Move the cabinet away from the wall so you can reach its back and the intended fixing area.
Confirm the cabinet’s final location before marking or drilling. Check that the doors can open fully and that the cabinet does not block a walkway, doorway, or emergency route.
Step 2: Identify the Wall Construction
Determine what is behind the visible wall surface.
For drywall, locate the wood or metal framing where possible. For concrete, brick, or masonry, confirm that the fixing area is solid and undamaged.
If the wall structure is unclear, do not drill based on guesswork. Ask a qualified installer to identify a suitable fixing point.
Step 3: Select the Fixing Points
Choose fixing positions near the upper part of the cabinet, using the manufacturer’s designated mounting points whenever available.
The cabinet-side fixing must connect to a strong structural section, such as a reinforced top panel, side panel, frame, or mounting rail. Do not rely only on a thin decorative back panel.
For a wide or heavy cabinet, use two separated fixing points when permitted by the cabinet and hardware instructions.
Step 4: Level the Cabinet and Mark the Positions
Place the cabinet in its final position and check it with a spirit level.
If the floor is uneven, use suitable shims to level the cabinet before anchoring it. If a baseboard creates a gap behind the cabinet, use a solid spacer or mounting block where required.
Mark the wall and cabinet fixing positions, then move the cabinet forward again.
Step 5: Prepare the Wall Fixings
Install the wall side according to the wall construction:
- Wood framing: Drill suitable pilot holes and use screws designed for structural timber.
- Metal framing: Use fixings approved for the metal stud system and expected load.
- Concrete or solid masonry: Use the specified masonry drill bit and compatible concrete or expansion anchors.
- Brick or block: Use anchors approved for the specific solid or hollow masonry material.
- Other hollow walls: Use a rated fixing system suitable for the complete wall assembly, not a basic plastic plug intended for light loads.
The hole diameter, depth, screw size, and installation method must follow the fixing manufacturer’s instructions.
Step 6: Attach the Hardware to the Wall
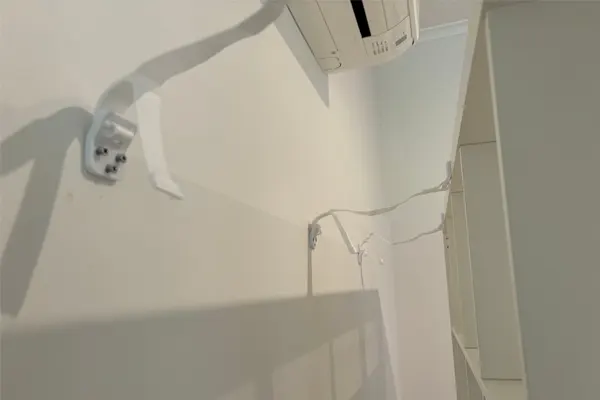
Secure the wall plate, bracket, strap, cable, or mounting rail at the marked positions.
Check that each fixing sits firmly against the wall and does not rotate, loosen, or pull away under moderate hand pressure.
Step 7: Attach the Hardware to the Cabinet
Connect the other side of the restraint to the approved structural area of the cabinet.
Use screws that are suitable for the cabinet material and short enough that they will not pass through the visible surface. Tighten them firmly without stripping the screw holes or damaging the panel.
Step 8: Return the Cabinet to Position
Move the cabinet carefully back toward the wall.
For adjustable straps or cables, leave enough slack to position the cabinet before tightening them. For rigid L-shaped brackets, align the cabinet and bracket holes before inserting the final screws.
Step 9: Tighten and Balance the Restraints
Tighten all fixing points evenly. The restraint should limit forward movement without pulling the cabinet backward, twisting its frame, or moving it out of level.
When two restraints are used, check that one side is not carrying noticeably more tension than the other.
Step 10: Test the Installation
Open the cabinet doors and apply gentle forward pressure near the top of the cabinet.
Check that:
- The cabinet remains level and stable.
- The wall fixings do not loosen or rotate.
- The cabinet-side screws remain secure.
- The straps or cables are tight and undamaged.
- The cabinet does not rock or separate noticeably from the wall.
Do not test the installation by climbing on the cabinet or applying excessive force.
Step 11: Reload the Cabinet Safely
Return the stored materials after the installation has passed inspection.
Place heavier items on lower shelves and lighter materials above. Avoid overloading the cabinet or exceeding the manufacturer’s recommended shelf capacity.
Step 12: Record and Recheck the Installation
Record the installation date, cabinet location, fixing system, and inspection result.
Recheck the cabinet after it has been moved, heavily loaded, struck, or included in a classroom layout change. Loose, damaged, or corroded hardware should be repaired or replaced immediately.
Why We Design Most Preschool Storage Cabinets to Be Open or Low?
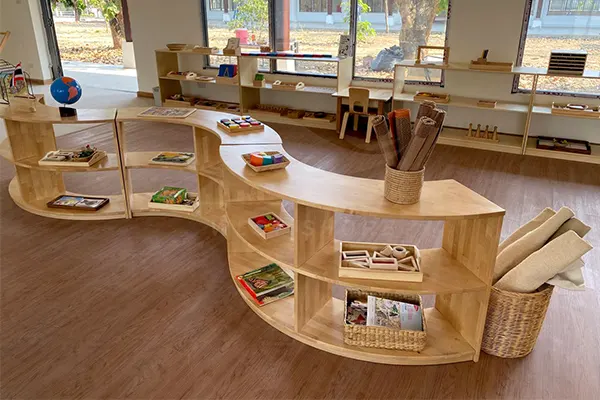
At West Shore Furniture, many of our preschool storage units are designed with open shelves, low heights, or both. This is not simply a style choice. It helps reduce several risks that are common with tall cabinets and heavy doors.
Lower Cabinets Are More Stable
A low cabinet has a lower center of gravity and is less likely to tip forward during normal classroom use. Its wider, lower profile also makes it more suitable for dividing activity areas without creating a tall obstruction.
Low furniture can still require a stability assessment, especially when it is narrow, placed on uneven flooring, or used for heavy storage. However, it generally creates less leverage than a tall cabinet.
Open Shelves Remove Door-Related Risks
Cabinet doors add moving parts and can create extra forces when children pull on the handles, lean on an open door, or open several doors at the same time.
Open storage removes these door-related risks. It also avoids finger-trapping points around hinges and reduces the maintenance required for locks, handles, and door alignment.
Children Can Access Materials More Independently
Open shelves allow children to see where materials belong and retrieve them without asking an adult to open a cabinet. This supports classroom independence and makes it easier to organize materials by activity.
For younger children, the shelf height can be matched to their reach so they do not need to climb or stretch toward upper storage areas.
Create a Safer and More Functional Preschool Storage Area
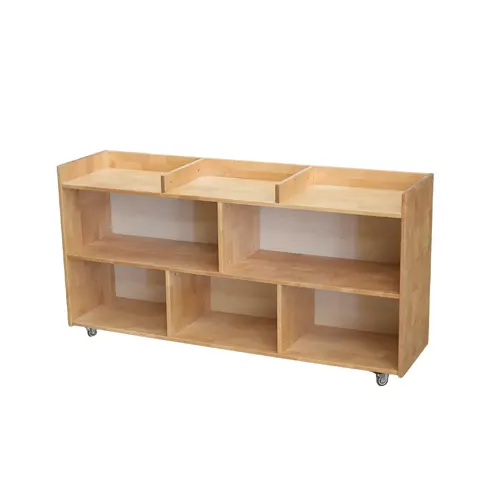
Our classroom storage solutions are designed around children’s safety, easy access, and daily classroom needs. From low open shelving to mobile storage units, we help you create organized learning spaces with stable structures, child-friendly designs, and flexible layouts. Explore our complete range of preschool storage furniture or contact us for a customized classroom solution.
Explore Classroom Storage SolutionsFAQs About Securing Preschool Storage Cabinets
Do all preschool storage cabinets with doors need to be anchored to the wall?
Not every cabinet requires the same fixing method. Tall cabinets, narrow cabinets, cabinets with heavy loads, and units that children may pull or climb on usually require additional anchoring. The final decision should consider the cabinet height, depth, weight distribution, and manufacturer’s recommendations.
Can I secure a preschool storage cabinet directly to drywall?
A heavy preschool storage cabinet should not normally rely only on drywall or a basic plastic wall plug. Whenever possible, the fixing should connect to a structural point behind the wall, such as a stud or an approved reinforced fixing system.
Where should the anti-tip hardware be attached on a storage cabinet?
The cabinet-side fixing should connect to a strong structural area, such as the top panel, side panel, reinforced rail, or a manufacturer-designed fixing point. Avoid attaching brackets or straps only to a thin back panel because it may not provide enough holding strength.
Should preschool storage cabinets with doors use two wall anchors?
For wide or heavy cabinets, two separated fixing points are generally recommended because they distribute the load more evenly and help reduce twisting or forward movement. Always follow the cabinet design and hardware instructions.
Can I move a cabinet after it has been anchored?
Yes, but the fixing hardware should be removed and reinstalled correctly at the new location. Do not simply move the cabinet and reuse damaged anchors or old screw holes without checking the wall and fixing points.
Why do many preschool storage cabinets use open shelves instead of doors?
Open shelving allows children to independently access materials, helps teachers maintain visibility, and reduces risks associated with doors, hinges, and children pulling on handles. Cabinets with doors are still useful for teacher-only supplies, electronics, or items requiring controlled access.
How often should cabinet anchors be checked?
Anchoring hardware should be checked during regular classroom safety inspections and after any major event, such as moving the cabinet, changing the classroom layout, overloading the cabinet, or noticing unusual movement. Loose screws, damaged straps, or bent brackets should be repaired immediately.
Can a heavy cabinet tip over even if it is not empty?
Yes. Cabinet weight alone does not guarantee stability. A cabinet can become unstable when the load is placed too high, doors are pulled open, shelves are climbed on, or the fixing system is weak.
Conclusion
Securing preschool storage cabinets with doors to the wall is an important step in creating a safer classroom environment, but the right solution starts before installation. The cabinet structure, wall construction, fixing hardware, and daily usage habits all affect long-term stability. At West Shore Furniture, we consider these factors during product design by focusing on stable structures, child-friendly heights, and practical classroom layouts. From low open storage to customized classroom storage solutions, we help you create organized learning spaces that support children’s independence while meeting everyday safety needs.