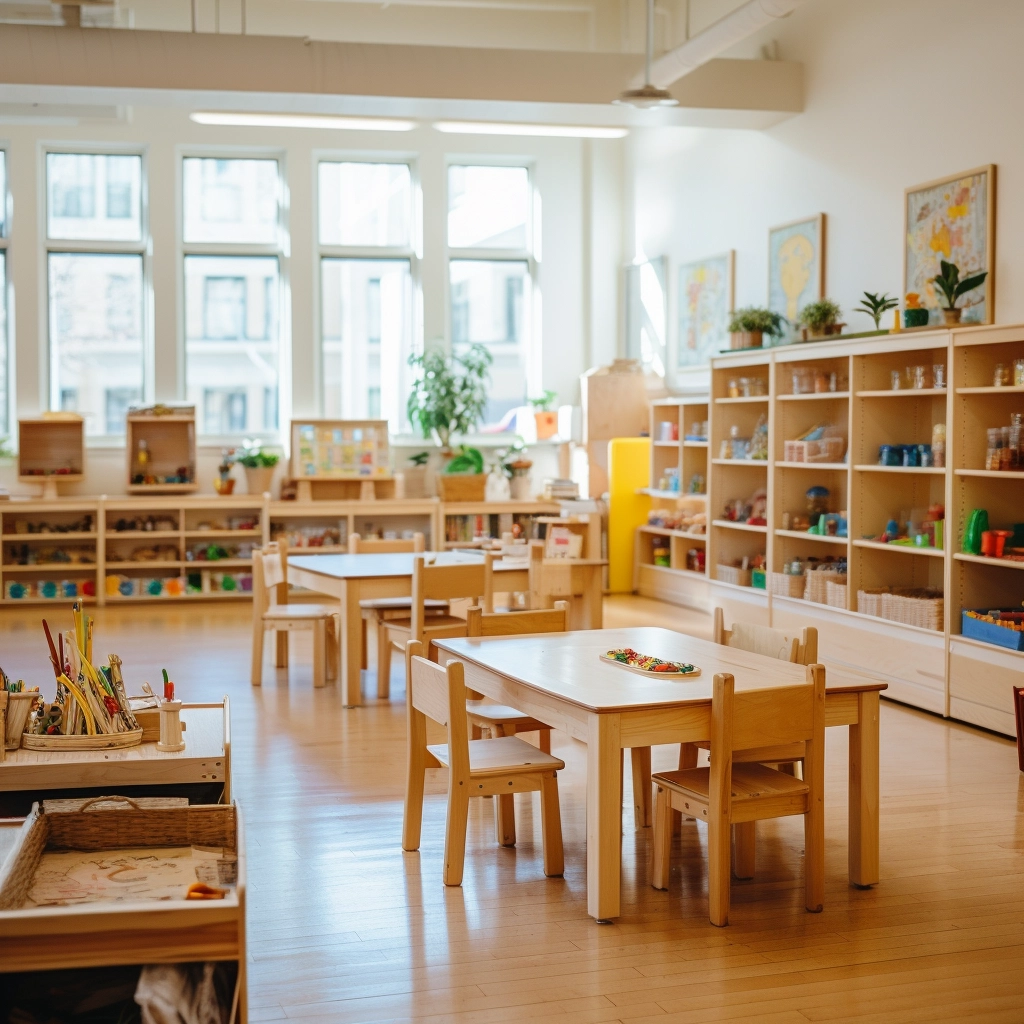
Do you know how to help preschoolers develop their artistic and creative abilities at school? One of the most popular kindergarten classes is crafts, which allows children to freely explore and create art and enjoy this special creative moment. This is where arts and crafts for preschoolers truly shine.
Through arts and crafts for preschoolers, they can explore their imaginations, improve fine motor skills, develop cognitive abilities, and express themselves creatively. Learning new skills and repeated exposure to art supplies builds confidence, which impacts future development.
In this article, I’ll show you 21 of the best preschool and daycare craft projects—easy, fun, and educational. Introducing arts and crafts for preschoolers opens up a world of imaginative and meaningful play.
งานฝีมือสำหรับเด็กก่อนวัยเรียน: มากกว่าแค่กิจกรรมที่สนุกสนาน
ในโลกของโรงเรียนอนุบาล มักมีการถกเถียงกันว่างานฝีมือควรมีที่ทางในการศึกษาปฐมวัยหรือไม่ แม้ว่าจะเป็นเรื่องจริงที่งานฝีมือและศิลปะนั้นแตกต่างกัน แต่ศิลปะนั้นเกี่ยวกับ... ความคิดสร้างสรรค์แบบเปิดกว้างในขณะที่งานฝีมือโดยทั่วไปมีผลลัพธ์ที่กำหนดไว้ ทั้งสองอย่างนี้มีคุณค่าในหลักสูตรที่รอบด้าน
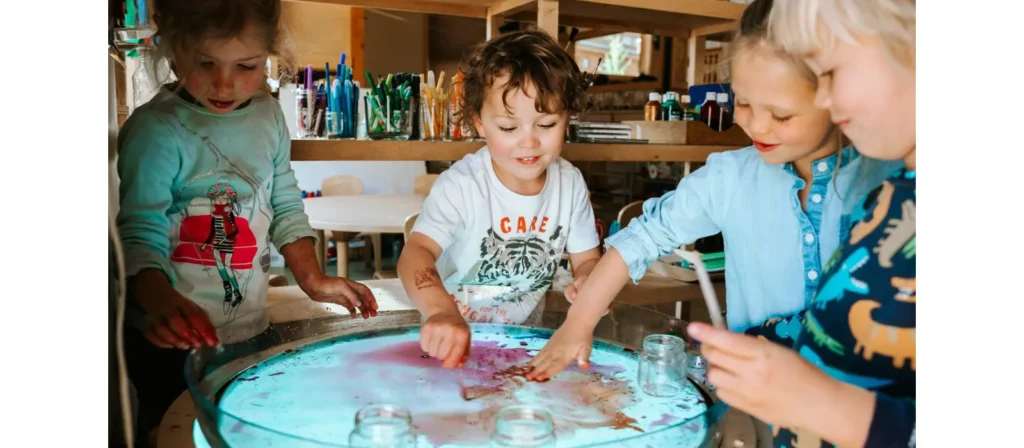
ศิลปะช่วยให้เด็กๆ ได้สำรวจวัสดุ สี และพื้นผิวต่างๆ ได้อย่างอิสระโดยไม่มีข้อจำกัด โดยเน้นที่กระบวนการมากกว่าผลิตภัณฑ์ขั้นสุดท้าย ซึ่งถือเป็นสิ่งสำคัญในการส่งเสริมความคิดสร้างสรรค์และการแสดงออกถึงตัวตน อย่างไรก็ตาม งานฝีมือมีข้อดีเฉพาะตัวที่ช่วยพัฒนาทักษะการเคลื่อนไหวกล้ามเนื้อมัดเล็ก เสริมสร้างแนวคิด เช่น การจดจำสีและรูปร่าง และสามารถรองรับหัวข้อการเรียนรู้ที่กว้างขึ้นได้ เมื่อทำที่บ้านกับผู้ใหญ่ที่เอาใจใส่ งานฝีมือจะกลายเป็นกิจกรรมสร้างความผูกพันที่ไม่เหมือนใคร สร้างความทรงจำที่มีความหมาย
Rather than viewing crafts as limiting, we should see them as complementing open-ended art experiences. A balance of both ensures that children are free to create while gaining valuable skills through structured activities.
ที่นี่ เราจะมาสำรวจงานฝีมือก่อนวัยเรียนที่ดีที่สุด 21 ชิ้นที่เหมาะสำหรับมือเล็กๆ
งานฝีมือสำหรับเด็กก่อนวัยเรียนที่ดีที่สุด 21 ชิ้น
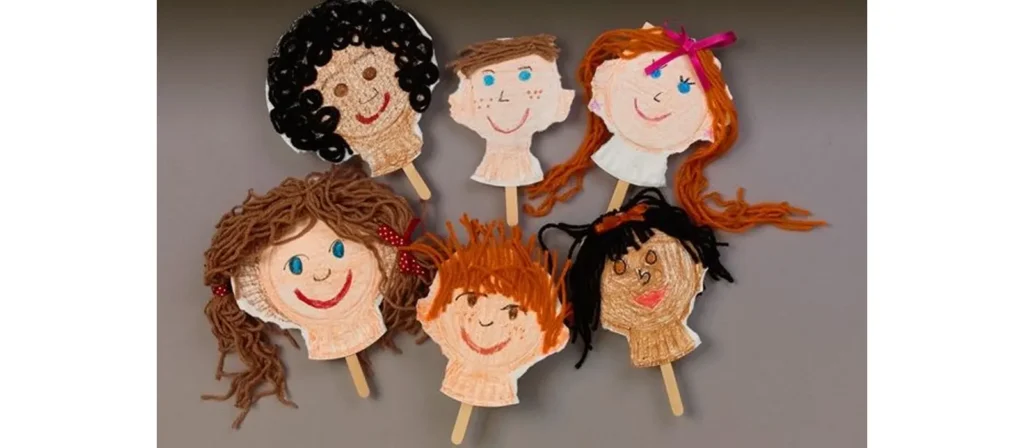
1. หน้าจานกระดาษ
ภาพรวมกิจกรรม:
Turn ordinary paper plates into a gallery of joyful expressions with this delightful Paper Plate Faces activity. Children can draw, paint, or glue on yarn, buttons, and colored paper to create funny, happy, or even curious faces that reflect their emotions. Through this creative process, they begin to understand feelings, develop empathy, and strengthen their fine motor skills while having fun with textures and shapes.
วัสดุ:
จานกระดาษ, ปากกาเมจิก, เส้นด้าย, กาว, ของตกแต่งต่างๆ (สติกเกอร์, ตาโปน, พู่ห้อย)
วิธีการทำ:
- Set up a cheerful crafting station by laying out paper plates, markers, glue, and all sorts of fun decorations within easy reach.
- Give each child their own plate and invite them to design a face that shows an emotion such as happy, silly, surprised, or sleepy.
- Show them how to draw simple features, then let them freely add yarn hair, googly eyes, or stickers to bring their creations to life.
- Chat as they work by asking questions like “What feeling does your face have?” or “Can you make that expression too?”
- When the masterpieces are dry, turn your classroom into a Face Gallery or let the children take their smiling plates home to share.
รูปแบบต่างๆ:
ใช้จานที่มีขนาดต่างกันเพื่อสร้างกลุ่ม "ครอบครัวหน้า" ที่แสดงออกถึงความรู้สึก ซึ่งเป็นส่วนเสริมที่สมบูรณ์แบบสำหรับงานศิลปะและงานฝีมือตามธีมสำหรับเด็กก่อนวัยเรียน
2. กล้องส่องทางไกล DIY

ภาพรวมกิจกรรม:
Spark curiosity and adventure with this charming DIY Binoculars craft. Using cardboard tubes, colorful paper, string, and a touch of imagination, children can create their very own pair of pretend binoculars. As they decorate and assemble their masterpiece, they strengthen hand-eye coordination, fine motor skills, and creativity while learning about observation and exploration.
วัสดุ:
กระดาษชำระเปล่า 2 ม้วนต่อเด็ก 1 คน เทปหรือกาว เชือกหรือเส้นด้าย ที่เจาะรู ดินสอสีหรือปากกาเมจิก สติกเกอร์ กระดาษสี (ไม่จำเป็น)
วิธีการทำ:
- Get your creative corner ready with cardboard tubes, colorful paper, tape, glue, and string.
- Give each child two rolls and invite them to decorate using markers, crayons, stickers, or paper wraps to make their binoculars uniquely theirs.
- Help them tape or glue the rolls together to form the binocular shape.
- Show how to thread yarn through the holes and tie knots to create a neck strap, introducing safe tool use in a fun way.
- Encourage kids to go on a pretend “explorer walk” around the classroom or playground, observing everything they can spot.
- Ask playful questions such as “What did you find?” or “Can you see something that starts with the letter B?”
- When finished, let them share their discoveries and show off their colorful binoculars to friends and family.
รูปแบบต่างๆ:
- ใช้ม้วนกระดาษเช็ดมือที่ตัดครึ่งเพื่อใช้เป็นกล้องส่องทางไกลขนาดจัมโบ้
- เปลี่ยนงานฝีมือนี้ให้เป็นเกมโดยการสร้างการล่าขุมทรัพย์ที่เด็กๆ จะต้อง "ค้นหา" วัตถุที่ซ่อนอยู่
- จับคู่กับหนังสือหรือเพลงเกี่ยวกับธรรมชาติหรือการสำรวจเพื่อเสริมสร้างศิลปะและงานฝีมือตามธีมสำหรับเซสชั่นเด็กก่อนวัยเรียน
3. งานฝีมือฟักทองง่ายๆ

ภาพรวมกิจกรรม:
Celebrate the cozy spirit of autumn with this adorable Easy Pumpkin Craft. Using orange paper, glue, and a little creativity, children can cut, roll, or layer pieces to form their own bright, cheerful pumpkins. As they work with shapes and colors, they strengthen fine motor skills, practice hand coordination, and learn basic concepts like size and pattern.
วัสดุ:
Orange construction paper, green construction paper, scissors (child-safe), glue sticks, black markers, optional: googly eyes, yarn, glitter.
วิธีการทำ:
- Prepare a cozy crafting table with orange and green paper, glue sticks, scissors, and fun extras like googly eyes or glitter.
- Give each child orange paper circles or strips and guide them to glue the pieces together into a round pumpkin shape.
- Show how to add a green paper stem and let them draw a face using markers.
- Encourage them to decorate their pumpkins with yarn vines, sparkly glitter, or funny eyes to make each one special.
- Chat as they create by asking, “What kind of face will your pumpkin have? Happy or spooky?”
- After drying, use their adorable pumpkins to decorate a classroom wall or create a cheerful pumpkin patch for everyone to enjoy.
รูปแบบต่างๆ:
- ลองใช้จานกระดาษแทนกระดาษก่อสร้างเพื่อให้ฐานแข็งแรงยิ่งขึ้น
- เปลี่ยนเป็นงานประดิษฐ์เพื่อการจดจำชื่อโดยให้เด็กๆ เขียนชื่อของพวกเขาบนฟักทอง
- ทำฟักทองขนาดเล็กและทำเป็นพวงมาลัยเพื่อแขวนรอบห้อง
4. ที่คาดผมลายไก่งวง

ภาพรวมกิจกรรม:
Nothing captures the joy of fall quite like creating a colorful Turkey Headband. In this heartwarming craft, children use simple materials such as construction paper, feathers, and glue to design their own playful turkey crowns. As they cut, paste, and arrange the feathers, little hands strengthen fine motor skills while young minds practice color recognition and creativity.
This activity naturally invites storytelling and imagination. Children love pretending to be cheerful turkeys, moving around the classroom with laughter and excitement. It is also a wonderful opportunity to talk about gratitude, sharing, and the beauty of autumn traditions.
วัสดุ:
กระดาษก่อสร้างสีน้ำตาล กระดาษก่อสร้างสีแดง สีส้ม และสีเหลือง กรรไกร (ปลอดภัยสำหรับเด็ก) กาวหรือเทป ดินสอสีหรือปากกาเมจิก ตาโปน (ไม่จำเป็น) เครื่องเย็บกระดาษ
วิธีการทำ:
- Get the table ready with brown paper strips, colorful paper feathers, glue, and markers.
- Help each child fit a brown strip around their head and secure it into a circle to form the headband base.
- Invite children to color and decorate their paper feathers, then glue them to the back of the headband.
- Show how to make a turkey face using paper shapes or googly eyes, and add a beak and red wattle for fun.
- Chat about Thanksgiving and encourage each child to share one thing they are thankful for.
- When finished, let them wear their festive headbands and waddle around like cheerful turkeys during a classroom parade.
รูปแบบต่างๆ:
- เพิ่มชื่อเด็กที่ด้านหน้าของที่คาดศีรษะเพื่อให้เป็นองค์ประกอบส่วนบุคคลที่สนุกสนาน
- สร้างขนนแสดงความขอบคุณ: ให้เด็กแต่ละคนเขียนหรือวาดบางสิ่งบางอย่างที่พวกเขารู้สึกขอบคุณลงบนขนนก่อนที่จะติดมันลงไป
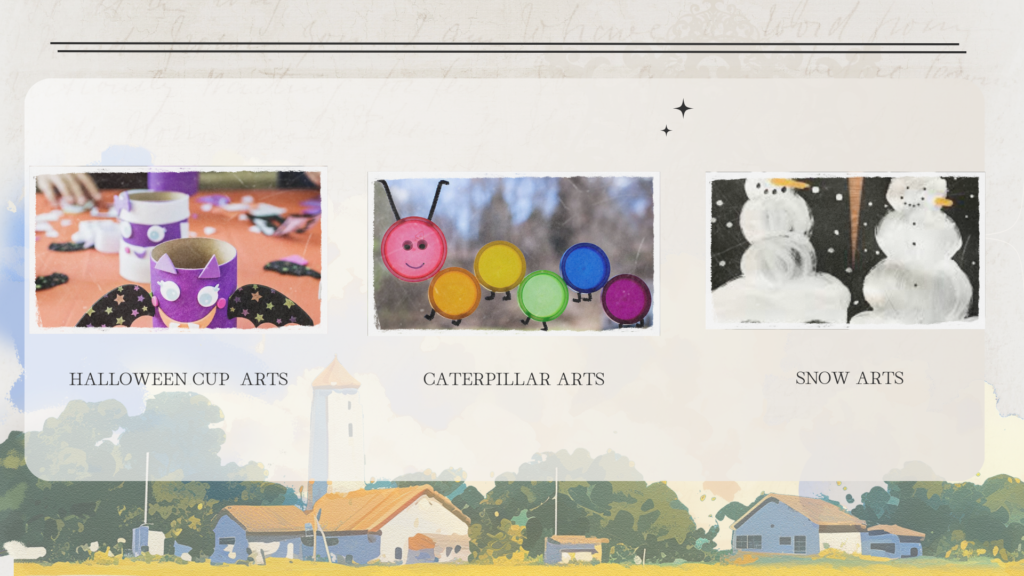
5. แม่มดถ้วยกระดาษ

ภาพรวมกิจกรรม:
Bring a touch of Halloween magic to the classroom with this fun and imaginative Paper Cup Witch craft. Using simple materials like paper cups, construction paper, yarn, and markers, children can create their own friendly witches complete with pointy hats, bright eyes, and curly hair. As they cut, glue, and decorate, they strengthen fine motor skills and practice following steps, turning creativity into confidence.
วัสดุ:
ถ้วยกระดาษ (สีเขียวหรือสีขาว) กระดาษก่อสร้างสีดำ กาว กรรไกร (ปลอดภัยสำหรับเด็ก) เส้นด้ายหรือกระดาษหั่นฝอย (สำหรับผม) ตาโปน ปากกาเมจิกหรือดินสอสี
วิธีการทำ:
- Arrange paper cups, pre-cut witch hats, yarn hair, and black paper shapes on the table so everything is easy to reach.
- Give each child a paper cup and invite them to glue on googly eyes and draw a friendly witch face with markers.
- Help them add yarn or shredded paper hair, then top it with a pointy black hat for a magical touch.
- Wrap a small paper cape or collar around the cup to complete the witch’s outfit.
- As they create, ask fun questions such as “What kind of magic does your witch do?” or “Is your witch silly, spooky, or kind?”
- When finished, line up all the witches together for a charming Halloween display that’s full of personality.
รูปแบบต่างๆ:
- เพิ่มไม้กวาดขนาดเล็กโดยใช้แท่งไอศกรีมและกระดาษราเฟียหรือกระดาษสีน้ำตาล
- เปลี่ยนเป็นหุ่นกระบอกฮาโลวีนได้โดยการติดหลอดหรือไม้ไว้ที่ก้นแก้ว
- ส่งเสริมให้เด็กๆ สร้างตัวละครอื่นๆ เช่น ผี ฟักทอง หรือพ่อมด สำหรับฉากฮาโลวีนทั้งหมด
6. ไอศกรีมโคนสีพองๆ
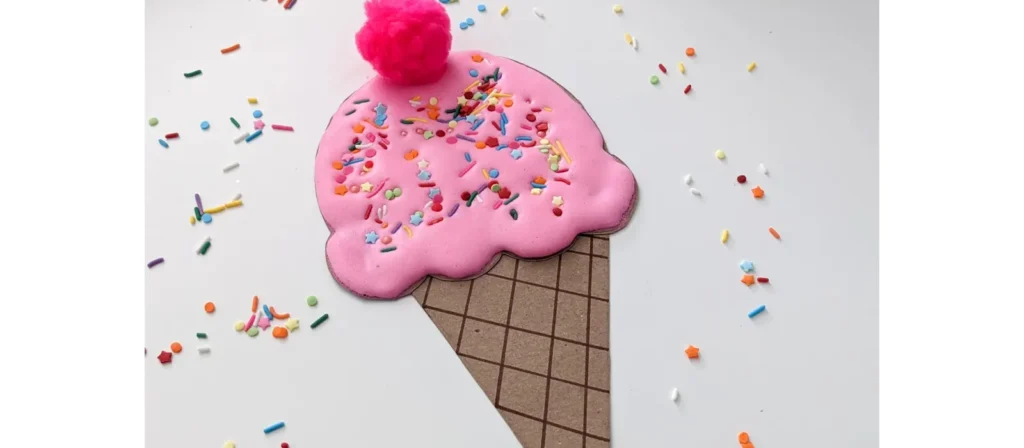
ภาพรวมกิจกรรม:
Bring a scoop of sweetness into the classroom with this delightful Puffy Paint Ice Cream Cones craft. Using homemade puffy paint made from shaving cream and glue, children can swirl and spread “ice cream” on paper cones, then top them with sprinkles, glitter, or pom-poms for extra fun. As they mix colors and textures, they explore sensory play while strengthening hand control and creativity.
วัสดุ:
ครีมโกนหนวด กาวสีขาว สีผสมอาหารหรือสีที่ล้างออกได้ กระดาษก่อสร้างสีน้ำตาล (รูปกรวย) กระดาษแข็งสีขาวหรือกระดาษ (พื้นหลัง) กรรไกร ชามผสม ช้อน
วิธีการทำ:
- Start by mixing equal parts shaving cream and white glue in bowls, then add a few drops of food coloring or washable paint to create colorful “ice cream” puffy paint.
- Give each child a cone cutout and a sheet of cardstock to glue it on.
- Invite them to scoop, swirl, and spread the puffy paint above the cone to make their ice cream scoops.
- Encourage creativity by mixing colors, stacking tall cones, and talking about pretend flavors like strawberry, mint, or rainbow swirl.
- Let them sprinkle glitter, tiny paper dots, or pom-poms for extra toppings.
- Allow the artwork to dry overnight so the puffy texture stays firm, leaving behind a sweet, fluffy masterpiece that looks good enough to eat.
รูปแบบต่างๆ:
- เพิ่มลูกกวาดโดยใช้กลิตเตอร์หรือกระดาษตัดเป็นจุดเล็กๆ
- เปลี่ยนกรวยที่ทำเสร็จแล้วให้เป็นของจัดแสดงบนผนังที่มีชื่อว่า “Our Sweetest Ideas!”
- ใช้ครีมโกนหนวดที่มีกลิ่นหอมหรือหยดวานิลลาสักหยดเพื่อความรู้สึกที่หลากหลาย
7. ศิลปะการถูใบไม้
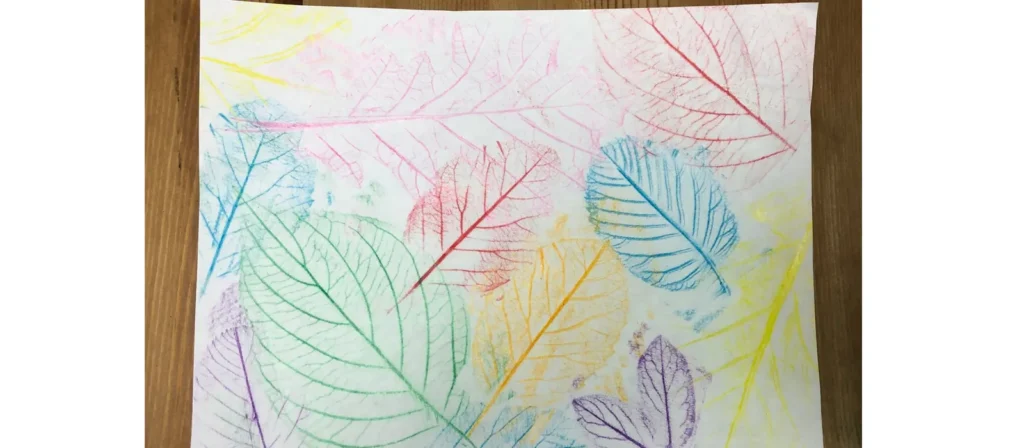
ภาพรวมกิจกรรม:
Celebrate the beauty of nature with this enchanting Leaf Rubbing Art activity. Children can collect leaves of different shapes and sizes, place them under a sheet of paper, and gently rub crayons or colored pencils over the surface to reveal the delicate patterns and veins. As the hidden designs appear, little learners experience the wonder of discovery while developing fine motor control and observational skills.
วัสดุ:
ใบไม้หลากหลาย (รูปทรง/ขนาดต่างๆ) กระดาษสีขาว ดินสอสี (พร้อมกระดาษห่อที่แกะออกแล้ว) เทป (ทางเลือก) คลิปบอร์ดหรือพื้นผิวการทำงานแบบแบน
วิธีการทำ:
- Take children outside to collect leaves of different shapes and sizes, or provide a set of pre-collected leaves at the table.
- Give each child a few leaves and show them how to place them vein-side up on a flat surface or clipboard.
- Lay a sheet of white paper over the leaves and demonstrate how to gently rub the side of a crayon to reveal the patterns beneath.
- Encourage kids to try different colors and leaf types, comparing the shapes and textures they uncover.
- Chat about nature as they work by asking, “What kind of tree do you think this leaf came from?” or “Why do leaves change color in fall?”
- Display their colorful rubbings around the classroom or turn them into bookmarks and greeting cards to celebrate the beauty of the season.
รูปแบบต่างๆ:
- นำชิ้นงานที่ขัดเสร็จแล้วไปทำเป็นการ์ดอวยพร ที่คั่นหนังสือ หรือของตกแต่งตามฤดูกาล
- ใช้กระดาษสีดำและดินสอสีอ่อนเพื่อสร้างเอฟเฟกต์อันน่าทึ่ง
- จับคู่กับการเดินเล่นในธรรมชาติแบบเรียบง่ายและการตามล่าหาใบไม้เพื่อให้มีวันที่เต็มไปด้วยธีม
8. การสร้างสรรค์ดินน้ำมันแบบโฮมเมด
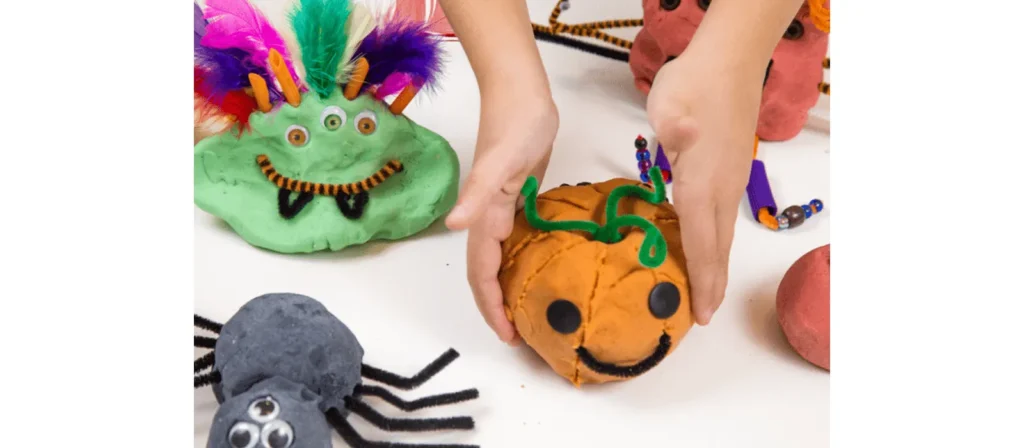
ภาพรวมกิจกรรม:
There’s something truly magical about molding, rolling, and shaping with soft, colorful dough. In this joyful Homemade Playdough Creations activity, children make their own playdough using simple ingredients like flour, salt, and water, then use it to sculpt anything their imagination can dream up such as animals, food, or playful patterns. The process engages all their senses while building fine motor strength, creativity, and focus.
วัสดุ:
แป้ง เกลือ ครีมออฟทาร์ทาร์ น้ำ น้ำมันพืช สีผสมอาหาร (หรือแป้งโดว์สำเร็จรูป) ชามผสม ช้อน อุปกรณ์ปั้นรูปที่ปลอดภัยสำหรับเด็ก (มีดพลาสติก แม่พิมพ์คุกกี้ ไม้คลึงแป้ง)
วิธีการทำ:
- Prepare colorful playdough ahead of time or let children join in the fun of making it themselves by mixing flour, salt, water, oil, and food coloring.
- Once the dough is ready and cool, divide it into different colors and place it on trays or mats for easy shaping.
- Provide rolling pins, cookie cutters, and plastic tools so children can mold animals, letters, or their favorite foods.
- Encourage creativity by asking playful questions such as “What are you making today?” or “Can you shape your name out of dough?”
- Let them explore textures, colors, and shapes freely, building both imagination and fine motor skills along the way.
- When finished, store the dough in sealed containers so it can be used again for more creative sessions throughout the week.
รูปแบบต่างๆ:
- เติมน้ำมันหอมระเหย (เช่น ลาเวนเดอร์หรือเปเปอร์มินต์) ลงไปเพื่อให้รู้สึกผ่อนคลาย
- ผสมผสานองค์ประกอบจากธรรมชาติ เช่น กิ่งไม้ หิน หรือใบไม้ เพื่อสร้างธีมที่เกี่ยวข้องกับธรรมชาติ
- ใช้เครื่องตัดรูปทรงเพื่อเชื่อมโยงกิจกรรมกับแนวคิดทางคณิตศาสตร์เบื้องต้น เช่น รูปแบบหรือเรขาคณิต
9. เรือหนอนผีเสื้อจอมหิวโหย
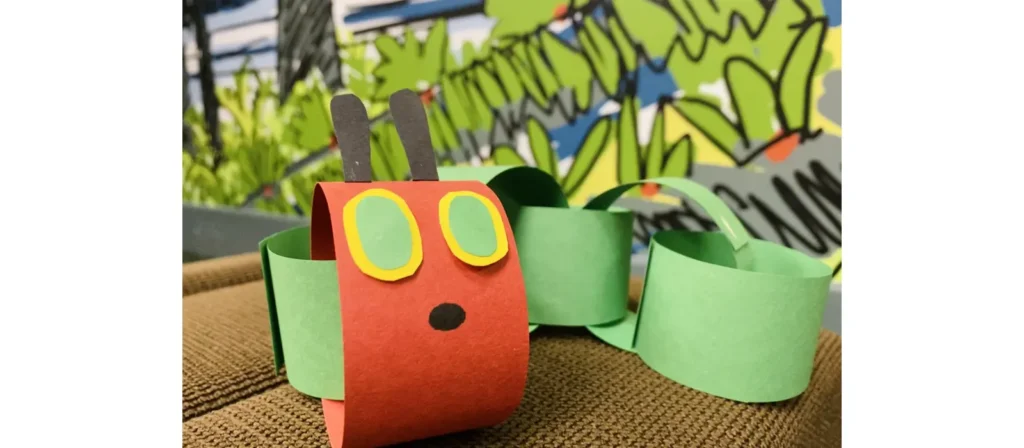
ภาพรวมกิจกรรม:
Bring Eric Carle’s beloved story to life with this charming The Very Hungry Caterpillar Craft. Using colorful paper circles, glue, and googly eyes, children can create their own friendly caterpillar while recalling each part of the story. As they cut, count, and arrange the pieces, they strengthen fine motor skills, practice sequencing, and develop early literacy through storytelling connections.
วัสดุ:
กระดาษก่อสร้างสี (แดงและเขียว), กาวแท่ง, กรรไกร (ปลอดภัยสำหรับเด็ก), ปากกาเมจิกสีดำ, ตาโปน, จานกระดาษ (ไม่จำเป็นสำหรับจัดแสดง), สำเนาหนังสือ (ไม่จำเป็น)
วิธีการทำ:
- Begin by reading หนอนผีเสื้อผู้หิวโหย together or watching a short video version to spark children’s imagination.
- Give each child a set of green circles for the body and one red circle for the head.
- Show them how to glue the circles in a line to form the caterpillar, then add googly eyes, a smile, and antennae using a marker or paper strips.
- Encourage counting and sequencing by asking, “How many green circles did you use?” or “What did the caterpillar eat first?”
- Once finished, display the adorable caterpillars on a bulletin board or let children take them home as a fun reminder of the story.
- For added creativity, invite them to make the butterfly stage next, connecting art with storytelling and learning.
รูปแบบต่างๆ:
- เพิ่มองค์ประกอบการนับโดยการนับวงกลมสีเขียวแต่ละวง
- สร้างภาพจิตรกรรมฝาผนังวงจรชีวิตด้วยระยะของหนอนผีเสื้อ รังไหม และผีเสื้อ
- ใช้สำลีแทนกระดาษวงกลมเพื่อให้ดูนุ่มฟูยิ่งขึ้น
10. ดอกทานตะวันลายพิมพ์มือ
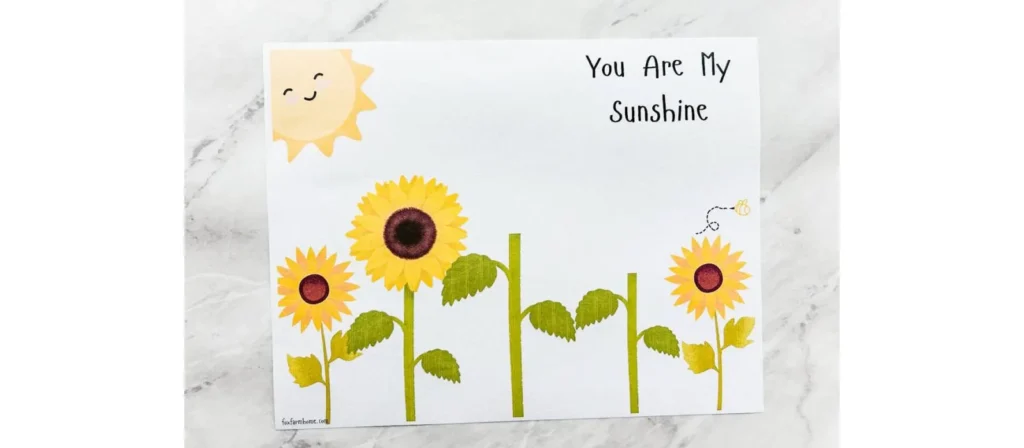
ภาพรวมกิจกรรม:
Fill the classroom with sunshine and smiles through this beautiful Handprint Sunflowers activity. Children trace and paint their hands to form bright yellow petals, then add a brown center and a green stem to complete their cheerful sunflowers. As they press their colorful handprints onto the paper, they build fine motor strength, explore symmetry and color blending, and experience the joy of creating something uniquely their own.
วัสดุ:
กระดาษก่อสร้างสีเหลืองและสีเขียว กระดาษวงกลมสีน้ำตาล (หรือถ้วยกระดาษสำหรับคัพเค้ก) กาว กรรไกร (ปลอดภัยสำหรับเด็ก) ดินสอ ปากกาเมจิกสีดำ ตัวเลือก: เมล็ดทานตะวันจริง
วิธีการทำ:
- Get your table ready with yellow, green, and brown paper, glue, pencils, and scissors.
- Help children trace their hands several times on yellow paper and cut them out to form bright sunflower petals.
- Glue a brown circle or cupcake liner in the center of the page to make the flower’s middle.
- Invite kids to arrange and glue their handprint petals around the center to create a full, sunny bloom.
- Add a green stem and leaves to finish the sunflower.
- For extra fun, glue real sunflower seeds in the middle to give it a textured look.
- When all the flowers are done, display them together to form a cheerful classroom “garden” that shines with creativity and color.
รูปแบบต่างๆ:
- เขียนชื่อเด็กแต่ละคนลงบนกลีบดอกไม้และเปลี่ยนเป็น "สวนของชั้นเรียน"
- ใช้สีทาให้กลีบลายฝ่ามือดูเลอะเทอะและน่าสัมผัสมากขึ้น
- สร้างกิจกรรมการนับโดยให้เด็กๆ นับกลีบดอกไม้ที่พวกเขาใช้
11. คอลลาจสายรุ้ง
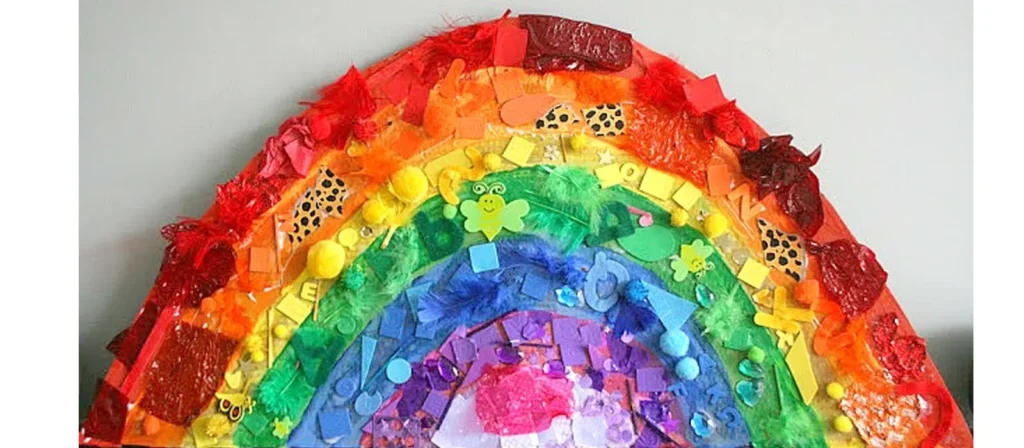
ภาพรวมกิจกรรม:
Brighten the classroom with color and creativity through this joyful Rainbow Collage activity. Children use scraps of paper, tissue, fabric, or any colorful materials to build their very own rainbows. As they sort, cut, and glue each color into place, they practice fine motor coordination, color recognition, and sequencing while expressing their individual creativity in a vibrant way.
วัสดุ:
เศษกระดาษก่อสร้างสี (หรือกระดาษทิชชู่) กาวแท่ง กระดาษสีขาวหรือกระดาษแข็ง สำลี กรรไกร (ปลอดภัยสำหรับเด็ก) ดินสอสีหรือปากกาเมจิก (ไม่จำเป็น)
วิธีการทำ:
- Get the table ready with sorted paper scraps or tissue pieces in rainbow color order, along with glue sticks, scissors, and cotton balls.
- Give each child a rainbow outline or let them draw their own on white paper or cardstock.
- Invite them to glue colorful scraps one by one, following the rainbow order and naming each color as they go.
- Add cotton balls at both ends to make soft, fluffy clouds that complete the rainbow.
- Encourage conversation by asking questions like “What comes after yellow?” or “Which color is your favorite?”
- Once dry, display the bright rainbows on a classroom wall or send them home to bring a little sunshine to family spaces.
รูปแบบต่างๆ:
- ใช้สื่อจากธรรมชาติ เช่น ใบไม้และกลีบดอกเพื่อสร้างสายรุ้งตามธีมวันคุ้มครองโลก
- เปลี่ยนให้เป็นเวอร์ชัน 3 มิติโดยการวางวัสดุซ้อนกัน เช่น เส้นด้าย ผ้าสักหลาด หรือกระดุม
- สร้างสายรุ้งขนาดเล็กบนจานกระดาษเพื่อให้เป็นกลุ่มได้เร็วขึ้น
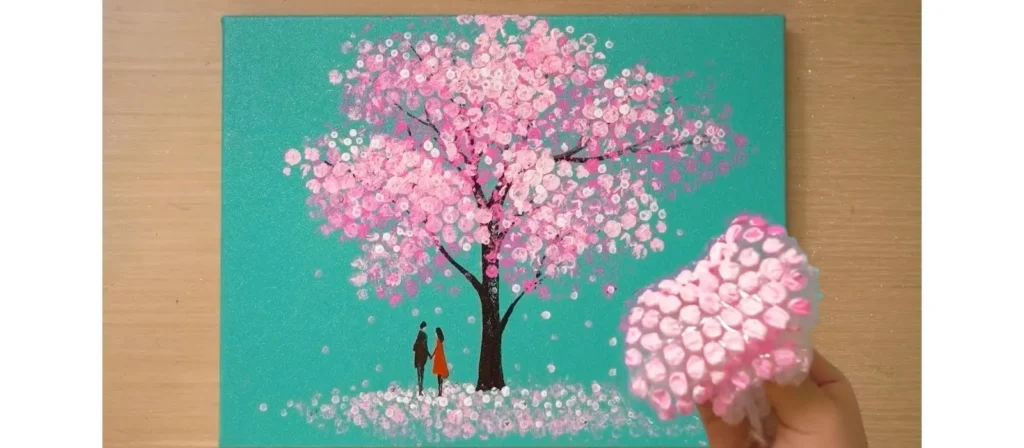
12. ต้นไม้ลายนิ้วมือ

ภาพรวมกิจกรรม:
Turn tiny fingerprints into a forest of creativity with this heartwarming Fingerprint Trees activity. Children use their fingertips dipped in colorful paint to create leaves, blossoms, or fruits on tree branches drawn or printed on paper. Each gentle press leaves a unique mark, helping them explore colors, patterns, and the beauty of individuality while developing fine motor coordination and sensory awareness.
วัสดุ:
กระดาษแข็งสีขาว ปากกาเมจิกหรือดินสอสีน้ำตาล สีที่ล้างออกได้ (สีฤดูใบไม้ร่วงหรือฤดูใบไม้ผลิ) จานกระดาษหรือถาดสี ผ้าเช็ดทำความสะอาดหรือชามใส่น้ำสำหรับทำความสะอาด
วิธีการทำ:
- Prepare white cardstock with tree trunks and branches already drawn, or let children sketch their own using brown markers or crayons.
- Pour small amounts of washable paint onto paper plates—choose warm tones like red, yellow, and orange for fall, or fresh colors like green, pink, and purple for spring.
- Invite children to dip their fingertips lightly into the paint and press them along the branches to create colorful leaves or blossoms.
- Encourage them to experiment with different colors and pressure to see how each fingerprint looks unique.
- Talk together about the seasons by asking, “Do these colors remind you of autumn or spring?”
- Let the paintings dry and display them as a bright seasonal forest that celebrates every child’s individuality.
รูปแบบต่างๆ:
- สร้างต้นไม้สี่ต้นเคียงข้างกันเพื่อแสดงถึงฤดูกาลทั้งสี่
- ให้ใช้คิวทิปหรือสำลีก้านสำหรับเด็กที่ไม่ชอบใช้มือ
- เพิ่มใบไม้ที่ร่วงหล่นรอบฐานหรือมีนกอยู่บนกิ่งก้านเพื่อดูรายละเอียดเพิ่มเติม
13. การทาสีด้วยแผ่นกันกระแทก
ภาพรวมกิจกรรม:
Turn ordinary packaging into a burst of creativity with this exciting Bubble Wrap Painting activity. Children dip pieces of bubble wrap into paint and press them onto paper to reveal fun, textured patterns that pop with color and imagination. As they explore the bumpy surface, they engage their senses, strengthen fine motor skills, and learn about texture and repetition in art.
วัสดุ:
พลาสติกกันกระแทก (ตัดเป็นแผ่นหรือเป็นรูปทรงเล็กๆ), สีที่ล้างออกได้, จานกระดาษ (สำหรับสี), กระดาษแข็งสีขาวหรือกระดาษแผ่นใหญ่, เทป (ทางเลือก), เสื้อคลุมหรือผ้ากันเปื้อน
วิธีการทำ:
- Cut bubble wrap into small squares or fun shapes like hearts, circles, or stars.
- Pour bright washable paints onto paper plates and set out sheets of white cardstock for printing.
- Show children how to dip the bubble wrap into paint and press it onto the paper to make colorful textured patterns.
- Encourage them to try different colors and layering effects, watching how patterns overlap and blend.
- Talk about what they see and feel by asking, “What does it feel like?” or “What happens when two colors mix?”
- Once finished, let the artwork dry flat—when the paint sets, the bubbly textures look even more amazing.
- Display their masterpieces on the wall or use them to decorate classroom bulletin boards for a vibrant touch of creativity.
รูปแบบต่างๆ:
- ใช้เทปกันกระแทกหุ้มไม้คลึงแป้งหรือกระดาษแข็งสำหรับคลึงแป้ง
- ตัดกระดาษกันกระแทกให้เป็นรูปร่างตามฤดูกาล (เช่น เกล็ดหิมะหรือใบไม้) เพื่อพิมพ์ลายตามธีม
- จับคู่กิจกรรมกับหนังสือเกี่ยวกับพื้นผิวหรือประสาทสัมผัสทั้งห้า
14. แทมโบรีนจานกระดาษ
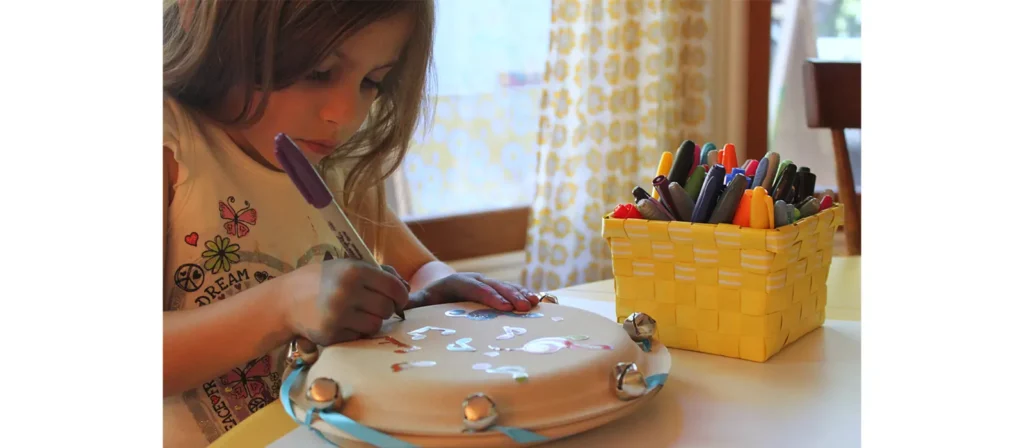
ภาพรวมกิจกรรม:
Bring rhythm and laughter to the classroom with this joyful Paper Plate Tambourines activity. Children decorate two paper plates with colorful paints, stickers, or drawings, then fill them with a few dried beans or beads before sealing them together. Once finished, they can shake their handmade tambourines to make cheerful music that fills the room with sound and smiles.
วัสดุ:
จานกระดาษ (2 ชิ้นต่อเด็ก) ถั่วแห้งหรือพาสต้า เครื่องเย็บกระดาษหรือกาว ปากกาเมจิกหรือดินสอสี สติกเกอร์ ริบบิ้นหรือเส้นด้าย (ทางเลือก) ที่เจาะรู
วิธีการทำ:
- Prepare two paper plates for each child and set out markers, stickers, and paints for decoration.
- Invite children to decorate the bottom sides of their plates with bright colors and fun designs—this is their very own musical instrument.
- Place a small handful of dried beans or pasta on one plate, then cover it with the second plate, decorated sides facing out.
- Help seal the edges with a stapler or glue to trap the contents securely inside.
- For extra fun, punch small holes around the edges and let children tie colorful ribbons or yarn for movement and flair.
- Once the tambourines are ready, gather everyone for a rhythm circle or mini parade and let the joyful music begin.
- Encourage kids to experiment with different sounds by shaking gently, tapping, or moving to the beat.
รูปแบบต่างๆ:
- ลองใช้กระดิ่งหรือปุ่มภายในเพื่อให้ได้เสียงที่แตกต่างกัน
- Add a name label and use it during music time or performances.
- สำรวจความแตกต่างของเสียงด้วยไส้ที่หลากหลาย เช่น ข้าว ลูกปัด หรือหิน
15. หุ่นกระบอกจากถุงกระดาษ
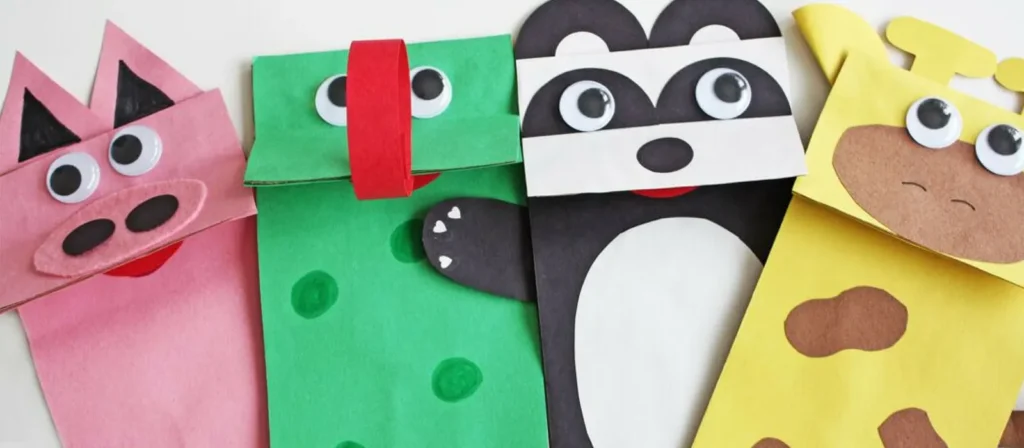
ภาพรวมกิจกรรม:
Let imagination take center stage with this delightful Paper Bag Puppets activity. Children turn simple paper bags into charming characters using markers, yarn, googly eyes, and bits of colored paper. As they design their puppets such as animals, people, or storybook friends, they develop creativity, storytelling skills, and fine motor coordination while expressing their emotions through art.
วัสดุ:
ถุงกระดาษใส่อาหารกลางวันสีน้ำตาลหรือสีขาว เศษกระดาษก่อสร้าง กาวแท่ง ดินสอสีหรือปากกาเมจิก ตาโปน เส้นด้าย กรรไกร (ปลอดภัยสำหรับเด็ก) สติกเกอร์หรือกระดุม (ทางเลือก)
วิธีการทำ:
- Prepare paper bags, colorful paper scraps, yarn, googly eyes, glue, and markers on the table.
- Let children choose a paper bag and start by decorating the flap to make their puppet’s face.
- Encourage them to add googly eyes, yarn hair, and paper cutouts for mouths, ears, or hats.
- Decorate the lower part of the bag as clothing, adding details like buttons, arms, or accessories.
- Once dry, have children slip their hands inside the bags and bring their puppets to life through playful storytelling.
- Pair children to perform mini puppet shows together and encourage them to give voices to their characters.
- Create a classroom puppet theater corner so their new friends can star in many future adventures.
รูปแบบต่างๆ:
- กำหนดธีมเช่น สัตว์ ผู้ช่วยเหลือชุมชน หรือตัวละครในหนังสือเรื่องโปรด
- เพิ่มเส้นด้ายหรือริบบิ้นเพื่อสร้างพื้นผิว
- สร้างมุมละครหุ่นกระบอกโดยใช้กล่องกระดาษแข็งและม่านเพื่อให้ใช้จินตนาการได้อย่างยาวนาน
16. ที่ดักแสงแดดจากกระดาษทิชชู่

ภาพรวมกิจกรรม:
Fill the classroom with color and light through this enchanting Tissue Paper Suncatchers activity. Children use pieces of colorful tissue paper, clear contact paper, and simple shapes like hearts, stars, or circles to create beautiful window art that glows in the sunlight. As they layer and arrange the colors, they learn about transparency, color blending, and composition while strengthening their fine motor and visual-spatial skills.
วัสดุ:
กระดาษสัมผัสใสหรือแผ่นเคลือบ กระดาษทิชชู่หลากสี (ตัดเป็นสี่เหลี่ยมเล็กๆ) กระดาษก่อสร้างสีดำ (สำหรับใส่กรอบ) กรรไกร (ปลอดภัยสำหรับเด็ก) เทป
วิธีการทำ:
- Prepare black paper frames by cutting simple shapes like hearts, stars, or circles, and remove the centers.
- Peel the backing off a piece of clear contact paper and place it sticky-side up on the table.
- Position the black frame on top and press it gently to secure it in place.
- Invite children to fill the inside with colorful tissue paper squares, overlapping the pieces to see how new colors appear.
- Once their design is complete, cover it with another piece of contact paper to seal the suncatcher.
- Trim any extra edges, then tape the finished artwork to a sunny window.
- Watch as sunlight shines through, turning the classroom into a rainbow-filled gallery of glowing colors.
รูปแบบต่างๆ:
- ใช้รูปทรงตามฤดูกาล เช่น ฟักทองสำหรับฤดูใบไม้ร่วง ไข่สำหรับฤดูใบไม้ผลิ หรือเกล็ดหิมะสำหรับฤดูหนาว
- ปล่อยให้เด็กๆ สร้างสรรค์ผลงานรูปทรงอิสระแบบนามธรรมโดยไม่ต้องมีกรอบ
- เพิ่มประกายแวววาวหรือเลื่อมเพื่อให้ดูเปล่งประกายยิ่งขึ้น
17. รอยมือจากแป้งเกลือ
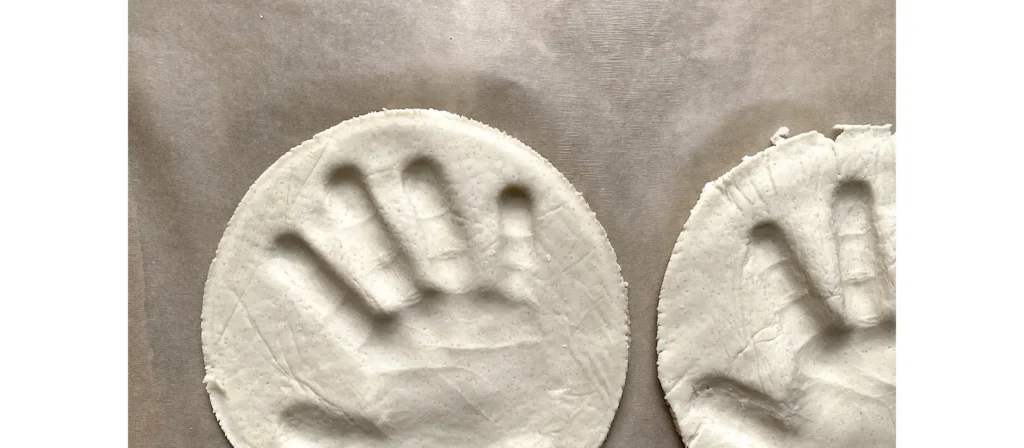
ภาพรวมกิจกรรม:
Capture a precious moment in time with this heartfelt Salt Dough Handprints activity. Children mix simple ingredients like flour, salt, and water to make soft dough, then press their tiny hands into it to create lasting impressions. After baking and decorating with paint or glitter, each handprint becomes a beautiful keepsake that celebrates growth, creativity, and the joy of making something by hand.
วัสดุ:
แป้ง เกลือ น้ำ ชามผสม ไม้คลึงแป้ง ถาดอบ สี พู่กัน ซีลแลนท์ใส (ไม่จำเป็น) ริบบิ้นหรือเชือก (ไม่จำเป็นสำหรับแขวน)
การตั้งค่า:
- ผสมแป้งเกลือล่วงหน้าหรือให้เด็กๆ ช่วยโดยใส่แป้ง 2 ถ้วย เกลือ 1 ถ้วย และน้ำอุ่น 1 ถ้วย ผสมและนวดจนเนียน
- เตรียมไม้คลึงแป้งและแผ่นรองหรือถาดขนาดเล็กสำหรับใช้ทำงาน
- อุ่นเตาอบไว้ที่ 200°F (90°C) หากอบจนแข็ง
คำแนะนำการทำกิจกรรม:
- คลึงแป้งเป็นแผ่นหนาประมาณ ½ นิ้ว สำหรับเด็กแต่ละคน
- ช่วยให้พวกเขากดมือของพวกเขาให้แน่นลงบนแป้งเพื่อให้มีรอยมือที่ลึก
- หากจะต้องแขวนชิ้นงานในภายหลัง ให้ใช้ดินสอหรือฟางเจาะรูเล็กๆ ที่ด้านบน
- อบเป็นเวลา 1-2 ชั่วโมงหรือปล่อยให้แห้งโดยอากาศเป็นเวลาหลายวัน
- เมื่อแห้งแล้ว เด็กๆ สามารถวาดรอยมือของตนเองด้วยสีใดก็ได้ตามต้องการ ปิดผนึกด้วยสเปรย์ใสเพื่อความทนทานหากต้องการ
รูปแบบต่างๆ:
- เขียนชื่อเด็กและวันที่ลงในแป้งก่อนอบเพื่อเก็บไว้เป็นความทรงจำ
- เพิ่มสีกลิตเตอร์หรือสีเมทัลลิกเพื่อสร้างเอฟเฟกต์แฟนซี
- เปลี่ยนเป็นของขวัญสำหรับวันแม่หรือวันพ่อด้วยข้อความเช่น “รับรองว่าคุณเป็นคนดีที่สุด!”
18. ไม้กายสิทธิ์ริบบิ้นเต้นรำ
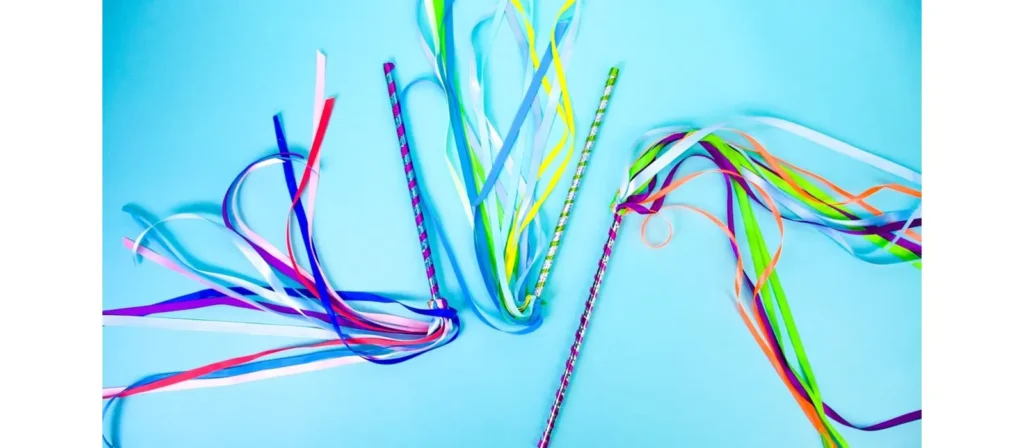
ภาพรวมกิจกรรม:
Add movement, color, and joy to the classroom with this lively Dancing Ribbon Wands activity. Children decorate sticks or dowels with bright ribbons, streamers, or fabric strips, then twirl and dance as their wands flutter through the air. As they wave and spin, they strengthen gross motor skills, coordination, and rhythm while expressing themselves through motion and music.
วัสดุ:
เดือยไม้หรือแท่งงานฝีมือ ริบบิ้นหรือกระดาษเครป (หลากสี) กาวหรือเทป กรรไกร (ปลอดภัยสำหรับเด็ก) สติกเกอร์หรือปากกาสำหรับตกแต่งที่จับ
วิธีการทำ:
- Mix 2 cups of flour, 1 cup of salt, and 1 cup of warm water in a bowl until the dough is smooth and easy to knead.
- Give each child a small piece of dough and let them roll it out to about half an inch thick on a mat or tray.
- Help them press their hand firmly into the dough to make a deep, clear handprint.
- If the piece will be hung, use a straw or pencil to poke a small hole near the top.
- Bake the handprints at 200°F (90°C) for 1–2 hours, or let them air dry over a few days until hard.
- Once dry, children can paint their creations with bright colors, add glitter for sparkle, and even write their names or the date.
- Seal with a clear spray for lasting shine, then tie a ribbon through the hole to hang it as a precious keepsake or family gift.
รูปแบบต่างๆ:
- ใช้สีตามฤดูกาลเพื่อสร้างไม้กายสิทธิ์ตามธีม (เช่น สีแดงและสีเขียวสำหรับวันหยุด และสีพาสเทลสำหรับฤดูใบไม้ผลิ)
- Add bells to the ends of the ribbons for a musical element.
- เปลี่ยนเป็นการแสดง: สร้างกิจวัตรกลุ่มง่ายๆ และปล่อยให้พวกเขา "แสดง" ให้กับผู้ปกครองหรือชั้นเรียนอื่นๆ
19. หุ่นเชิดสัตว์ประหลาดสุดแสนซน
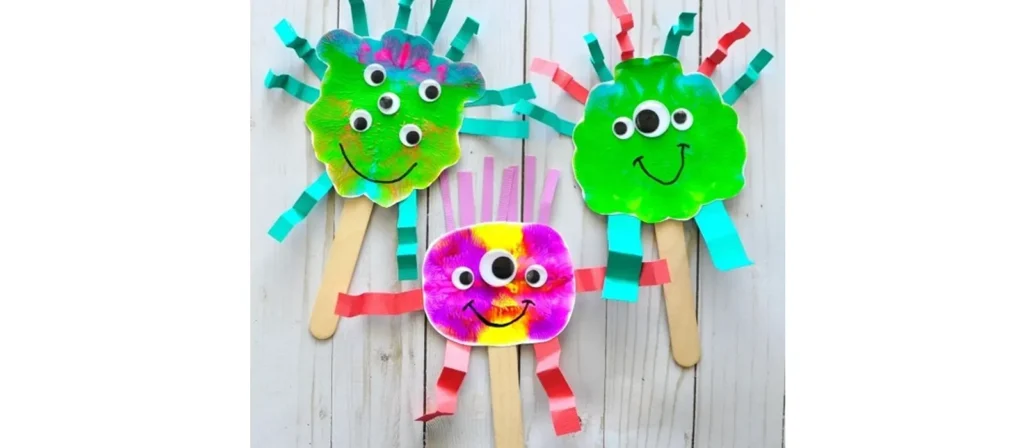
ภาพรวมกิจกรรม:
Bring giggles and creativity to art time with this playful Silly Monster Puppets activity. Children use colorful paper, yarn, googly eyes, and craft sticks to design their own friendly monsters with funny faces, spiky hair, and wobbly eyes. As they cut, glue, and decorate, they strengthen fine motor skills, experiment with colors and shapes, and discover how imagination can turn ordinary materials into extraordinary creations.
วัสดุ:
ถุงกระดาษใส่อาหารกลางวัน กระดาษก่อสร้าง กาวแท่ง ปากกาเมจิกหรือดินสอสี พู่กัน ตาโปน เส้นด้าย กรรไกร (ปลอดภัยสำหรับเด็ก) รูปทรงโฟมหรือไม้ทำความสะอาดท่อ (ทางเลือก)
วิธีการทำ:
- Prepare paper bags, colorful paper shapes, googly eyes, pom poms, yarn, and glue for each child.
- Show how the flap of the paper bag can become the monster’s mouth, then let children start decorating.
- Encourage them to glue on eyes in any number they like and add fun details like spiky hair, horns, arms, or big teeth.
- Let them use markers or crayons to draw silly smiles, wiggly tongues, or tiny spots for extra personality.
- As they work, ask fun questions such as “What’s your monster’s name?” or “Does it roar or laugh?”
- Once finished, gather the group for a monster puppet show where each child can perform with their silly new friend.
- Celebrate their creativity by displaying the puppets or creating a “Monster of the Week” wall to introduce everyone’s creations.
รูปแบบต่างๆ:
- กำหนดธีมของสัตว์ประหลาดสำหรับบทเรียนเฉพาะ (เช่น สัตว์ประหลาดแห่งอารมณ์สำหรับการเรียนรู้ SEL)
- ใช้ผ้าสักหลาดแทนกระดาษเพื่อให้ได้แบบมีพื้นผิว
- จัดทำผนังแสดง “สัตว์ประหลาดประจำสัปดาห์” โดยให้เด็กแต่ละคนแนะนำตัวละครของตนเอง
20. ศิลปะบนแผ่นกรองกาแฟ

ภาพรวมกิจกรรม:
Take young learners on an out-of-this-world adventure with this mesmerizing Coffee Filter Planet Art activity. Children color round coffee filters with markers, then lightly mist them with water to watch the colors blend and swirl like real galaxies. Once dry, they can cut out and label their colorful “planets,” turning simple materials into a stunning solar system full of imagination and discovery.
วัสดุ:
แผ่นกรองกาแฟรูปทรงกลม, ปากกาเมจิกที่ซักได้, ขวดสเปรย์หรือแก้วน้ำขนาดเล็กพร้อมที่หยด, กระดาษเช็ดมือ, ฟอยล์หรือถาด, กระดาษก่อสร้างสีดำ (ไม่จำเป็นสำหรับพื้นหลัง), กาว
วิธีการทำ:
- Flatten coffee filters on trays or foil so they are ready for coloring.
- Give children washable markers and let them fill the filters with bright circular designs that look like planets.
- When finished, spray the filters lightly with water or use droppers to wet the surface and watch the colors swirl together.
- Allow the filters to dry completely for one to two hours until the watercolor effect appears.
- Once dry, cut out the colorful planets and glue them onto black paper to create a mini solar system.
- Encourage children to name their planets or add stars and fun space facts around them.
- Display the finished artwork on the classroom wall to create a dazzling galaxy full of imagination and discovery.
รูปแบบต่างๆ:
- เปลี่ยนเป็นโครงการระบบสุริยะโดยการสร้างดาวเคราะห์หลายดวงและวางไว้ในวงโคจร
- ใช้ดินสอสีขาววาดลงบนฟิลเตอร์ก่อนเพื่อให้เกิดเอฟเฟกต์ “ต้านทาน” ที่ซ่อนอยู่
- เพิ่มกาวกลิตเตอร์เพื่อสร้างประกายแวววาวแบบกาแล็กซี่
21. มณฑลแห่งธรรมชาติ

ภาพรวมกิจกรรม:
Invite peace, focus, and creativity into the classroom with this beautiful Nature Mandalas activity. Children gather natural materials such as leaves, petals, stones, and twigs, then arrange them in circular patterns to create stunning mandalas that celebrate balance and harmony in nature. As they carefully place each piece, they strengthen concentration, pattern recognition, and an appreciation for the beauty found outdoors.
วัสดุ:
ใบไม้ กลีบดอก กิ่งไม้ หินเล็กๆ ลูกสน ลูกโอ๊ก เปลือกไม้ วงกลมกระดาษหรือฐานกระดาษแข็ง (ทางเลือก) กาว (ทางเลือกสำหรับการจัดแสดงแบบถาวร)
วิธีการทำ:
- Take children on a short nature walk to collect safe and interesting materials such as leaves, petals, stones, and twigs.
- Provide paper or cardboard circles as bases, or let children create directly on the ground or table for a more natural feel.
- Explain that a mandala begins in the center and grows outward in patterns or circles.
- Invite children to place one object in the center, then build outward by arranging similar items in repeating or symmetrical designs.
- Encourage them to observe textures and colors while working by asking, “How does this leaf feel?” or “What shapes do you notice?”
- When the mandalas are finished, display them indoors or take photos before nature reclaims the materials.
- Celebrate their creativity by discussing how each mandala is unique, just like the natural world it was made from.
รูปแบบต่างๆ:
- ใช้สื่อตามฤดูกาล เช่น ดอกไม้ในฤดูใบไม้ผลิและใบไม้หลากสีในฤดูใบไม้ร่วง
- เพิ่มสัมผัสส่วนตัว เช่น หินทาสีหรือสิ่งของที่มีป้ายกำกับ
- เปลี่ยนเป็นโครงการกลุ่ม: แมนดาลาขนาดใหญ่หนึ่งชิ้นที่สร้างสรรค์จากการทำงานเป็นทีมร่วมกัน
เคล็ดลับด้านความปลอดภัยและการทำความสะอาดสำหรับงานฝีมือ
แม้แต่ศิลปะและงานฝีมือที่ดีที่สุดสำหรับเด็กก่อนวัยเรียนก็อาจกลายเป็นความยุ่งเหยิงได้หากเราไม่ได้เตรียมตัวมา เมื่อมีโครงสร้างและนิสัยที่เหมาะสม คุณสามารถส่งเสริมความคิดสร้างสรรค์ได้โดยไม่ต้องกังวลว่าจะมีของเหลวหก เปื้อน หรือนิ้วมือเหนียวเหนอะหนะ

การกำหนดขอบเขตก่อนที่ความสนุกจะเริ่มต้น
- โซนการประดิษฐ์: ใช้โต๊ะเฉพาะหรือเสื่อที่ซักได้
- ผ้ากันเปื้อนหรือเสื้อยืดเก่า: สิ่งที่ต้องมีสำหรับเด็กก่อนวัยเรียน
- ตั้งกฎ “ล้างมือให้สะอาด” ก่อนทากาวหรือทาสี
การใช้วัสดุที่ปลอดภัยและเหมาะสมกับวัย
- เลือกใช้วัสดุที่ปลอดสารพิษและซักได้เสมอ
- หลีกเลี่ยงเครื่องมือมีคม อันตรายจากการสำลักเล็กน้อย หรือวัสดุที่ก่อให้เกิดภูมิแพ้
- เก็บวัสดุอันตรายให้พ้นมือเด็ก
การสอนเรื่องการทำความสะอาดเป็นส่วนหนึ่งของกิจกรรม
- ใช้ถังขยะที่มีรหัสสีเพื่อจัดระเบียบวัสดุ
- สร้างเพลงสนุก ๆ หรือกิจวัตรประจำวันเกี่ยวกับการทำความสะอาด
- กำหนด “ผู้นำการทำความสะอาด” ขนาดเล็กสำหรับแต่ละโต๊ะ
ศิลปะและงานฝีมือช่วยสนับสนุนการเรียนรู้แบบมอนเตสซอรีและเรจจิโอได้อย่างไร
ปรัชญาเบื้องหลัง มอนเตสซอรีและเรจจิโอเอมีเลีย สนับสนุนศิลปะและงานฝีมือสำหรับเด็กก่อนวัยเรียนอย่างเต็มที่ ไม่ใช่แค่ในรูปแบบศิลปะเท่านั้น แต่เป็นวิธีการเรียนรู้ การแสดงออก และการเข้าใจโลก
การส่งเสริมความเป็นอิสระผ่านการทำงานภาคปฏิบัติ
- เด็กๆ เลือกวัสดุและทำงานตามจังหวะของตัวเอง
- โครงการที่กำกับตนเองสร้างอิสระและความมั่นใจ
- อุปกรณ์และเครื่องมือต่างๆ สามารถเข้าถึงได้ตามความสูงของเด็ก
ส่งเสริมการสังเกตและความคิดสร้างสรรค์ที่ได้รับแรงบันดาลใจจากธรรมชาติ
- เมืองเรจจิโอเอมีเลียเน้นย้ำถึงวัสดุธรรมชาติและการสำรวจทางประสาทสัมผัส
- การเดินชมธรรมชาติและการเล่นแบบอิสระช่วยเชื่อมโยงศิลปะเข้ากับโลกแห่งความเป็นจริง
- งานฝีมือตามฤดูกาลช่วยเสริมสร้างจังหวะและวัฏจักรของชีวิต
การสนับสนุนพัฒนาการทางปัญญาผ่านการทำซ้ำและกิจวัตรประจำวัน
- การทำซ้ำการเคลื่อนไหวกล้ามเนื้อมัดเล็กช่วยสร้างเส้นทางของสมอง
- พิธีกรรมต่างๆ ที่เกี่ยวข้องกับศิลปะและงานฝีมือช่วยเสริมสร้างระเบียบ ความอดทน และสมาธิ
- วัสดุ Montessori อาจรวมถึงส่วนขยายของงานฝีมือ (เช่น การเจาะรู การร่างภาพ)
งานฝีมือประหยัดงบ: เคล็ดลับสำหรับเด็กก่อนวัยเรียนและอนุบาล
High-quality arts and crafts for preschoolers don’t require a big budget. With a bit of creativity and planning, you can provide meaningful art experiences without breaking the bank.
ใช้วัสดุรีไซเคิลและวัสดุในชีวิตประจำวัน
- กระดาษชำระม้วน ฝาขวด กล่องซีเรียล และเศษผ้า
- ร่วมมือกับผู้ปกครองเพื่อบริจาคถัง
- สอนความยั่งยืนผ่านการใช้ซ้ำ
ซื้อเป็นจำนวนมากและจัดระเบียบอย่างชาญฉลาด
- แหล่งจัดหาอุปกรณ์พื้นฐาน (กาว กระดาษ พู่กัน) จากผู้ขายส่ง
- จัดเก็บตามหมวดหมู่และสีเพื่อการเข้าถึงที่รวดเร็ว
- แม่แบบลามิเนตที่นิยมใช้ซ้ำ
วางแผนหน่วยการเรียนรู้ล่วงหน้า
- จัดเรียงงานฝีมือให้สอดคล้องกับฤดูกาล วันหยุด หรือหัวข้อบทเรียน
- นำงานฝีมือมาใช้ซ้ำตามช่วงวัยโดยมีการเปลี่ยนแปลงเล็กน้อย
- เก็บแฟ้มเทมเพลตและคำแนะนำที่พิมพ์ได้ไว้สำหรับทีมของคุณ
บทสรุป
งานศิลปะและงานฝีมือสำหรับเด็กก่อนวัยเรียนนั้นไม่ใช่แค่กิจกรรมสนุกๆ ในแต่ละวันเท่านั้น แต่ยังมีความสำคัญต่อการพัฒนาทักษะการเคลื่อนไหวของกล้ามเนื้อมัดเล็ก ส่งเสริมการแสดงออกทางอารมณ์ และจุดประกายความรักในความคิดสร้างสรรค์ตลอดชีวิต ไม่ว่าคุณจะเป็นครู เจ้าของโรงเรียน หรือผู้ปกครอง การให้เด็กๆ ได้มีอิสระในการสร้างสรรค์ด้วยมือของตนเองจะช่วยสร้างความมั่นใจ ความผูกพัน และความอยากรู้อยากเห็น
เบื้องหลังพื้นที่งานฝีมือที่ประสบความสำเร็จทุกแห่งคือสภาพแวดล้อมที่ได้รับการออกแบบอย่างพิถีพิถัน เวสท์ชอร์เฟอร์นิเจอร์เราเชี่ยวชาญในการสร้างสภาพแวดล้อมเหล่านี้ ด้วยประสบการณ์มากกว่า 20 ปีในการผลิตและจัดหาเฟอร์นิเจอร์สำหรับเด็กก่อนวัยเรียน เราจึงเสนอโซลูชันบริการครบวงจรตั้งแต่การจัดวางห้องเรียนและการปรับแต่งเฟอร์นิเจอร์ไปจนถึงการผลิต การควบคุมคุณภาพ และการจัดส่ง กลุ่มผลิตภัณฑ์ของเราประกอบด้วยเฟอร์นิเจอร์สำหรับเด็กก่อนวัยเรียนหลายแบบในสไตล์ วัสดุ และขนาดที่แตกต่างกัน เพื่อตอบสนองความต้องการที่หลากหลายของพื้นที่การเรียนรู้ในช่วงเริ่มต้น
เมื่อคุณพร้อมที่จะยกระดับพื้นที่ศิลปะของคุณหรือออกแบบพื้นที่โรงเรียนอนุบาลใหม่เพื่อสร้างแรงบันดาลใจให้เกิดความคิดสร้างสรรค์มากยิ่งขึ้น เราพร้อมช่วยเหลือคุณ เพราะสภาพแวดล้อมที่เหมาะสมจะสร้างความแตกต่างอย่างมาก