
Wooden preschool furniture faces food spills, paint, glue, frequent wiping, and constant movement. This wooden preschool furniture care guide starts with the actual material and finish on each part. You can then choose compatible cleaning products, protect edges and joints from moisture, check hardware before it loosens, and record small problems before they interrupt the classroom. The steps below are designed for busy preschool rooms, not household furniture kept in light use.
Start With The Material And Finish
The word “wooden” is too broad for a care plan. One table may combine a laminate top, plywood core, solid wood legs, painted edges, and metal fasteners. A cubby may have a clear-coated plywood body, a different back panel, plastic bins, and wall anchors. Each part responds differently to water, cleaners, abrasion, and repair products.
In our preschool furniture work, we separate the core, visible surface, finish, edge, and hardware before recommending care. This prevents staff from applying oil to laminate, soaking an exposed plywood edge, or treating a painted panel as unfinished wood.
Keep the following details with the product record:
| Record | What You Need To Know | Why It Matters |
|---|---|---|
| Product | Model, SKU, room, and purchase date | Helps you find the correct instructions and parts |
| Core | Solid wood, plywood, MDF, particleboard, or another material by part | Damage at an edge or screw hole can expose the core |
| Surface | Clear coat, paint, laminate, veneer, oil, wax, or unfinished wood | Determines which cleaners and touch-up methods are suitable |
| Edge | Sealed plywood edge, edge band, solid edge, or painted edge | Edges often receive impact and moisture first |
| Hardware | Fastener, hinge, glide, caster, brake, handle, and anchor type | Lets you order the correct replacement part |
| Care Products | Approved cleaner, sanitizer, disinfectant, and touch-up product | Stops staff from guessing during a spill or illness event |
If the original specification only says “wood,” ask the supplier to identify each major part. A practical comparison of solid wood, plywood, and MDF can help you prepare the questions, but the care sheet must match the exact item you own.
Use The Right Cleaning Routine
Use the same basic sequence for routine care, then adjust the products to the surface:
- Remove crumbs, grit, dried paint flakes, and loose dirt with a soft cloth or brush.
- Clean the surface with a product approved for that finish.
- Wipe away residue and dry edges, seams, joints, and hardware openings.
- Sanitize or disinfect only when your program requires it and the product is suitable for the surface.
You should clean a surface before sanitizing or disinfecting it. Dirt and organic material can reduce the effectiveness of the next step. When a disinfectant is required, the surface must remain wet for the contact time stated on the product label.
That creates an important furniture-care decision. The disinfectant must work as labeled, and the furniture surface must tolerate the product and required wet time. If you cannot confirm both conditions, ask the furniture supplier and your cleaning-product supplier before using it across the room. Test any newly approved method on a hidden area first.
Do not mix cleaning or disinfecting products. Keep chemicals out of children’s reach and follow your program’s ventilation, protective-equipment, food-contact, and storage procedures.
Ask For Care Details Before You Buy
Care starts before delivery. Add these questions to your furniture specification or purchase record:
- What is the core material for the top, body, door, back, edge, seat, and leg?
- What finish or laminate is used on each exposed surface?
- Which cleaning, sanitizing, and disinfecting products are compatible?
- How long may the surface stay wet during routine cleaning or disinfection?
- Which edges, joints, holes, and bases need extra moisture protection?
- Does the finish need oil, wax, polish, recoating, or none of these?
- Which touch-up system matches the production finish?
- Which glides, casters, hinges, handles, locks, and anchors can be replaced?
- What inspection, assembly, anchoring, and warranty instructions should staff keep?
These care fields belong beside the room, quantity, dimensions, material, finish, and hardware in your preschool furniture buying record. When the furniture arrives, give the final care sheet to the staff who will clean and inspect it. A specification that stays in the purchasing inbox cannot guide the classroom routine.
Need these answers on the purchase record?
Send the floor plan, the ages, the opening date, and the cleaning products your program uses.
Send the floor planCare For Each Surface
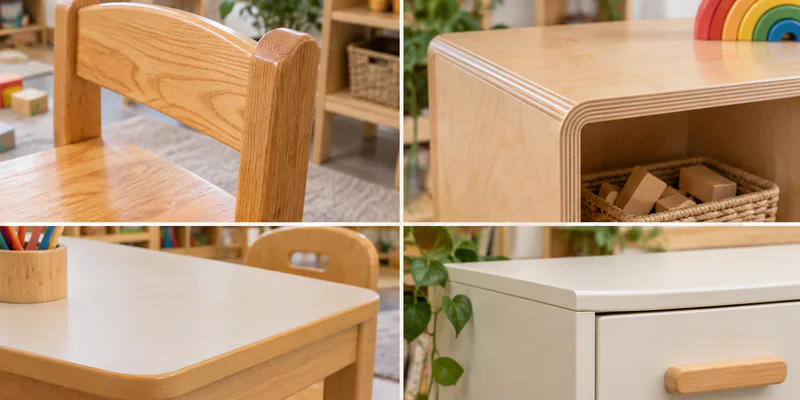
Furniture that looks similar can need different care. Use this table as a starting point and follow the item-specific instructions when they differ.
| Surface | Routine Care | Check Closely | Avoid |
|---|---|---|---|
| Sealed Solid Wood | Use a soft, slightly damp cloth and an approved cleaner, then dry the surface | Finish breaks, end grain, joints, and leg-to-seat connections | Automatic oiling or waxing when the finish does not require it |
| Clear-Coated Plywood | Clean the coated face and dry edges, holes, seams, and the base | Swelling, layer separation, chipped coating, and exposed core | Soaking an edge or sanding the face without confirming veneer and finish thickness |
| Laminate-Faced Panel | Use a nonabrasive cloth and compatible cleaner; dry around edge bands and seams | Lifted edge band, chips, joint lines, and moisture around sinks | Wood oil, wax, abrasive pads, and liquid left at the edge |
| Painted Wood Or MDF Part | Wipe with a soft cloth and approved product; dry damaged areas quickly | Paint chips, soft areas, exposed core, and worn handle zones | Scrubbing through the paint or flooding a damaged edge |
Do not choose a method from appearance alone. A wood-grain surface may be laminate or veneer. A painted door may use a different core from the cabinet. An exposed plywood edge may have a clear finish that is easy to miss.
Handle Spills And Marks
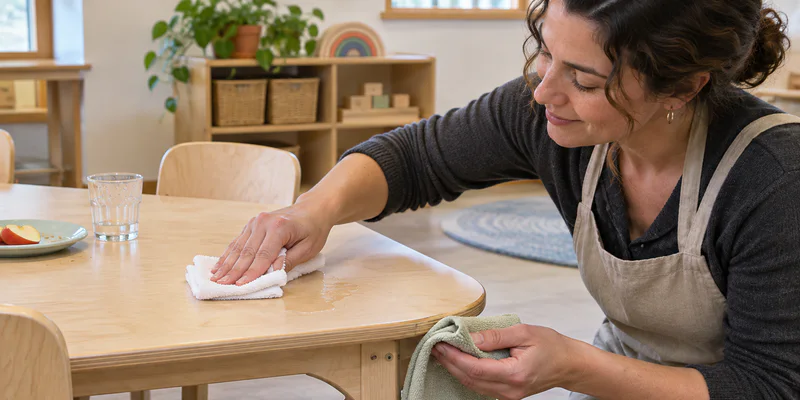
Fast action usually matters more than aggressive scrubbing. Start with the least force and the least liquid that can do the job.
| Problem | What You Should Do |
|---|---|
| Food Or Drink | Blot the spill, clean with an approved product, and dry the top, edge, underside lip, and nearby joint |
| Washable Paint Or Glue | Remove it while fresh with the compatible method; soften residue with a damp cloth only if the finish allows it |
| Crayon Or Marker | Check the care sheet, spot-test the approved method, and work gently from the edge of the mark |
| Bodily Fluid | Follow your program’s infection-control process; clean first, then use a suitable disinfectant for the required contact time |
| Unknown Cleaner Reaction | Stop using the product, keep children away from the area, photograph the change, and contact the supplier with the product label |
Avoid metal scrapers, scouring pads, and concentrated solvents unless the furniture manufacturer has approved a specific method. Heat, alcohol, vinegar, baking soda, bleach, oil, and wax are not universal solutions. Each can be suitable for some products and damaging to others.
If a spill reaches a crack, open seam, swollen edge, or porous exposed core, surface wiping may not restore cleanability. Remove the item from use when you cannot clean the affected area or confirm that the structure remains sound.
Keep Water Away From Edges And Joints
Wood and wood-based panels change as they gain or lose moisture. Liquid water can move quickly into exposed end grain, open seams, fastener holes, damaged edge banding, and an unsealed core. A protective coating can slow moisture movement, but it does not make every joint waterproof.
Pay extra attention to:
- tables used for art, snacks, water play, and sensory activities;
- furniture beside sinks, changing areas, exterior doors, or wet floors;
- cubby and shelf bases that touch mop water;
- holes around screws, bolts, hinges, handles, and casters;
- chipped corners, lifting edge bands, and worn clear coats;
- damp cloths, cups, plant pots, and cleaning bottles left on a surface.
Use trays or washable mats for wet activities. Wipe spills before they run over an edge. Dry the underside lip as well as the top. Keep mop water away from cabinet bases, and do not store damp cloths inside wooden cubbies. If a room has repeated condensation or humidity problems, address the room condition along with the furniture.
Protect Furniture During Daily Use
Daily handling can loosen a well-built item when staff move it in ways it was not designed to move.
- Empty shelves and cabinets before relocating them.
- Lift fixed furniture with enough adults; never drag it by the top or side panel.
- Push mobile storage from the intended handle area and release the brakes first.
- Lock casters after the unit reaches its working position.
- Use activity mats under paint, glue, clay, food, and water work.
- Lift bins, equipment, and heavy materials to avoid sliding them across finished tops.
- Use label holders or approved removable labels; strong tape can lift or mark a finished surface.
- Keep children from climbing shelves, cabinet doors, table braces, or storage tops.
Furniture placement also affects care. Leave enough access for staff to clean around the base and inspect wall anchors. A unit pressed tightly against a damp wall can hide moisture and delay detection.
Check Hardware And Moving Parts
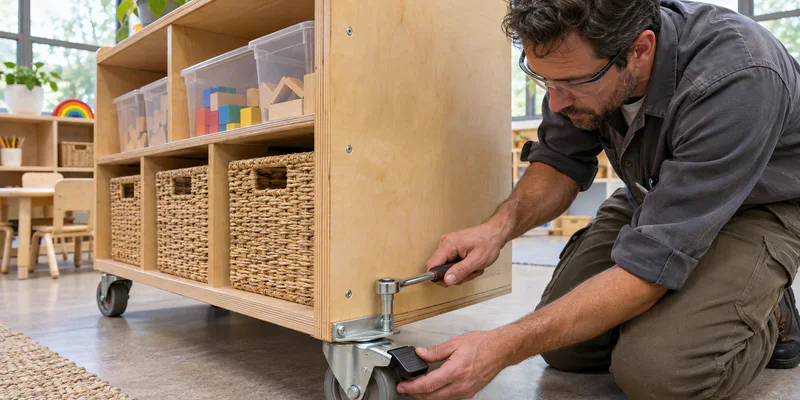
A short inspection catches wear before it spreads into the wood around a connection. Adjust the timing to the item, room intensity, manufacturer’s instructions, and local requirements.
Check these points:
- chair legs, seat joints, backs, and glides;
- table legs, braces, adjustable feet, and underside fasteners;
- cubby and shelf anchors, shelf supports, hooks, and back panels;
- cabinet hinges, handles, locks, and drawer slides;
- caster plates, wheels, brakes, and mounting screws;
- screw caps, plugs, and other small parts that children can reach.
Tighten only to the product instructions. Overtightening can strip a threaded insert, crush a panel, or weaken the material around a screw. Use the correct replacement part. A wheel, screw, or hinge chosen by appearance may have the wrong size, load rating, or mounting method.
Take the item out of use if a load-bearing joint is cracked, a fastener no longer grips, an anchor point is damaged, or the same wobble returns after adjustment. The separate guide on when to repair or replace classroom furniture covers that decision in more detail.
Use A Simple Care Schedule
The following schedule is a practical starting point, not a universal legal requirement. Change it for the age group, activity, furniture type, product instructions, and licensing rules that apply to your program.
| Timing | Care Task | Record |
|---|---|---|
| After A Spill | Blot, clean, dry, and inspect the nearest edge or joint | Record only if the finish, edge, or hardware changed |
| Daily | Clean high-touch and activity surfaces; scan for wobble, sharp areas, loose parts, or moisture | Note any item taken out of use |
| Weekly | Check chair joints, table fasteners, glides, handles, hinges, casters, and wet-area furniture | Add small adjustments and parts needed |
| Monthly | Inspect every item or matching set, including undersides, bases, anchors, edges, and back panels | Update condition, repair, and responsible person |
| Quarterly Or Each Term | Review the room list, recurring damage, care products, staff instructions, and spare parts | Approve changes to the care plan and budget |
Use a simple status such as In Use, Monitor, Repair, and Remove From Use. Add the date, room, item, issue, action, and staff member. Photos help you compare a lifting edge or finish change over time.
Know What Staff Can Repair
Routine maintenance should stay within the product instructions and your staff’s training. A compatible glide, handle, caster, screw cap, or other replaceable part may be straightforward. Tightening an accessible fastener can also be routine when the surrounding material and connection remain sound.
Surface touch-up needs more control. Confirm the original coating, color, preparation method, curing time, and whether the product is approved for that use. A generic marker or clear coat can hide damage while leaving an incompatible or incomplete surface.
Do not use glue, tape, filler, a larger screw, or an added bracket to conceal structural damage. Do not sand a laminate face, thin veneer, unknown coating, or child-contact surface without written repair instructions. Send the item for qualified repair or remove it from service when the repair would change its structure, anchoring, load path, cleanability, or safety features.
Keep The Care Record With The Room
The best routine is specific enough for staff to follow: identify the surface, clean with a compatible product, dry vulnerable areas, inspect the hardware, and record changes. Keep the care sheet with the room list and product record so new staff do not need to guess.
If you are planning new preschool classroom furniture, send West Shore Furniture your floor plan, age groups, room list, and the cleaning products your program uses. We can help you identify the material, finish, edge, hardware, and care questions that should be confirmed before you approve the furniture specification.
Production is commonly 30–45 days after the drawing is frozen, and a classroom package is commonly 10–14 weeks door to door. Send the floor plan, the ages, the opening date, and the cleaning products the program already uses.
FAQ
Can You Clean Wooden Preschool Furniture With Vinegar?
Do not treat vinegar as a universal wood cleaner. Its suitability depends on the finish, concentration, exposure time, and manufacturer’s instructions. Use the approved care method for the exact surface. Never mix vinegar with bleach or other cleaning products.
Can You Use Bleach On Wooden Furniture?
Only use a bleach product when the product label allows the intended use and the furniture instructions confirm that the surface can tolerate the solution and contact time. A sealed top, exposed plywood edge, painted panel, and laminate seam may respond differently. Test an approved method in a hidden area before wider use.
Should You Oil Or Wax Wooden Preschool Furniture?
Use oil or wax only when the finish instructions require it. Some unfinished or oil-finished solid wood may need periodic treatment. Sealed wood, paint, laminate, and many clear commercial finishes do not benefit from automatic oiling or waxing, and added products can leave residue or interfere with later touch-up.
What Should You Do With A Swollen Plywood Edge?
Stop the moisture source and remove the item from use if the damage affects stability, creates a sharp area, or prevents proper cleaning. Photograph the edge and ask the supplier or a qualified furniture professional to check the core and nearby joint. Drying the surface does not press separated layers or a swollen core back to its original condition.
How Often Should You Inspect Preschool Furniture?
Use quick daily observation and a documented monthly check as a practical starting point. Inspect high-use chairs, mobile storage, wet-area furniture, and repaired items more often. Follow the manufacturer’s schedule and any local licensing requirements when they call for a different interval.