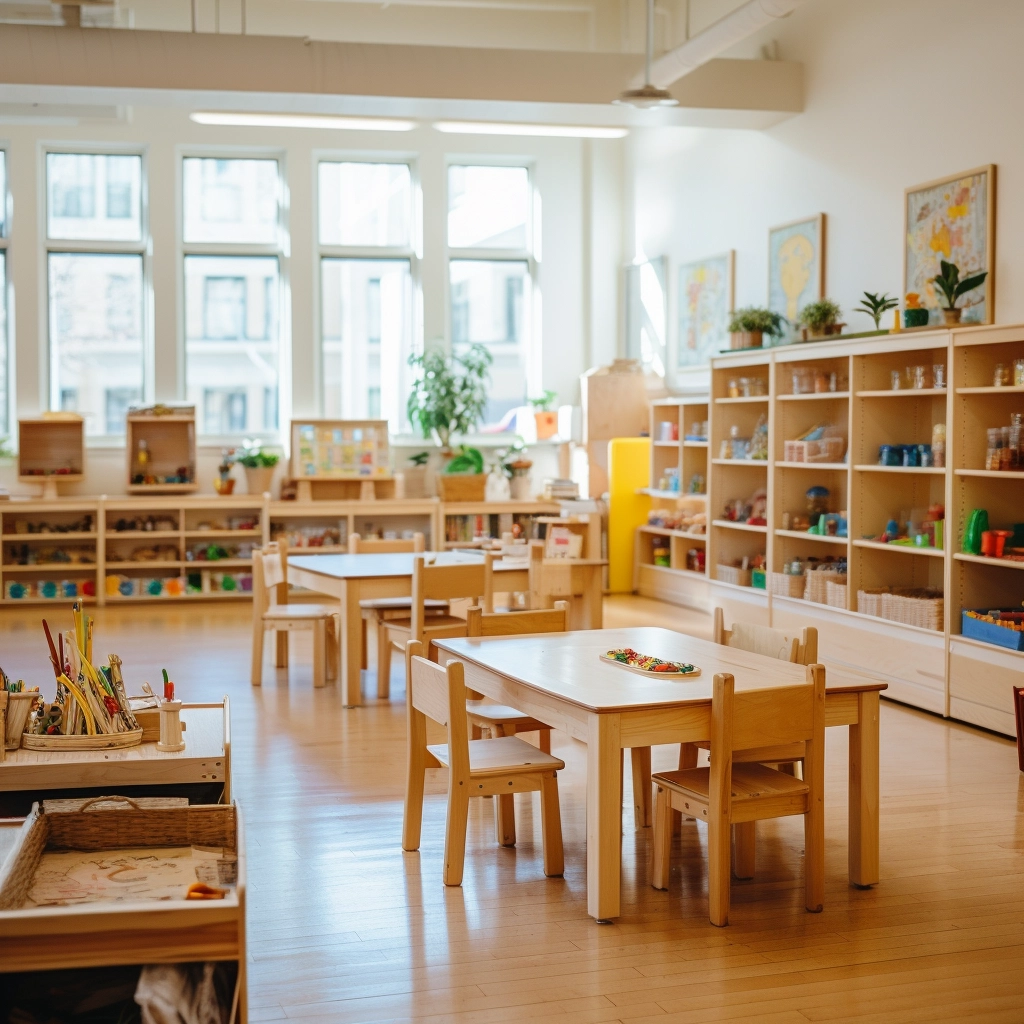
Do you know how to help preschoolers develop their artistic and creative abilities at school? One of the most popular kindergarten classes is crafts, which allows children to freely explore and create art and enjoy this special creative moment. This is where arts and crafts for preschoolers truly shine.
Through arts and crafts for preschoolers, they can explore their imaginations, improve fine motor skills, develop cognitive abilities, and express themselves creatively. Learning new skills and repeated exposure to art supplies builds confidence, which impacts future development.
In this article, I’ll show you 21 of the best preschool and daycare craft projects—easy, fun, and educational. Introducing arts and crafts for preschoolers opens up a world of imaginative and meaningful play.
幼稚園の工作:単なる楽しいアクティビティ以上のもの
幼稚園の世界では、工作が幼児教育に位置づけられるかどうかについてしばしば議論があります。確かに工作と美術は異なりますが、美術は 自由な創造性一方、工芸には通常、一定の成果がありますが、どちらもバランスの取れたカリキュラムにおいて価値があります。
美術は、子どもたちが素材、色、質感を制約なく自由に探求し、最終的な作品ではなくプロセスに集中することを可能にします。これは創造性と自己表現を育むために不可欠です。しかし、工作には独自の利点があります。細かい運動能力を発達させ、以下のような概念を強化するのに役立ちます。 色と形の認識、 より幅広い学習テーマをサポートできます。ご家庭で、思いやりのある大人と一緒に工作を行うことで、特別な絆が生まれ、有意義な思い出を作ることができます。
Rather than viewing crafts as limiting, we should see them as complementing open-ended art experiences. A balance of both ensures that children are free to create while gaining valuable skills through structured activities.
ここでは、小さな手にぴったりの幼稚園児向けの工作ベスト 21 を紹介します。
幼稚園児向けの工作ベスト21
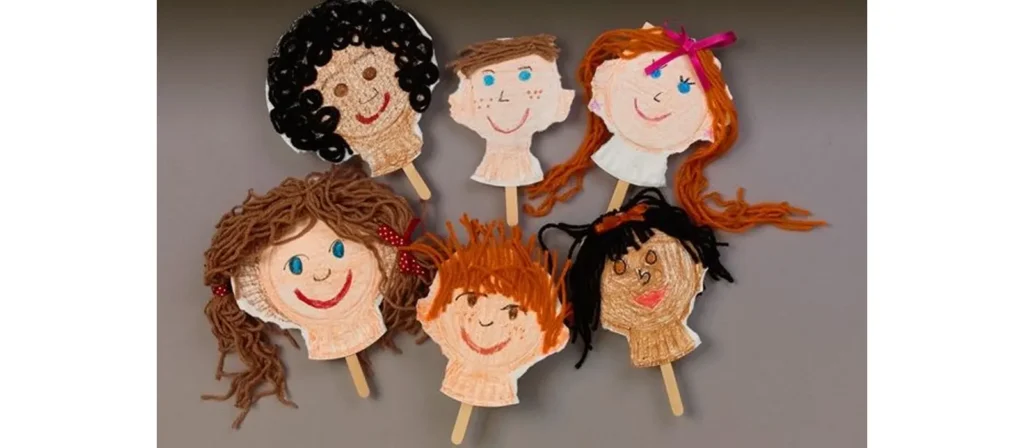
1. 紙皿の顔
活動概要:
Turn ordinary paper plates into a gallery of joyful expressions with this delightful Paper Plate Faces activity. Children can draw, paint, or glue on yarn, buttons, and colored paper to create funny, happy, or even curious faces that reflect their emotions. Through this creative process, they begin to understand feelings, develop empathy, and strengthen their fine motor skills while having fun with textures and shapes.
材料:
紙皿、マーカー、毛糸、のり、各種飾り(ステッカー、動く目、ポンポン)
やり方:
- Set up a cheerful crafting station by laying out paper plates, markers, glue, and all sorts of fun decorations within easy reach.
- Give each child their own plate and invite them to design a face that shows an emotion such as happy, silly, surprised, or sleepy.
- Show them how to draw simple features, then let them freely add yarn hair, googly eyes, or stickers to bring their creations to life.
- Chat as they work by asking questions like “What feeling does your face have?” or “Can you make that expression too?”
- When the masterpieces are dry, turn your classroom into a Face Gallery or let the children take their smiling plates home to share.
バリエーション:
さまざまなサイズのプレートを使用して、表情豊かな「顔の家族」のグループを構築します。これは、未就学児向けのテーマ別の美術工芸に最適です。
2. DIY双眼鏡

活動概要:
Spark curiosity and adventure with this charming DIY Binoculars craft. Using cardboard tubes, colorful paper, string, and a touch of imagination, children can create their very own pair of pretend binoculars. As they decorate and assemble their masterpiece, they strengthen hand-eye coordination, fine motor skills, and creativity while learning about observation and exploration.
材料:
お子様1人につきトイレットペーパーの芯2個、テープまたは接着剤、ひもまたは毛糸、穴あけパンチ、クレヨンまたはマーカー、ステッカー、色紙(オプション)
やり方:
- Get your creative corner ready with cardboard tubes, colorful paper, tape, glue, and string.
- Give each child two rolls and invite them to decorate using markers, crayons, stickers, or paper wraps to make their binoculars uniquely theirs.
- Help them tape or glue the rolls together to form the binocular shape.
- Show how to thread yarn through the holes and tie knots to create a neck strap, introducing safe tool use in a fun way.
- Encourage kids to go on a pretend “explorer walk” around the classroom or playground, observing everything they can spot.
- Ask playful questions such as “What did you find?” or “Can you see something that starts with the letter B?”
- When finished, let them share their discoveries and show off their colorful binoculars to friends and family.
バリエーション:
- 大型双眼鏡の場合は、ペーパータオルのロールを半分に切って使用します。
- 子どもたちが隠された物を「見つける」必要がある宝探しゲームを作成して、この工作をゲームに変えてみましょう。
- 自然や探検に関する本や歌と組み合わせて、未就学児のセッションのテーマに沿った美術工芸を強化します。
3. 簡単なカボチャの工作

活動概要:
Celebrate the cozy spirit of autumn with this adorable Easy Pumpkin Craft. Using orange paper, glue, and a little creativity, children can cut, roll, or layer pieces to form their own bright, cheerful pumpkins. As they work with shapes and colors, they strengthen fine motor skills, practice hand coordination, and learn basic concepts like size and pattern.
材料:
Orange construction paper, green construction paper, scissors (child-safe), glue sticks, black markers, optional: googly eyes, yarn, glitter.
やり方:
- Prepare a cozy crafting table with orange and green paper, glue sticks, scissors, and fun extras like googly eyes or glitter.
- Give each child orange paper circles or strips and guide them to glue the pieces together into a round pumpkin shape.
- Show how to add a green paper stem and let them draw a face using markers.
- Encourage them to decorate their pumpkins with yarn vines, sparkly glitter, or funny eyes to make each one special.
- Chat as they create by asking, “What kind of face will your pumpkin have? Happy or spooky?”
- After drying, use their adorable pumpkins to decorate a classroom wall or create a cheerful pumpkin patch for everyone to enjoy.
バリエーション:
- より丈夫な土台を作るには、画用紙の代わりに紙皿を使ってみてください。
- 子どもたちにカボチャに自分の名前を書かせて、名前を認識する工芸品にしてみましょう。
- ミニカボチャを作って、部屋の周りに飾るガーランドを作りましょう。
4. 七面鳥のヘッドバンド

活動概要:
Nothing captures the joy of fall quite like creating a colorful Turkey Headband. In this heartwarming craft, children use simple materials such as construction paper, feathers, and glue to design their own playful turkey crowns. As they cut, paste, and arrange the feathers, little hands strengthen fine motor skills while young minds practice color recognition and creativity.
This activity naturally invites storytelling and imagination. Children love pretending to be cheerful turkeys, moving around the classroom with laughter and excitement. It is also a wonderful opportunity to talk about gratitude, sharing, and the beauty of autumn traditions.
材料:
茶色の画用紙、赤、オレンジ、黄色の画用紙、はさみ(子供に安全なもの)、のりまたはテープ、クレヨンまたはマーカー、動く目(オプション)、ホッチキス
やり方:
- Get the table ready with brown paper strips, colorful paper feathers, glue, and markers.
- Help each child fit a brown strip around their head and secure it into a circle to form the headband base.
- Invite children to color and decorate their paper feathers, then glue them to the back of the headband.
- Show how to make a turkey face using paper shapes or googly eyes, and add a beak and red wattle for fun.
- Chat about Thanksgiving and encourage each child to share one thing they are thankful for.
- When finished, let them wear their festive headbands and waddle around like cheerful turkeys during a classroom parade.
バリエーション:
- 楽しいパーソナライズ要素として、ヘッドバンドの前面に子供の名前を追加します。
- 感謝の羽根を作りましょう。羽根を取り付ける前に、子どもたちに羽根に感謝していることを書いたり描いたりしてもらいます。
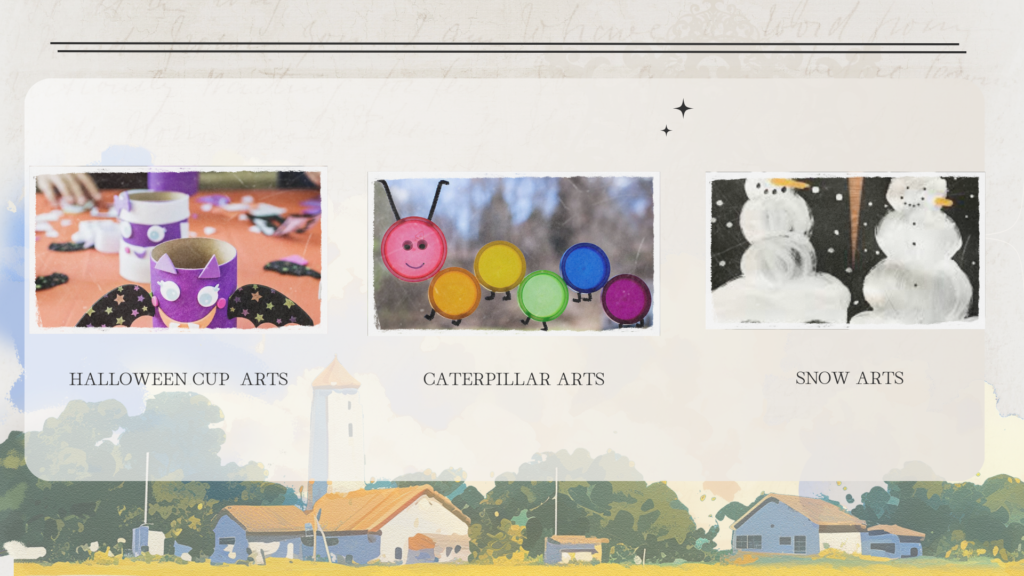
5. 紙コップの魔女

活動概要:
Bring a touch of Halloween magic to the classroom with this fun and imaginative Paper Cup Witch craft. Using simple materials like paper cups, construction paper, yarn, and markers, children can create their own friendly witches complete with pointy hats, bright eyes, and curly hair. As they cut, glue, and decorate, they strengthen fine motor skills and practice following steps, turning creativity into confidence.
材料:
紙コップ(緑または白)、黒の画用紙、のり、はさみ(子供に安全)、毛糸または細断した紙(髪の毛用)、動く目、マーカーまたはクレヨン
やり方:
- Arrange paper cups, pre-cut witch hats, yarn hair, and black paper shapes on the table so everything is easy to reach.
- Give each child a paper cup and invite them to glue on googly eyes and draw a friendly witch face with markers.
- Help them add yarn or shredded paper hair, then top it with a pointy black hat for a magical touch.
- Wrap a small paper cape or collar around the cup to complete the witch’s outfit.
- As they create, ask fun questions such as “What kind of magic does your witch do?” or “Is your witch silly, spooky, or kind?”
- When finished, line up all the witches together for a charming Halloween display that’s full of personality.
バリエーション:
- アイスキャンディーの棒とラフィア紙または茶色の紙を使って小さなほうきの柄を追加します。
- カップの底にストローや棒を付けてハロウィン人形にしてみましょう。
- ハロウィーンのシーン全体にわたって、幽霊、カボチャ、魔法使いなど他のキャラクターを作成するように子供たちを促します。
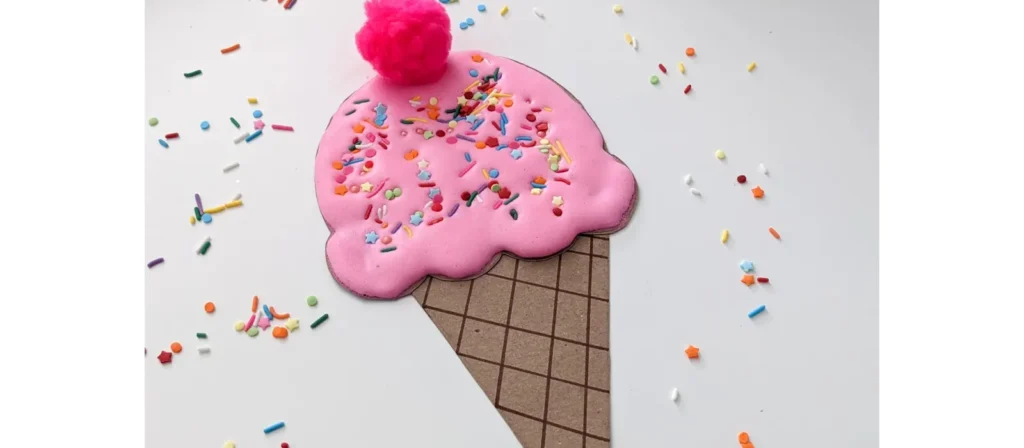
6. ふわふわペイントのアイスクリームコーン
活動概要:
Bring a scoop of sweetness into the classroom with this delightful Puffy Paint Ice Cream Cones craft. Using homemade puffy paint made from shaving cream and glue, children can swirl and spread “ice cream” on paper cones, then top them with sprinkles, glitter, or pom-poms for extra fun. As they mix colors and textures, they explore sensory play while strengthening hand control and creativity.
材料:
シェービングクリーム、白い接着剤、食品着色料または洗える絵の具、茶色の画用紙(コーン)、白い厚紙または紙(背景)、はさみ、ミキシングボウル、スプーン
やり方:
- Start by mixing equal parts shaving cream and white glue in bowls, then add a few drops of food coloring or washable paint to create colorful “ice cream” puffy paint.
- Give each child a cone cutout and a sheet of cardstock to glue it on.
- Invite them to scoop, swirl, and spread the puffy paint above the cone to make their ice cream scoops.
- Encourage creativity by mixing colors, stacking tall cones, and talking about pretend flavors like strawberry, mint, or rainbow swirl.
- Let them sprinkle glitter, tiny paper dots, or pom-poms for extra toppings.
- Allow the artwork to dry overnight so the puffy texture stays firm, leaving behind a sweet, fluffy masterpiece that looks good enough to eat.
バリエーション:
- グリッターや小さく切った紙のドットを使って散りばめます。
- 完成したコーンを「私たちの最高のアイデア!」という壁面ディスプレイにしましょう。
- 香り付きのシェービングクリームを使用したり、バニラを一滴加えて多感覚的なひねりを加えましょう。
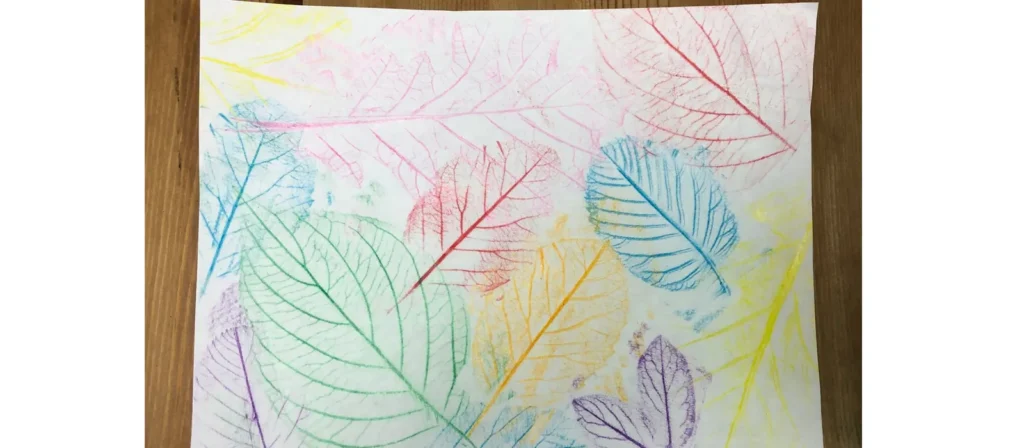
7. 葉擦れアート
活動概要:
Celebrate the beauty of nature with this enchanting Leaf Rubbing Art activity. Children can collect leaves of different shapes and sizes, place them under a sheet of paper, and gently rub crayons or colored pencils over the surface to reveal the delicate patterns and veins. As the hidden designs appear, little learners experience the wonder of discovery while developing fine motor control and observational skills.
材料:
様々な形の葉っぱ(様々な形や大きさ)、白い紙、クレヨン(包装を取り除いたもの)、テープ(オプション)、クリップボードまたは平らな作業台
やり方:
- Take children outside to collect leaves of different shapes and sizes, or provide a set of pre-collected leaves at the table.
- Give each child a few leaves and show them how to place them vein-side up on a flat surface or clipboard.
- Lay a sheet of white paper over the leaves and demonstrate how to gently rub the side of a crayon to reveal the patterns beneath.
- Encourage kids to try different colors and leaf types, comparing the shapes and textures they uncover.
- Chat about nature as they work by asking, “What kind of tree do you think this leaf came from?” or “Why do leaves change color in fall?”
- Display their colorful rubbings around the classroom or turn them into bookmarks and greeting cards to celebrate the beauty of the season.
バリエーション:
- 完成した擦り絵をグリーティングカードやブックマーク、季節の装飾品などにしましょう。
- ドラマチックな効果を出すには、黒い紙と明るい色のクレヨンを使用します。
- シンプルな自然散策と落ち葉探しを組み合わせて、テーマ満載の一日をお過ごしください。
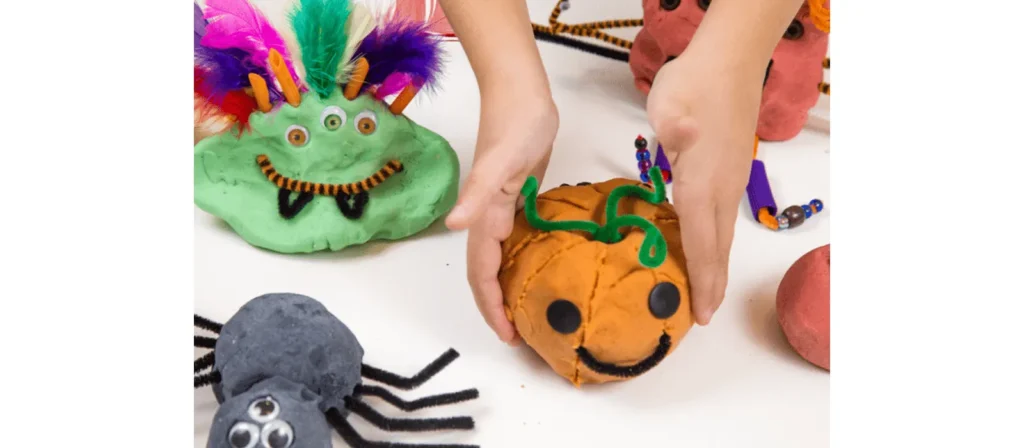
8. 手作り粘土作品
活動概要:
There’s something truly magical about molding, rolling, and shaping with soft, colorful dough. In this joyful Homemade Playdough Creations activity, children make their own playdough using simple ingredients like flour, salt, and water, then use it to sculpt anything their imagination can dream up such as animals, food, or playful patterns. The process engages all their senses while building fine motor strength, creativity, and focus.
材料:
小麦粉、塩、酒石酸クリーム、水、植物油、食品着色料(または既製の粘土)、ミキシングボウル、スプーン、子供に安全な彫刻用具(プラスチックナイフ、クッキーカッター、麺棒)
やり方:
- Prepare colorful playdough ahead of time or let children join in the fun of making it themselves by mixing flour, salt, water, oil, and food coloring.
- Once the dough is ready and cool, divide it into different colors and place it on trays or mats for easy shaping.
- Provide rolling pins, cookie cutters, and plastic tools so children can mold animals, letters, or their favorite foods.
- Encourage creativity by asking playful questions such as “What are you making today?” or “Can you shape your name out of dough?”
- Let them explore textures, colors, and shapes freely, building both imagination and fine motor skills along the way.
- When finished, store the dough in sealed containers so it can be used again for more creative sessions throughout the week.
バリエーション:
- 心を落ち着かせる感覚を加えるために、エッセンシャル オイル (ラベンダーやペパーミントなど) を加えます。
- 自然をベースにしたテーマには、小枝、石、葉などの自然の要素を取り入れます。
- 図形カッターを使用して、パターンや幾何学などの初期の数学の概念とアクティビティを結び付けます。
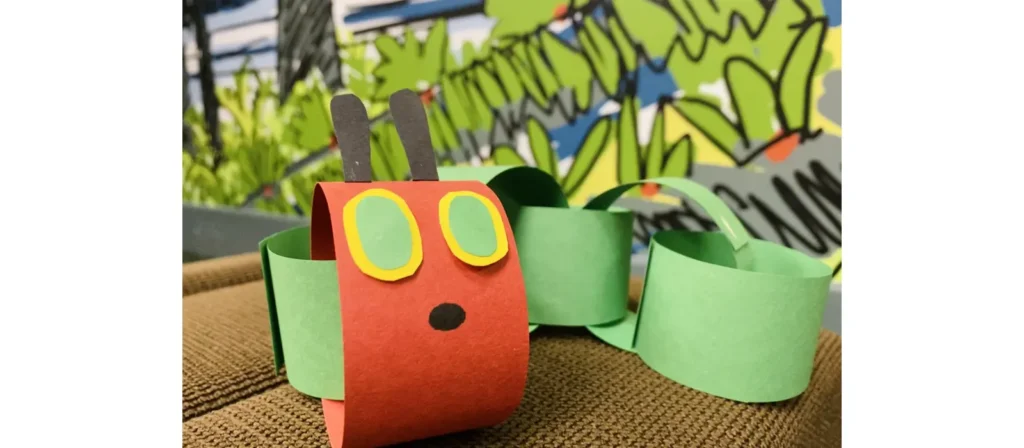
9. はらぺこあおむしの工作
活動概要:
Bring Eric Carle’s beloved story to life with this charming The Very Hungry Caterpillar Craft. Using colorful paper circles, glue, and googly eyes, children can create their own friendly caterpillar while recalling each part of the story. As they cut, count, and arrange the pieces, they strengthen fine motor skills, practice sequencing, and develop early literacy through storytelling connections.
材料:
色画用紙(赤と緑)、のりスティック、はさみ(子供に安全)、黒のマーカー、動く目、紙皿(展示用はオプション)、本のコピー(オプション)
やり方:
- Begin by reading はらぺこあおむし together or watching a short video version to spark children’s imagination.
- Give each child a set of green circles for the body and one red circle for the head.
- Show them how to glue the circles in a line to form the caterpillar, then add googly eyes, a smile, and antennae using a marker or paper strips.
- Encourage counting and sequencing by asking, “How many green circles did you use?” or “What did the caterpillar eat first?”
- Once finished, display the adorable caterpillars on a bulletin board or let children take them home as a fun reminder of the story.
- For added creativity, invite them to make the butterfly stage next, connecting art with storytelling and learning.
バリエーション:
- 各緑色の円に番号を付けてカウント要素を追加します。
- 幼虫、繭、蝶の段階を描いたライフサイクルの壁画を作成します。
- よりふわふわした見た目にするには、紙の円の代わりにコットンボールを使用します。
10. 手形ひまわり
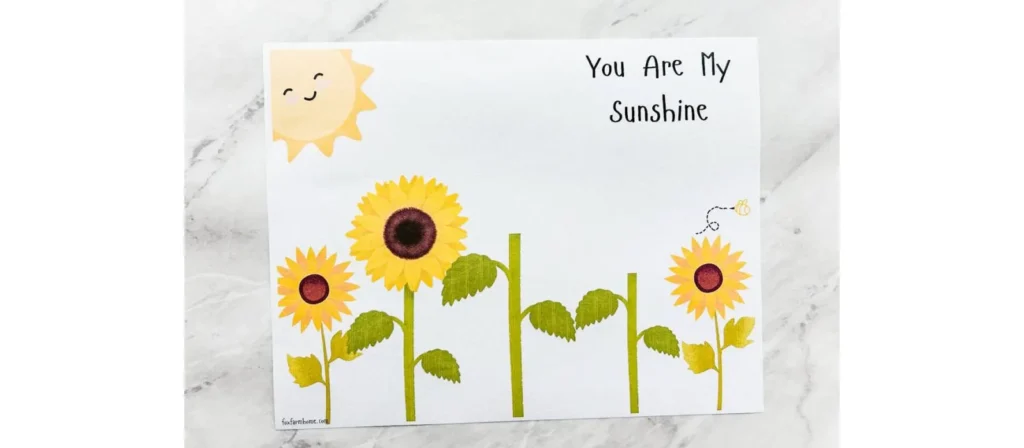
活動概要:
Fill the classroom with sunshine and smiles through this beautiful Handprint Sunflowers activity. Children trace and paint their hands to form bright yellow petals, then add a brown center and a green stem to complete their cheerful sunflowers. As they press their colorful handprints onto the paper, they build fine motor strength, explore symmetry and color blending, and experience the joy of creating something uniquely their own.
材料:
黄色と緑の画用紙、茶色の円形の紙(またはカップケーキのライナー)、のり、はさみ(子供に安全)、鉛筆、黒のマーカー、オプション:本物のひまわりの種
やり方:
- Get your table ready with yellow, green, and brown paper, glue, pencils, and scissors.
- Help children trace their hands several times on yellow paper and cut them out to form bright sunflower petals.
- Glue a brown circle or cupcake liner in the center of the page to make the flower’s middle.
- Invite kids to arrange and glue their handprint petals around the center to create a full, sunny bloom.
- Add a green stem and leaves to finish the sunflower.
- For extra fun, glue real sunflower seeds in the middle to give it a textured look.
- When all the flowers are done, display them together to form a cheerful classroom “garden” that shines with creativity and color.
バリエーション:
- 花びらに子どもたちの名前を書いて、「クラスの庭」のディスプレイにしましょう。
- ペイントを使って手形の花びらを作り、より雑然とした、より触り心地の良いバージョンを作りましょう。
- 子どもたちに使った花びらを数えてもらい、数えるアクティビティを作りましょう。
11. レインボーコラージュ
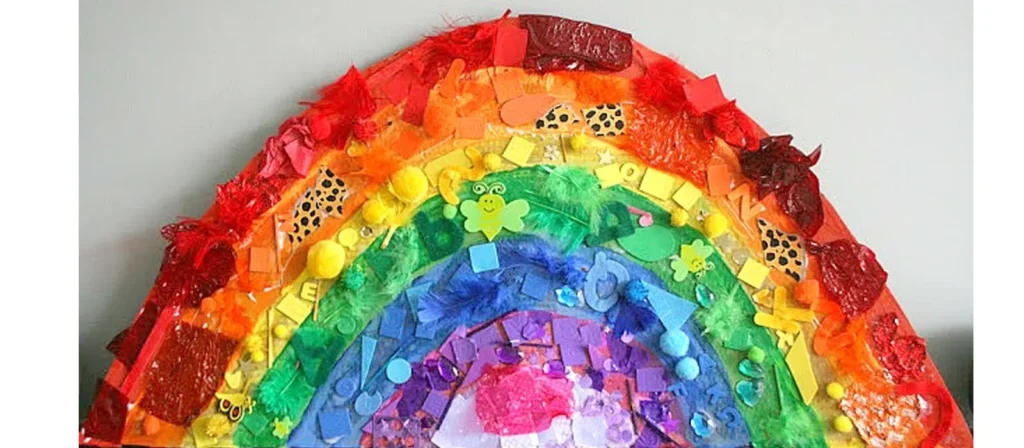
活動概要:
Brighten the classroom with color and creativity through this joyful Rainbow Collage activity. Children use scraps of paper, tissue, fabric, or any colorful materials to build their very own rainbows. As they sort, cut, and glue each color into place, they practice fine motor coordination, color recognition, and sequencing while expressing their individual creativity in a vibrant way.
材料:
色画用紙の切れ端(またはティッシュペーパー)、スティックのり、白い紙または厚紙、コットンボール、はさみ(子供に安全なもの)、クレヨンまたはマーカー(オプション)
やり方:
- Get the table ready with sorted paper scraps or tissue pieces in rainbow color order, along with glue sticks, scissors, and cotton balls.
- Give each child a rainbow outline or let them draw their own on white paper or cardstock.
- Invite them to glue colorful scraps one by one, following the rainbow order and naming each color as they go.
- Add cotton balls at both ends to make soft, fluffy clouds that complete the rainbow.
- Encourage conversation by asking questions like “What comes after yellow?” or “Which color is your favorite?”
- Once dry, display the bright rainbows on a classroom wall or send them home to bring a little sunshine to family spaces.
バリエーション:
- 地球の日をテーマにした虹を作るには、葉や花びらなどの自然素材を使用します。
- 糸やフェルト、ボタンなどの素材を重ねて3Dバージョンにすることもできます。
- グループでより速く作るには、紙皿に小さな虹を作りましょう。
12. 指紋ツリー

活動概要:
Turn tiny fingerprints into a forest of creativity with this heartwarming Fingerprint Trees activity. Children use their fingertips dipped in colorful paint to create leaves, blossoms, or fruits on tree branches drawn or printed on paper. Each gentle press leaves a unique mark, helping them explore colors, patterns, and the beauty of individuality while developing fine motor coordination and sensory awareness.
材料:
白い厚紙、茶色のマーカーまたはクレヨン、洗える絵の具(秋または春の色)、紙皿または絵の具トレイ、掃除用のウェットティッシュまたは水入れ
やり方:
- Prepare white cardstock with tree trunks and branches already drawn, or let children sketch their own using brown markers or crayons.
- Pour small amounts of washable paint onto paper plates—choose warm tones like red, yellow, and orange for fall, or fresh colors like green, pink, and purple for spring.
- Invite children to dip their fingertips lightly into the paint and press them along the branches to create colorful leaves or blossoms.
- Encourage them to experiment with different colors and pressure to see how each fingerprint looks unique.
- Talk together about the seasons by asking, “Do these colors remind you of autumn or spring?”
- Let the paintings dry and display them as a bright seasonal forest that celebrates every child’s individuality.
バリエーション:
- 四季を表すために、4 本の木を並べて作成します。
- 指を使いたくないお子様には、綿棒やQティップを使用してください。
- ベースの周りに落ち葉を追加したり、枝に鳥を追加して、さらに詳細に表現します。
13. プチプチで絵を描く
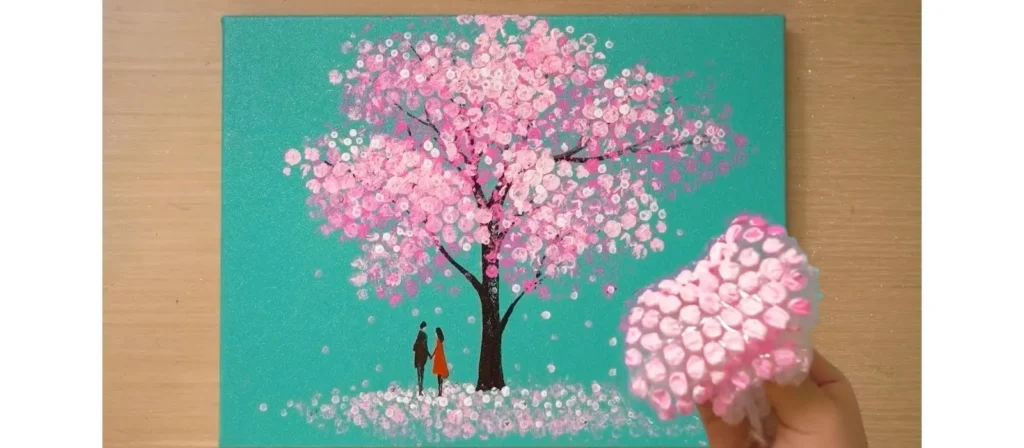
活動概要:
Turn ordinary packaging into a burst of creativity with this exciting Bubble Wrap Painting activity. Children dip pieces of bubble wrap into paint and press them onto paper to reveal fun, textured patterns that pop with color and imagination. As they explore the bumpy surface, they engage their senses, strengthen fine motor skills, and learn about texture and repetition in art.
材料:
プチプチ(小さなシートまたは形に切る)、洗える絵の具、紙皿(絵の具用)、白い厚紙または大きな紙、テープ(オプション)、スモックまたはエプロン
やり方:
- Cut bubble wrap into small squares or fun shapes like hearts, circles, or stars.
- Pour bright washable paints onto paper plates and set out sheets of white cardstock for printing.
- Show children how to dip the bubble wrap into paint and press it onto the paper to make colorful textured patterns.
- Encourage them to try different colors and layering effects, watching how patterns overlap and blend.
- Talk about what they see and feel by asking, “What does it feel like?” or “What happens when two colors mix?”
- Once finished, let the artwork dry flat—when the paint sets, the bubbly textures look even more amazing.
- Display their masterpieces on the wall or use them to decorate classroom bulletin boards for a vibrant touch of creativity.
バリエーション:
- 麺棒または段ボールの筒の周りにプチプチをテープで巻き、テクスチャを塗ります。
- テーマに沿ったプリントを作るために、プチプチを季節の形(雪の結晶や葉など)に切ります。
- このアクティビティを、質感や五感に関する本と組み合わせてください。
14. 紙皿タンバリン
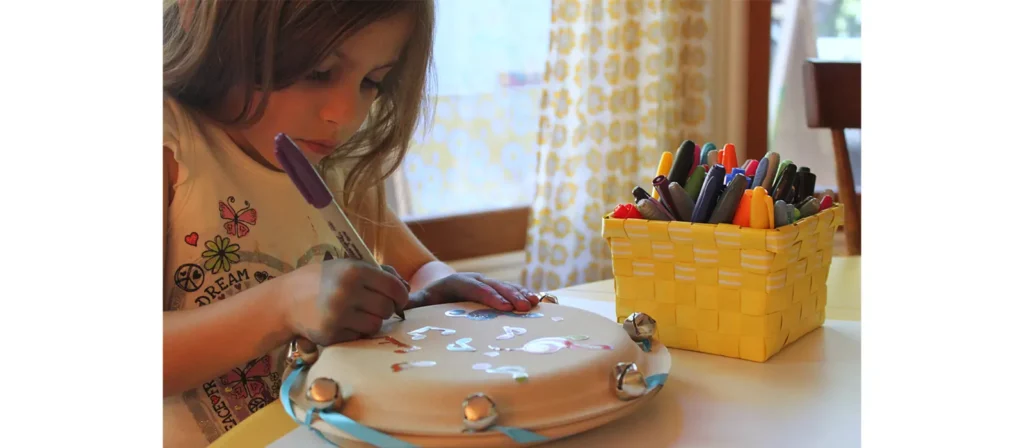
活動概要:
Bring rhythm and laughter to the classroom with this joyful Paper Plate Tambourines activity. Children decorate two paper plates with colorful paints, stickers, or drawings, then fill them with a few dried beans or beads before sealing them together. Once finished, they can shake their handmade tambourines to make cheerful music that fills the room with sound and smiles.
材料:
紙皿(子供1人につき2枚)、乾燥豆またはパスタ、ホッチキスまたは糊、マーカーまたはクレヨン、ステッカー、リボンまたは毛糸(オプション)、穴あけパンチ
やり方:
- Prepare two paper plates for each child and set out markers, stickers, and paints for decoration.
- Invite children to decorate the bottom sides of their plates with bright colors and fun designs—this is their very own musical instrument.
- Place a small handful of dried beans or pasta on one plate, then cover it with the second plate, decorated sides facing out.
- Help seal the edges with a stapler or glue to trap the contents securely inside.
- For extra fun, punch small holes around the edges and let children tie colorful ribbons or yarn for movement and flair.
- Once the tambourines are ready, gather everyone for a rhythm circle or mini parade and let the joyful music begin.
- Encourage kids to experiment with different sounds by shaking gently, tapping, or moving to the beat.
バリエーション:
- さまざまな音を出すために、内部のベルやボタンを使ってみてください。
- Add a name label and use it during music time or performances.
- 米、ビーズ、小石など、さまざまな詰め物を使った音の違いを調べます。
15. 紙袋人形
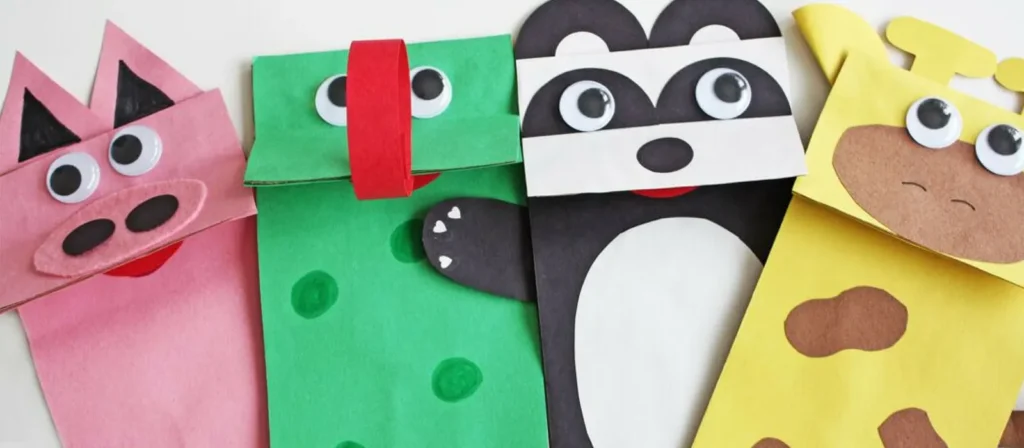
活動概要:
Let imagination take center stage with this delightful Paper Bag Puppets activity. Children turn simple paper bags into charming characters using markers, yarn, googly eyes, and bits of colored paper. As they design their puppets such as animals, people, or storybook friends, they develop creativity, storytelling skills, and fine motor coordination while expressing their emotions through art.
材料:
茶色または白の紙製ランチバッグ、画用紙の切れ端、スティックのり、クレヨンまたはマーカー、動く目、毛糸、はさみ(子供に安全)、ステッカーまたはボタン(オプション)
やり方:
- Prepare paper bags, colorful paper scraps, yarn, googly eyes, glue, and markers on the table.
- Let children choose a paper bag and start by decorating the flap to make their puppet’s face.
- Encourage them to add googly eyes, yarn hair, and paper cutouts for mouths, ears, or hats.
- Decorate the lower part of the bag as clothing, adding details like buttons, arms, or accessories.
- Once dry, have children slip their hands inside the bags and bring their puppets to life through playful storytelling.
- Pair children to perform mini puppet shows together and encourage them to give voices to their characters.
- Create a classroom puppet theater corner so their new friends can star in many future adventures.
バリエーション:
- 動物、地域のヘルパー、お気に入りの絵本のキャラクターなどのテーマを割り当てます。
- 質感を出すために糸やリボンの毛を追加します。
- 段ボール箱とカーテンを使って人形劇のコーナーを作り、想像力を豊かに遊びましょう。
16. ティッシュペーパーのサンキャッチャー

活動概要:
Fill the classroom with color and light through this enchanting Tissue Paper Suncatchers activity. Children use pieces of colorful tissue paper, clear contact paper, and simple shapes like hearts, stars, or circles to create beautiful window art that glows in the sunlight. As they layer and arrange the colors, they learn about transparency, color blending, and composition while strengthening their fine motor and visual-spatial skills.
材料:
透明コンタクトペーパーまたはラミネートシート、様々な色のティッシュペーパー(小さな正方形に切る)、黒い画用紙(額縁用)、はさみ(子供に安全)、テープ
やり方:
- Prepare black paper frames by cutting simple shapes like hearts, stars, or circles, and remove the centers.
- Peel the backing off a piece of clear contact paper and place it sticky-side up on the table.
- Position the black frame on top and press it gently to secure it in place.
- Invite children to fill the inside with colorful tissue paper squares, overlapping the pieces to see how new colors appear.
- Once their design is complete, cover it with another piece of contact paper to seal the suncatcher.
- Trim any extra edges, then tape the finished artwork to a sunny window.
- Watch as sunlight shines through, turning the classroom into a rainbow-filled gallery of glowing colors.
バリエーション:
- 季節の形を使用します。秋にはカボチャ、春には卵、冬には雪の結晶などです。
- 子どもたちに、フレームなしで抽象的で自由な形のデザインを作成させましょう。
- キラキラやスパンコールを組み込むと、さらに輝きが増します。
17. 塩粘土の手形
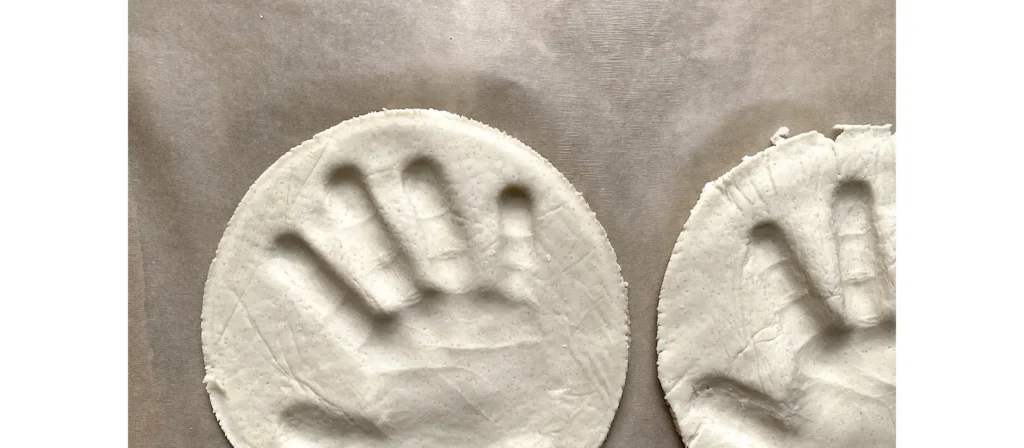
活動概要:
Capture a precious moment in time with this heartfelt Salt Dough Handprints activity. Children mix simple ingredients like flour, salt, and water to make soft dough, then press their tiny hands into it to create lasting impressions. After baking and decorating with paint or glitter, each handprint becomes a beautiful keepsake that celebrates growth, creativity, and the joy of making something by hand.
材料:
小麦粉、塩、水、ミキシングボウル、麺棒、ベーキングトレイ、絵の具、絵筆、透明シーラント(オプション)、リボンまたは紐(吊り下げ用)
設定:
- 塩生地をあらかじめ混ぜておくか、子どもたちに手伝ってもらっても構いません。小麦粉2カップ、塩1カップ、ぬるま湯1カップを加え、滑らかになるまで混ぜてこねます。
- 作業用の麺棒と小さなマットまたはトレイを用意します。
- 固めるために焼く場合は、オーブンを 200°F (90°C) に予熱します。
アクティビティの説明:
- 子ども一人につき、生地を約1.5cmの厚さに伸ばします。
- 生地にしっかりと手を押し当てて深い手形がつくように手伝ってください。
- 作品を後で壁に掛ける場合は、鉛筆かストローを使って上部に小さな穴を開けます。
- 1~2時間焼くか、数日間自然乾燥させます。
- 乾いたら、お子様は好きな色で手形を塗ることができます。耐久性を高めるために、必要に応じて透明スプレーで仕上げてください。
バリエーション:
- いつまでも残る思い出となるよう、焼く前に生地に子供の名前と日付を書いてください。
- 派手な効果を出すために、グリッターペイントやメタリック仕上げを加えます。
- 「間違いなく、あなたは最高よ!」などのメッセージを添えて、母の日や父の日のギフトにしましょう。
18. ダンシングリボンワンド
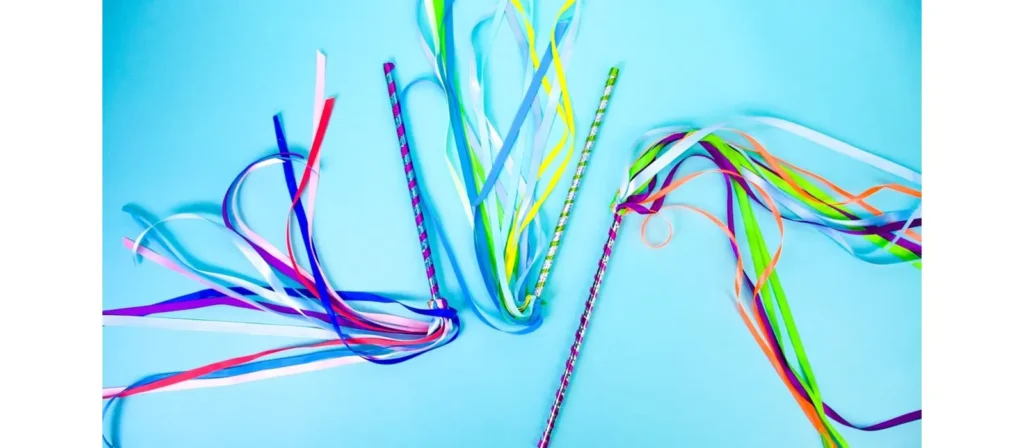
活動概要:
Add movement, color, and joy to the classroom with this lively Dancing Ribbon Wands activity. Children decorate sticks or dowels with bright ribbons, streamers, or fabric strips, then twirl and dance as their wands flutter through the air. As they wave and spin, they strengthen gross motor skills, coordination, and rhythm while expressing themselves through motion and music.
材料:
木製の棒またはクラフトスティック、リボンまたはクレープ紙のストリーマー(さまざまな色)、のりまたはテープ、はさみ(子供に安全)、ハンドルを飾るためのステッカーまたはマーカー
やり方:
- Mix 2 cups of flour, 1 cup of salt, and 1 cup of warm water in a bowl until the dough is smooth and easy to knead.
- Give each child a small piece of dough and let them roll it out to about half an inch thick on a mat or tray.
- Help them press their hand firmly into the dough to make a deep, clear handprint.
- If the piece will be hung, use a straw or pencil to poke a small hole near the top.
- Bake the handprints at 200°F (90°C) for 1–2 hours, or let them air dry over a few days until hard.
- Once dry, children can paint their creations with bright colors, add glitter for sparkle, and even write their names or the date.
- Seal with a clear spray for lasting shine, then tie a ribbon through the hole to hang it as a precious keepsake or family gift.
バリエーション:
- 季節の色を使用して、テーマのある杖を作成します (例: 休日には赤と緑、春にはパステルカラー)。
- Add bells to the ends of the ribbons for a musical element.
- パフォーマンスに変えましょう。簡単なグループルーチンを作成し、保護者や他のクラスの前で「パフォーマンス」してもらいます。
19. ばかげたモンスター人形
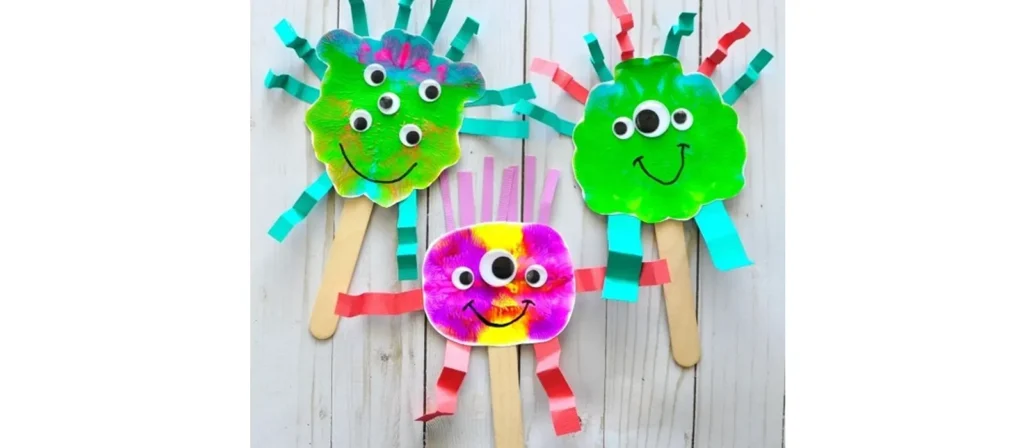
活動概要:
Bring giggles and creativity to art time with this playful Silly Monster Puppets activity. Children use colorful paper, yarn, googly eyes, and craft sticks to design their own friendly monsters with funny faces, spiky hair, and wobbly eyes. As they cut, glue, and decorate, they strengthen fine motor skills, experiment with colors and shapes, and discover how imagination can turn ordinary materials into extraordinary creations.
材料:
紙製のランチバッグ、画用紙、スティックのり、マーカーまたはクレヨン、ポンポン、動く目、毛糸、はさみ(子供に安全)、発泡スチロールまたはパイプクリーナー(オプション)
やり方:
- Prepare paper bags, colorful paper shapes, googly eyes, pom poms, yarn, and glue for each child.
- Show how the flap of the paper bag can become the monster’s mouth, then let children start decorating.
- Encourage them to glue on eyes in any number they like and add fun details like spiky hair, horns, arms, or big teeth.
- Let them use markers or crayons to draw silly smiles, wiggly tongues, or tiny spots for extra personality.
- As they work, ask fun questions such as “What’s your monster’s name?” or “Does it roar or laugh?”
- Once finished, gather the group for a monster puppet show where each child can perform with their silly new friend.
- Celebrate their creativity by displaying the puppets or creating a “Monster of the Week” wall to introduce everyone’s creations.
バリエーション:
- 特定のレッスンに合わせてモンスターのテーマを設定します (例: SEL 学習用の感情モンスター)。
- 質感のあるバージョンにするには、紙の代わりにフェルトを使用します。
- 各子供が自分のキャラクターを紹介する「今週のモンスター」の壁ディスプレイを作ります。
20. コーヒーフィルターの惑星アート

活動概要:
Take young learners on an out-of-this-world adventure with this mesmerizing Coffee Filter Planet Art activity. Children color round coffee filters with markers, then lightly mist them with water to watch the colors blend and swirl like real galaxies. Once dry, they can cut out and label their colorful “planets,” turning simple materials into a stunning solar system full of imagination and discovery.
材料:
丸いコーヒーフィルター、洗えるマーカー、スプレーボトルまたは小さな水カップとスポイト、ペーパータオル、アルミホイルまたはトレイ、黒の画用紙(背景用はオプション)、接着剤
やり方:
- Flatten coffee filters on trays or foil so they are ready for coloring.
- Give children washable markers and let them fill the filters with bright circular designs that look like planets.
- When finished, spray the filters lightly with water or use droppers to wet the surface and watch the colors swirl together.
- Allow the filters to dry completely for one to two hours until the watercolor effect appears.
- Once dry, cut out the colorful planets and glue them onto black paper to create a mini solar system.
- Encourage children to name their planets or add stars and fun space facts around them.
- Display the finished artwork on the classroom wall to create a dazzling galaxy full of imagination and discovery.
バリエーション:
- 複数の惑星を作り、それを軌道上に配置することで、太陽系プロジェクトに変えます。
- 隠れた「レジスト」効果を出すために、最初に白いクレヨンを使ってフィルターの上に絵を描きます。
- 銀河のような輝きを出すためにグリッターグルーを加えます。
21. 自然曼荼羅

活動概要:
Invite peace, focus, and creativity into the classroom with this beautiful Nature Mandalas activity. Children gather natural materials such as leaves, petals, stones, and twigs, then arrange them in circular patterns to create stunning mandalas that celebrate balance and harmony in nature. As they carefully place each piece, they strengthen concentration, pattern recognition, and an appreciation for the beauty found outdoors.
材料:
葉、花びら、小枝、小石、松ぼっくり、どんぐり、樹皮、円形の紙または厚紙の土台(オプション)、接着剤(永久展示の場合はオプション)
やり方:
- Take children on a short nature walk to collect safe and interesting materials such as leaves, petals, stones, and twigs.
- Provide paper or cardboard circles as bases, or let children create directly on the ground or table for a more natural feel.
- Explain that a mandala begins in the center and grows outward in patterns or circles.
- Invite children to place one object in the center, then build outward by arranging similar items in repeating or symmetrical designs.
- Encourage them to observe textures and colors while working by asking, “How does this leaf feel?” or “What shapes do you notice?”
- When the mandalas are finished, display them indoors or take photos before nature reclaims the materials.
- Celebrate their creativity by discussing how each mandala is unique, just like the natural world it was made from.
バリエーション:
- 春には花、秋には色とりどりの葉など、季節の素材を使用します。
- ペイントした石やラベルを付けたアイテムなど、個人的なタッチを加えましょう。
- グループ プロジェクトにしましょう: 集団的なチームワークで 1 つの大きなマンダラを作成します。
工作タイムの安全と片付けのヒント
幼稚園児向けの最高の工作でも、準備が不十分だと散らかってしまいます。適切な構成と習慣があれば、こぼしたり、汚れたり、ベタベタした指を気にすることなく、創造性を育むことができます。

楽しみが始まる前に境界線を設定する
- 工作ゾーン: 専用のテーブルや洗えるマットを使用する
- エプロンや古いTシャツ:未就学児に必須アイテム
- 接着剤や塗料を塗る前に「手を清潔にする」ルールを確立する
安全で年齢に適した教材の使用
- 常に無毒で洗えるものを選ぶ
- 鋭利な道具、窒息の危険性、アレルギーを引き起こす可能性のある材料を避けてください
- 危険物は手の届かないところに保管してください
活動の一環として清掃を教える
- 色分けされた箱を使って資料を整理する
- 掃除に関する楽しい歌やルーティンを作る
- 各テーブルにミニ「清掃リーダー」を配置する
アート&クラフトがモンテッソーリ教育とレッジョ教育をどのようにサポートするか
背後にある哲学 モンテッソーリとレッジョ・エミリア 未就学児の美術工芸を、単なる芸術形式としてではなく、世界を学び、表現し、理解する方法として、強く支持します。
実践的な仕事を通して自立を育む
- 子どもたちは自分のペースで教材を選び、課題を完了します
- 自主的なプロジェクトは自律性と自信を育みます
- 工具や備品は子供の身長に合わせて取り扱える
観察力と自然に触発された創造性を育む
- レッジョ・エミリアは自然素材と感覚の探求を重視している
- 自然散策や自由遊びが芸術と現実世界を結びつける
- 季節の工芸品は生活のリズムとサイクルを強化する
反復とルーティンを通して認知発達をサポートする
- 微細運動の繰り返しは脳の神経経路の構築に役立つ
- 芸術や工芸に関する儀式は秩序、忍耐、集中力を養う
- モンテッソーリ教材には、工作の拡張(例:ピン打ち、トレース)が含まれる場合があります。
予算に優しい工作:幼稚園・保育園向けのヒント
High-quality arts and crafts for preschoolers don’t require a big budget. With a bit of creativity and planning, you can provide meaningful art experiences without breaking the bank.
リサイクル素材や日常の素材を使う
- トイレットペーパーの芯、ボトルキャップ、シリアルの箱、布切れ
- 保護者と協力して寄付箱を設置する
- 再利用を通じて持続可能性を教える
まとめ買いして賢く整理
- 卸売業者から基本的な資材(接着剤、紙、ブラシ)を調達する
- すぐにアクセスできるようにカテゴリと色で保存します
- よく使うテンプレートをラミネートして繰り返し使えるようにする
テーマ別ユニットを事前に計画する
- 季節、休日、レッスンのテーマに合わせてクラフトをアレンジする
- 年齢を問わず、わずかな違いはあるものの工芸品を再利用する
- チーム用の印刷可能なテンプレートと説明書をまとめたバインダーを用意する
結論
未就学児にとって、工作は単なる楽しい時間ではありません。細かい運動能力の発達、感情表現の促進、そして生涯にわたる創造性への愛を育むために不可欠です。教師、学校経営者、あるいは保護者の方であっても、子どもたちに手を使って自由に創作する機会を与えることは、自信、つながり、そして好奇心を育むことにつながります。
成功するクラフトスペースの裏には、思慮深く設計された環境があります。 ウェストショア家具私たちは、そのような環境づくりを専門としています。20年以上にわたる幼児用家具の製造と供給の経験を活かし、フルサービスのソリューションを提供しています。教室のレイアウトや家具のカスタマイズから、製造、品質管理、そして納品まで、あらゆるニーズにお応えします。当社の製品ラインナップには、様々なスタイル、素材、サイズの幼稚園用家具を取り揃えており、幼児教育空間の多様なニーズにお応えします。
アートエリアのレベルを上げたり、幼稚園のスペースを再設計して創造性をさらに刺激する準備ができたら、私たちがお手伝いします。適切な環境がすべてを左右するからです。